
The Farm: Difference between revisions
imported>9000 Please stop forgetting periods |
imported>Margotbean c/e |
||
| (22 intermediate revisions by 13 users not shown) | |||
| Line 10: | Line 10: | ||
==Farm Maps== | ==Farm Maps== | ||
{{ | {{Main article|Farm Maps}} | ||
When creating a new character players can select from a number of different maps for their farm. Each of these maps offer unique benefits, and favor specific [[skills]]. | When creating a new character players can select from a number of different maps for their farm. Each of these maps offer unique benefits, and favor specific [[skills]]. | ||
| Line 23: | Line 23: | ||
! Associated Skill | ! Associated Skill | ||
|- | |- | ||
| style="text-align: center;"|[[File: | | style="text-align: center;"|[[File:Standard Farm Map Icon.png|48px|center|link=]] [[Farm Maps#Map Types|Standard Farm]] | ||
| | | | ||
* The majority of this map is [[farming]] land, ideal for [[crops]] and [[animals]]. | * The majority of this map is [[farming]] land, ideal for [[crops]] and [[animals]]. | ||
| [[File:Farming Skill Icon.png|24px|link=]] [[Skills#Farming|Farming]] | | [[File:Farming Skill Icon.png|24px|link=]] [[Skills#Farming|Farming]] | ||
|- | |- | ||
| style="text-align: center;"|[[File: | | style="text-align: center;"|[[File:Riverland Farm Map Icon.png|48px|center|link=]] [[Farm Maps#Map Types|Riverland Farm]] | ||
| | | | ||
* The majority of this map is water. [[Fishing]] is viable on this farm. | * The majority of this map is water. [[Fishing]] is viable on this farm. | ||
| Line 35: | Line 35: | ||
| [[File:Fishing Skill Icon.png|24px|link=]] [[Skills#Fishing|Fishing]] | | [[File:Fishing Skill Icon.png|24px|link=]] [[Skills#Fishing|Fishing]] | ||
|- | |- | ||
| style="text-align: center;"|[[File: | | style="text-align: center;"|[[File:Forest Farm Map Icon.png|48px|center|link=]] [[Farm Maps#Map Types|Forest Farm]] | ||
| | | | ||
* Many [[trees]] are found all around the map. | * Many [[trees]] are found all around the map. | ||
| Line 45: | Line 45: | ||
| [[File:Foraging Skill Icon.png|24px|link=]] [[Skills#Foraging|Foraging]] | | [[File:Foraging Skill Icon.png|24px|link=]] [[Skills#Foraging|Foraging]] | ||
|- | |- | ||
| style="text-align: center;"|[[File: | | style="text-align: center;"|[[File:Hilltop Farm Map Icon.png|48px|center|link=]] [[Farm Maps#Map Types|Hill-top Farm]] | ||
| | | | ||
* A special mining area, in the southwest part of the map, spawns the following items: | * A special mining area, in the southwest part of the map, spawns the following items: | ||
| Line 55: | Line 55: | ||
| [[File:Mining Skill Icon.png|24px|link=]] [[Skills#Mining|Mining]] | | [[File:Mining Skill Icon.png|24px|link=]] [[Skills#Mining|Mining]] | ||
|- | |- | ||
| style="text-align: center;"|[[File: | | style="text-align: center;"|[[File:Wilderness Farm Map Icon.png|48px|center|link=]] [[Farm Maps#Map Types|Wilderness Farm]] | ||
| | | | ||
* [[Monsters]] spawn at night (scales with the player's Combat level) | * [[Monsters]] spawn at night (scales with the player's Combat level). | ||
* Additional cliffs and ponds decrease the overall farming area. | * Additional cliffs and ponds decrease the overall farming area. | ||
| [[File:Combat Skill Icon.png|24px|link=]] [[Skills#Combat|Combat]] | | [[File:Combat Skill Icon.png|24px|link=]] [[Skills#Combat|Combat]] | ||
|- | |- | ||
| style="text-align: center;"|[[File: | | style="text-align: center;"|[[File:Four Corners Farm Map Icon.png|48px|center|link=]] [[Farm Maps#Map Types|Four Corners Farm]] | ||
| | | | ||
* [[Multiplayer]] Focused map | * [[Multiplayer]] Focused map | ||
| Line 67: | Line 67: | ||
| [[Multiplayer]] | | [[Multiplayer]] | ||
|- | |- | ||
| style="text-align: center;"|[[File: | | style="text-align: center;"|[[File:Beach Farm Map Icon.png|48px|center|link=]] [[Farm Maps#Map Types|Beach Farm]] | ||
| | | | ||
* Includes good spots for [[fishing]]. | * Includes good spots for [[fishing]]. | ||
* Fish caught on this map will be [[The Beach|Ocean]] Fish. | * Fish caught on this map will be [[The Beach|Ocean]] Fish. | ||
* Most of the ground is sand, which cannot be watered by sprinklers. | * Most of the ground is sand, which cannot be watered by [[Crafting#Sprinklers|sprinklers]]. | ||
* [[Supply Crate|Supply crates]] occasionally wash up on shore. | * [[Supply Crate|Supply crates]] occasionally wash up on shore. | ||
* Beach forage can be found on shores. | * Beach forage can be found on shores. | ||
|class="no-wrap"|[[File:Fishing Skill Icon.png|24px|link=]] [[Skills#Fishing|Fishing]]<br />[[File:Foraging Skill Icon.png|24px|link=]] [[Foraging]] | |class="no-wrap"|[[File:Fishing Skill Icon.png|24px|link=]] [[Skills#Fishing|Fishing]]<br />[[File:Foraging Skill Icon.png|24px|link=]] [[Foraging]] | ||
|- | |||
| style="text-align: center;"|[[File:Meadowlands Farm Map Icon.png|48px|center|link=]] [[Farm Maps#Map Types|Meadowlands Farm]] | |||
| | |||
* Has a chewy blue grass that [[animals]] love. | |||
* Players start with a [[Coop]] and two [[chicken]]s. | |||
* Instead of receiving 15 [[Parsnip Seeds]] from [[Lewis|Mayor Lewis]], the player instead receives 15 pieces of [[Hay]]. | |||
| [[File:Farming Skill Icon.png|24px|link=]] [[Skills#Farming|Farming]] | |||
|} | |} | ||
==Farmhouse== | ==Farmhouse== | ||
[[File:House (tier 3).png|thumb|right|180px|A tier 3 House]] | [[File:House (tier 3).png|thumb|right|180px|A tier 3 House]] | ||
{{ | {{Main article|Farmhouse}} | ||
The Farmhouse is the only form of player housing. | The Farmhouse is the only form of player housing. On the Standard farm map, the house features a TV, a single bed, a picture, a table and chair, decorative dishes, and a fireplace. The appearance and specific furniture of the Farmhouse varies based on the chosen farm map. The farmhouse can be upgraded 3 times: once by paying {{Price|10000}} and giving 450 [[Wood]] to [[Robin]], and again by paying {{Price|65000}} and giving 100 [[Hardwood]] to [[Robin]]. The final upgrade adds a cellar which can age wine and cheese in [[Cask]]s; it costs {{Price|100000}}. All upgrades take approximately 2 full days to complete. | ||
===Marriage=== | ===Marriage=== | ||
{{ | {{Main article|Marriage}} | ||
Marriage is possible after upgrading the [[Farmhouse]] at least once. Once married, the player's spouse will immediately set up a [[Marriage#Spouse Rooms|unique room]] inside the Farmhouse, located to the right of the bedroom. | |||
==Shipping Box== | ==Shipping Box== | ||
{{ | {{Main article|Shipping}} | ||
The shipping box is a rectangular wooden box located to the right of the farmhouse. Items with value can be placed inside the box (excluding tools) and will be sold overnight with the total earnings from selling the items displayed once the player goes to bed for the night. The latest item placed in the box can be recovered, but items placed before the latest item may not be recovered. For example, if the player places 10 corn in, it may be recovered before shipping out for the night, however, if the player places an eggplant on top of the corn, only the eggplant may be recovered, but the corn reaches its inevitable fate of being sold. | The shipping box is a rectangular wooden box located to the right of the farmhouse. Items with value can be placed inside the box (excluding tools) and will be sold overnight with the total earnings from selling the items displayed once the player goes to bed for the night. The latest item placed in the box can be recovered, but items placed before the latest item may not be recovered. For example, if the player places 10 corn in, it may be recovered before shipping out for the night, however, if the player places an eggplant on top of the corn, only the eggplant may be recovered, but the corn reaches its inevitable fate of being sold. | ||
==Mailbox== | ==Mailbox== | ||
{{ | {{Main article|Letters}} | ||
The mailbox is located to the bottom-right corner of the farmhouse. It is used to receive and read incoming [[letters]]. Any unread mail will be indicated by the display of a floating speech bubble containing an envelope icon hovering over the mailbox. | The mailbox is located to the bottom-right corner of the farmhouse. It is used to receive and read incoming [[letters]]. Any unread mail will be indicated by the display of a floating speech bubble containing an envelope icon hovering over the mailbox. | ||
==Crops== | ==Crops== | ||
[[File: | [[File:Scarecrow Range.png|thumb|right|Visual representation of the protection range of a scarecrow]] | ||
{{ | {{Main article|Crops}} | ||
Seeds for crops can be | Seeds for crops can be purchased from [[Pierre]] in his shop or the [[JojaMart]] with the selection correlated to the active season, or obtained from completing [[Community Center]] bundles or [[Museum]] rewards. However, these seeds can only be planted on the farm or in the [[Greenhouse]]. In order to begin the process of growing a crop, the player must find a clear 1x1 area to till with a hoe. Once tilled, the seed may be planted and watered. All crops must be watered daily in order to continue growing. Once a crop is fully grown, it may be harvested. Most crops grow once, and the entire plant is harvested, but for crops like berries and corn, these crops only have their edible portions harvested, allowing the crop to grow back faster than when it was planted. However, once the season for the crop ends, it will wither and die immediately. | ||
===Fruit Trees=== | ===Fruit Trees=== | ||
{{ | {{Main article|Fruit Trees}} | ||
Fruit Tree seeds can be | Fruit Tree seeds can be purchased from [[Pierre]]'s Shop and occasionally from the [[Traveling Cart]] and sowed on the farm in the center of a 3x3 square. All fruit trees take approximately 28 days to mature completely, and, depending on the season, will produce 1 fruit per day. Fruit trees do not produce fruit during winter. | ||
===Crows=== | ===Crows=== | ||
| Line 107: | Line 114: | ||
==Buildings== | ==Buildings== | ||
{{ | {{Main article|Carpenter's Shop}} | ||
Buildings can be purchased from [[Robin]] in the [[Carpenter's Shop]] at varying prices. Farm buildings are required to house animals. Both coops and barn buildings have upgrades, and the base building must be purchased before the upgrade. Each of these buildings can be built multiple times to support more animals. | Buildings can be purchased from [[Robin]] in the [[Carpenter's Shop]] at varying prices. Farm buildings are required to house animals. Both coops and barn buildings have upgrades, and the base building must be purchased before the upgrade. Each of these buildings can be built multiple times to support more animals. | ||
| Line 122: | Line 129: | ||
| [[Weeds|Weed]] | | [[Weeds|Weed]] | ||
| Any | | Any | ||
| {{ | | {{Name|Fiber|0-1}} {{Name|Mixed Seeds|0-1}} | ||
| Respawns randomly; spreads destructively | | Respawns randomly; spreads destructively | ||
|- | |- | ||
| | | [[File:Wild Grass Screenshot.png|134px]] | ||
| [[Grass]] | | [[Grass]] | ||
| [[Scythe]] | | [[Scythe]] | ||
| {{ | | {{Name|Hay|0-1}} (only if [[Silo]] exists) | ||
| Respawns randomly; Spreads non-destructively | | Respawns randomly; Spreads non-destructively | ||
|} | |} | ||
====Trees==== | ====Trees==== | ||
{{ | {{Main article|Trees}} | ||
Apart from [[Fruit Trees]], there are 3 types of [[Trees|common trees]] that grow in Stardew Valley: [[Maple Tree]]s, [[Oak Tree]]s, and [[Pine Tree]]s. | Apart from [[Fruit Trees]], there are 3 types of [[Trees|common trees]] that grow in Stardew Valley: [[Maple Tree]]s, [[Oak Tree]]s, and [[Pine Tree]]s. | ||
{| class="wikitable" | {| class="wikitable" | ||
| Line 143: | Line 150: | ||
|- | |- | ||
|Mature [[Maple Tree]] | |Mature [[Maple Tree]] | ||
|{{ | |{{Name|Axe|link=Axes{{!}}Axe}} | ||
|{{ | |{{Name|Wood|16-31|class=inline}}, {{Name|Sap|6|class=inline}}, {{Name|Maple Seed|0-2|class=inline}}, {{Name|Hardwood|if [[Foraging#Foraging Skill|Lumberjack]]|class=inline}} | ||
|Maple seeds spread non-destructively | |Maple seeds spread non-destructively | ||
|- | |- | ||
|Mature [[Oak Tree]] | |Mature [[Oak Tree]] | ||
|{{ | |{{Name|Axe|link=Axes{{!}}Axe}} | ||
|{{ | |{{Name|Wood|16-31|class=inline}}, {{Name|Sap|6|class=inline}}, {{Name|Acorn|0-2|class=inline}}, {{Name|Hardwood|if [[Foraging#Foraging Skill|Lumberjack]]|class=inline}} | ||
|Acorns spread non-destructively | |Acorns spread non-destructively | ||
|- | |- | ||
|Mature [[Pine Tree]] | |Mature [[Pine Tree]] | ||
|{{ | |{{Name|Axe|link=Axes{{!}}Axe}} | ||
|{{ | |{{Name|Wood|16-31|class=inline}}, {{Name|Sap|6|class=inline}}, {{Name|Pine Cone|0-2|class=inline}}, {{Name|Hardwood|if [[Foraging#Foraging Skill|Lumberjack]]|class=inline}} | ||
|Pine cones spread non-destructively | |Pine cones spread non-destructively | ||
|- | |- | ||
|[[Trees|Tree Seedling]] (stage 4) | |[[Trees|Tree Seedling]] (stage 4) | ||
|{{ | |{{Name|Axe|link=Axes{{!}}Axe}} | ||
|{{ | |{{Name|Wood|4-5}} | ||
|Grows to next stage | |Grows to next stage | ||
|- | |- | ||
|[[Trees|Tree Seedling]] (stages 2-3) | |[[Trees|Tree Seedling]] (stages 2-3) | ||
|Any | |Any | ||
|{{ | |{{Name|Wood|0-1}} | ||
|Grows to next stage | |Grows to next stage | ||
|- | |- | ||
|[[Trees|Fallen Seed]] | |[[Trees|Fallen Seed]] | ||
|{{ | |{{Name|Axe|link=Axes{{!}}Axe}}{{Name|Pickaxe|link=Pickaxes{{!}}Pickaxe}}{{Name|Hoe|link=Hoes{{!}}Hoe}} | ||
|[[File:Acorn.png|24px]][[File:Pine Cone.png|24px]][[File:Maple Seed.png|24px]] (1) | |[[File:Acorn.png|24px]][[File:Pine Cone.png|24px]][[File:Maple Seed.png|24px]] (1) | ||
|Grows to stage 2 seedling | |Grows to stage 2 seedling | ||
| Line 186: | Line 193: | ||
|[[File:Springobjects294.png|32px]][[File:Springobjects295.png|32px]] | |[[File:Springobjects294.png|32px]][[File:Springobjects295.png|32px]] | ||
|Twig | |Twig | ||
|{{ | |{{Name|Axe|link=Axes{{!}}Axe}} | ||
|{{ | |{{Name|Wood|1|size=24}} | ||
|Spawns randomly; spreads destructively | |Spawns randomly; spreads destructively | ||
|- | |- | ||
|[[File:Large Stump.png]] | |[[File:Large Stump.png]] | ||
|[[ | |[[Large Stump]] | ||
|{{ | |{{Name|Copper Axe|link=Axes{{!}}Copper Axe}} | ||
|{{ | |{{Name|Hardwood|2-3|size=24}} | ||
|Only on [[Farm Maps|Forest Farm]], [[Farm Maps|Four Corners]] and [[Farm Maps|Beach Farm]] | |Only on [[Farm Maps|Forest Farm]], [[Farm Maps|Four Corners]] and [[Farm Maps|Beach Farm]] | ||
|- | |- | ||
|[[File:Large Log.png]] | |[[File:Large Log.png]] | ||
|[[ | |[[Large Log]] | ||
|{{ | |{{Name|Steel Axe|link=Axes{{!}}Steel Axe}} | ||
|{{ | |{{Name|Hardwood|8-10|size=24}} | ||
|Never | |Never | ||
|} | |} | ||
====Stone==== | ====Stone==== | ||
{{ | {{Main article|Stone}} | ||
The farm's rock debris is not a primary way of farming stone (see [[The Mines]]). Stone debris is split into two types, both dropping stone. | The farm's rock debris is not a primary way of farming stone (see [[The Mines]]). Stone debris is split into two types, both dropping stone. | ||
{| class="wikitable" | {| class="wikitable" | ||
| Line 216: | Line 223: | ||
|[[File:Stone Index343.png|32px]][[File:Stone Index450.png|32px]] | |[[File:Stone Index343.png|32px]][[File:Stone Index450.png|32px]] | ||
|Rock | |Rock | ||
|{{ | |{{Name|Pickaxe|link=Pickaxes{{!}}Pickaxe}} | ||
|{{ | |{{Name|Stone|1|size=24}} | ||
|Spawns randomly; spreads destructively | |Spawns randomly; spreads destructively | ||
|- | |- | ||
|[[File:Farm Boulder.png|64px]] | |[[File:Farm Boulder.png|64px]] | ||
|[[Boulder]] | |[[Boulder]] | ||
|{{ | |{{Name|Steel Pickaxe|link=Pickaxes{{!}}Steel Pickaxe}} | ||
|{{ | |{{Name|Stone|15|size=24}} | ||
|Never | |Never | ||
|} | |} | ||
| Line 240: | Line 247: | ||
===Greenhouse=== | ===Greenhouse=== | ||
{{ | {{Main article|Greenhouse}} | ||
The Greenhouse in the beginning is unusable, as the player seems to assume it was destroyed by a storm. Completing the [[Bundles#Pantry|Pantry]] section of the [[Community Center]] will cause the greenhouse to be restored, and be of use to the player. It features a 12x10 plot for crops, and a water trough to refill the Watering can. Any seeds from any season may be planted here, even during the winter, giving the player a large advantage. Buildings may not be placed in the greenhouse. | The Greenhouse in the beginning is unusable, as the player seems to assume it was destroyed by a storm. Completing the [[Bundles#Pantry|Pantry]] section of the [[Community Center]] will cause the greenhouse to be restored, and be of use to the player. It features a 12x10 plot for crops, and a water trough to refill the Watering can. Any seeds from any season may be planted here, even during the winter, giving the player a large advantage. Buildings may not be placed in the greenhouse. | ||
===The Cave=== | ===The Cave=== | ||
[[File:CaveMushrooms.png|right|120px|thumb|Mushroom boxes]] | [[File:CaveMushrooms.png|right|120px|thumb|Mushroom boxes]] | ||
{{ | {{Main article|The Cave}} | ||
Once total earnings reach {{ | Once total earnings reach {{Price|25000}}, [[Demetrius]] meets the player at their door the next day. He states that he is working on research and asks if they wouldn't mind if he used their cave. He gives the player the option to either have fruit bats in the cave, or to install 6 mushroom boxes. Fruit bats will leave random fruit in the cave overnight, while the Mushroom Cave has a [[Dehydrator]] that dries out mushrooms, and mushroom boxes that will produce one of five different types of mushrooms on a regular basis. | ||
===Grandpa's Shrine=== | ===Grandpa's Shrine=== | ||
{{ | {{Main article|Grandpa}} | ||
{{ | {{Squote|Wait for my return at the dawn of the 3rd year.}} | ||
Grandpa's Shrine is a landmark located in the northwestern corner of the farm. Upon encountering the shrine, a note is present that reads "Wait for my return at the dawn of the 3rd year". Upon reaching the dawn of the 3rd year, a manifestation of grandpa appears and evaluates the player's performance. | Grandpa's Shrine is a landmark located in the northwestern corner of the farm. Upon encountering the shrine, a note is present that reads "Wait for my return at the dawn of the 3rd year". Upon reaching the dawn of the 3rd year, a manifestation of grandpa appears and evaluates the player's performance. | ||
After their third year of being on the farm and his initial evaluation, if the player got less than four candles, his shrine will still be active. | After their third year of being on the farm and his initial evaluation, if the player got less than four candles, his shrine will still be active. | ||
{{ | {{Squote|There's a diamond-shaped slot in the shrine... was that always there?}} | ||
If the player places a [[Diamond]] into Grandpa's Shrine, he will reappear and re-evaluate the farm the next day. He will apologize for being too harsh and promptly give them a new answer if the player made some changes. Interacting with the shrine after this event will produce a [[Statue Of Perfection]], if all four candles are lit. | If the player places a [[Diamond]] into Grandpa's Shrine, he will reappear and re-evaluate the farm the next day. He will apologize for being too harsh and promptly give them a new answer if the player made some changes. Interacting with the shrine after this event will produce a [[Statue Of Perfection]], if all four candles are lit. | ||
| Line 263: | Line 270: | ||
:[[File:Brown Chicken.png|26px]] ''See: [[Animals]]'' | :[[File:Brown Chicken.png|26px]] ''See: [[Animals]]'' | ||
:[[File:Cheese.png|26px]] ''See: [[Artisan Goods]]'' | :[[File:Cheese.png|26px]] ''See: [[Artisan Goods]]'' | ||
==History== | ==History== | ||
| Line 271: | Line 276: | ||
{{History|1.4|Added new multiplayer focused map: Four Corners Farm.}} | {{History|1.4|Added new multiplayer focused map: Four Corners Farm.}} | ||
{{History|1.5|Added Beach Farm. Once unlocked, the Greenhouse can now be moved at Robin’s shop. A stone carving of a Stardrop will now appear above Grandpa's Shrine after achieving Perfection.}} | {{History|1.5|Added Beach Farm. Once unlocked, the Greenhouse can now be moved at Robin’s shop. A stone carving of a Stardrop will now appear above Grandpa's Shrine after achieving Perfection.}} | ||
{{History|1.6|Added a new farm type: Meadowlands Farm. The farmhouse and pet bowl can now be moved through Robin's menu.}} | |||
{{History|1.6.15|Debris no longer spread under [[Crops#Giant Crops|giant crops]].}} | |||
{{NavboxLocations}} | {{NavboxLocations}} | ||
| Line 276: | Line 283: | ||
[[Category:Locations]] | [[Category:Locations]] | ||
[[Category:Gameplay]] | [[Category:Gameplay]] | ||
[[de:Der Hof]] | [[de:Der Hof]] | ||
Latest revision as of 17:09, 9 October 2026
| The Farm | |
 | |
  |
|keywords=Stardew Valley Wiki,Stardew Valley,Villagers,The Farm,The Farm,hours,location
}}{{#seo:
|keywords=Stardew Valley Wiki, Stardew Valley, The Farm, gift |site_name=Stardew Valley Wiki |type=article |title=The Farm - Stardew Valley Wiki }}
| “ | “You’ve inherited your grandfather’s old farm plot in Stardew Valley. Armed with hand-me-down tools and a few coins, you set out to begin your new life.” |
Upon completing the Character Creation and the initial dialogue with Robin at the Bus Stop, this is the location the player is transported to. Inherited from their grandfather after quitting their job at Joja Corporation, it is their duty to restore the land and make use of it.
- See Getting Started for more information
Farm Maps
- Main article: Farm Maps
When creating a new character players can select from a number of different maps for their farm. Each of these maps offer unique benefits, and favor specific skills.
The player's farm house will appear the same from the outside on all maps, but begins with a uniquely styled interior after the maps theme. These house interiors offer different furniture pieces, wallpaper and flooring for each map.
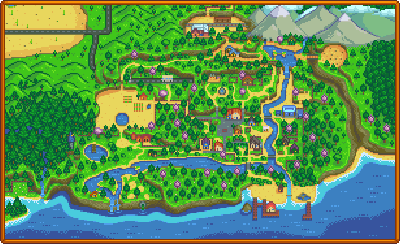
Each map will change how the farm appears on the game map slightly. Most simply change how the farm area appears, but some change areas outside the farm on the map - the Forest farm extends the forest to the west toward the farm and the Riverland map connects to a river which flows south of the desert. These changes are only reflected on the world map; no changes are made to the actual game world outside the player's farm based on map selection.
After selecting a map it cannot be changed; characters are permanently tied to their map type once created. Each map takes up the same area, but there are different amounts of usable, farmable, buildable land on each.
| Name | Description | Associated Skill |
|---|---|---|
 |
 Farming | |
 |
|
 Fishing |
 |
|
 Foraging |
 |
|
 Mining |
 |
|
 Combat |
 |
|
Multiplayer |
 |
|
Fishing Foraging
|
 |
|
Farming
|
Farmhouse

- Main article: Farmhouse
The Farmhouse is the only form of player housing. On the Standard farm map, the house features a TV, a single bed, a picture, a table and chair, decorative dishes, and a fireplace. The appearance and specific furniture of the Farmhouse varies based on the chosen farm map. The farmhouse can be upgraded 3 times: once by paying  10,000g and giving 450 Wood to Robin, and again by paying 65,000g and giving 100 Hardwood to Robin. The final upgrade adds a cellar which can age wine and cheese in Casks; it costs 100,000g. All upgrades take approximately 2 full days to complete.
Marriage
- Main article: Marriage
Marriage is possible after upgrading the Farmhouse at least once. Once married, the player's spouse will immediately set up a unique room inside the Farmhouse, located to the right of the bedroom.
Shipping Box
- Main article: Shipping
The shipping box is a rectangular wooden box located to the right of the farmhouse. Items with value can be placed inside the box (excluding tools) and will be sold overnight with the total earnings from selling the items displayed once the player goes to bed for the night. The latest item placed in the box can be recovered, but items placed before the latest item may not be recovered. For example, if the player places 10 corn in, it may be recovered before shipping out for the night, however, if the player places an eggplant on top of the corn, only the eggplant may be recovered, but the corn reaches its inevitable fate of being sold.
Mailbox
- Main article: Letters
The mailbox is located to the bottom-right corner of the farmhouse. It is used to receive and read incoming letters. Any unread mail will be indicated by the display of a floating speech bubble containing an envelope icon hovering over the mailbox.
Crops

- Main article: Crops
Seeds for crops can be purchased from Pierre in his shop or the JojaMart with the selection correlated to the active season, or obtained from completing Community Center bundles or Museum rewards. However, these seeds can only be planted on the farm or in the Greenhouse. In order to begin the process of growing a crop, the player must find a clear 1x1 area to till with a hoe. Once tilled, the seed may be planted and watered. All crops must be watered daily in order to continue growing. Once a crop is fully grown, it may be harvested. Most crops grow once, and the entire plant is harvested, but for crops like berries and corn, these crops only have their edible portions harvested, allowing the crop to grow back faster than when it was planted. However, once the season for the crop ends, it will wither and die immediately.
Fruit Trees
- Main article: Fruit Trees
Fruit Tree seeds can be purchased from Pierre's Shop and occasionally from the Traveling Cart and sowed on the farm in the center of a 3x3 square. All fruit trees take approximately 28 days to mature completely, and, depending on the season, will produce 1 fruit per day. Fruit trees do not produce fruit during winter.
Crows
Crows may randomly spawn on the farm each morning there are crops planted. Crows destroy crops by eating them. To avoid this, players may craft Scarecrows and place them within range of growing crops. Collectible Rarecrows can also be used to scare off crows.
Buildings
- Main article: Carpenter's Shop
Buildings can be purchased from Robin in the Carpenter's Shop at varying prices. Farm buildings are required to house animals. Both coops and barn buildings have upgrades, and the base building must be purchased before the upgrade. Each of these buildings can be built multiple times to support more animals.
Tip: It's a good idea to build a silo before purchasing animals to place in farm buildings, so there is a place to store hay for them to eat.
Debris
Farm debris is a naturally regenerating element on the Farm. It includes rocks, twigs, and weeds.
Small Plants
| Image | Name | Tool Required | Drops | Propagation |
|---|---|---|---|---|

|
Weed | Any |  Fiber (0-1)  Mixed Seeds (0-1) |
Respawns randomly; spreads destructively |

|
Grass | Scythe |  Hay (0-1) (only if Silo exists) |
Respawns randomly; Spreads non-destructively |
Trees
- Main article: Trees
Apart from Fruit Trees, there are 3 types of common trees that grow in Stardew Valley: Maple Trees, Oak Trees, and Pine Trees.
| Tree | Tool Required | Drops | Propagation |
|---|---|---|---|
| Mature Maple Tree |  Axe |
 Wood (16-31),  Sap (6),  Maple Seed (0-2),  Hardwood (if Lumberjack) |
Maple seeds spread non-destructively |
| Mature Oak Tree | Axe
|
Wood (16-31), Sap (6),  Acorn (0-2), Hardwood (if Lumberjack) |
Acorns spread non-destructively |
| Mature Pine Tree | Axe
|
Wood (16-31), Sap (6),  Pine Cone (0-2), Hardwood (if Lumberjack) |
Pine cones spread non-destructively |
| Tree Seedling (stage 4) | Axe
|
Wood (4-5)
|
Grows to next stage |
| Tree Seedling (stages 2-3) | Any | Wood (0-1)
|
Grows to next stage |
| Fallen Seed | Axe Pickaxe  Hoe |
   (1) |
Grows to stage 2 seedling |
Note: Seeds will not drop until Foraging Skill Level 1 is acquired. Tree seedlings that have not yet grown beyond their first stage will drop nothing.
Wood
Apart from trees, wooden debris is split into three types, two of which produce Hardwood.
| Image | Name | Tool Required | Drops | Propagation |
|---|---|---|---|---|
 
|
Twig | Axe
|
Wood (1)
|
Spawns randomly; spreads destructively |

|
Large Stump |  Copper Axe |
Hardwood (2-3)
|
Only on Forest Farm, Four Corners and Beach Farm |

|
Large Log |  Steel Axe |
Hardwood (8-10)
|
Never |
Stone
- Main article: Stone
The farm's rock debris is not a primary way of farming stone (see The Mines). Stone debris is split into two types, both dropping stone.
| Image | Name | Tool Required | Drops | Propagation |
|---|---|---|---|---|
 
|
Rock | Pickaxe
|
 Stone (1) |
Spawns randomly; spreads destructively |

|
Boulder |  Steel Pickaxe |
Stone (15)
|
Never |
Unique Areas

|

|
| Initial | Repaired |
There are three unique areas on The Farm (not including player placeable buildings,e.g., Barn, The Coop, etc.).
Greenhouse
- Main article: Greenhouse
The Greenhouse in the beginning is unusable, as the player seems to assume it was destroyed by a storm. Completing the Pantry section of the Community Center will cause the greenhouse to be restored, and be of use to the player. It features a 12x10 plot for crops, and a water trough to refill the Watering can. Any seeds from any season may be planted here, even during the winter, giving the player a large advantage. Buildings may not be placed in the greenhouse.
The Cave

- Main article: The Cave
Once total earnings reach 25,000g, Demetrius meets the player at their door the next day. He states that he is working on research and asks if they wouldn't mind if he used their cave. He gives the player the option to either have fruit bats in the cave, or to install 6 mushroom boxes. Fruit bats will leave random fruit in the cave overnight, while the Mushroom Cave has a Dehydrator that dries out mushrooms, and mushroom boxes that will produce one of five different types of mushrooms on a regular basis.
Grandpa's Shrine
- Main article: Grandpa
| “ | “Wait for my return at the dawn of the 3rd year.” |
Grandpa's Shrine is a landmark located in the northwestern corner of the farm. Upon encountering the shrine, a note is present that reads "Wait for my return at the dawn of the 3rd year". Upon reaching the dawn of the 3rd year, a manifestation of grandpa appears and evaluates the player's performance.
After their third year of being on the farm and his initial evaluation, if the player got less than four candles, his shrine will still be active.
| “ | “There's a diamond-shaped slot in the shrine... was that always there?” |
If the player places a Diamond into Grandpa's Shrine, he will reappear and re-evaluate the farm the next day. He will apologize for being too harsh and promptly give them a new answer if the player made some changes. Interacting with the shrine after this event will produce a Statue Of Perfection, if all four candles are lit.
After achieving Perfection, a stone carving of a Stardrop will appear above the shrine.
Additional Information
 See: Animals
 See: Artisan Goods


History
- 1.0: Introduced.
- 1.1: Added four new farm maps to character creation, each favoring different skills.
- 1.4: Added new multiplayer focused map: Four Corners Farm.
- 1.5: Added Beach Farm. Once unlocked, the Greenhouse can now be moved at Robin’s shop. A stone carving of a Stardrop will now appear above Grandpa's Shrine after achieving Perfection.
- 1.6: Added a new farm type: Meadowlands Farm. The farmhouse and pet bowl can now be moved through Robin's menu.
- 1.6.15: Debris no longer spread under giant crops.
| Locations | |
|---|---|
| Locations | Backwoods • Beach • Bus Stop • Calico Desert • Cindersap Forest • Farm • Farm Cave • Farm Pond • Graveyard • Ginger Island • Mastery Cave • Minecart • Mines • Mountain • Mutant Bug Lair • Pelican Town • Quarry • Quarry Mine • Railroad • Secret Woods • Sewers • Skull Cavern • Summit • Tunnel • Volcano Dungeon • Witch's Swamp |