Furniture: Difference between revisions
imported>Emily Romano →Misc.: Fixed furniture catalogue sizes. |
imported>Margotbean m Text replacement - "{{tprice|" to "{{Tprice|" |
||
| (294 intermediate revisions by 35 users not shown) | |||
| Line 1: | Line 1: | ||
{{TOC right}}{{ | {{TOC right}}{{Construction}} | ||
{{for|crafted decorative items|Crafting}} | {{for|crafted decorative items|Crafting}} | ||
:''See also: [[Wallpaper]], [[Flooring]]'' | :''See also: [[Wallpaper]], [[Flooring]]'' | ||
'''Furniture''' can be purchased from [[Robin]] at the [[Carpenter's Shop]] or from the [[Traveling Cart]] merchant. Both shops offer a random selection of furniture each day they are open. The cost of furniture at the Traveling Cart is random, but is always between {{ | '''Furniture''' can be purchased from [[Robin]] at the [[Carpenter's Shop]] or from the [[Traveling Cart]] merchant. Both shops offer a random selection of furniture each day they are open. The cost of furniture at the Traveling Cart is random, but is always between {{Tprice|furniture}}. Prices at the Carpenter's Shop do not vary. | ||
Some furniture can be obtained only by donating items to the [[Museum]], purchased at [[Festivals]], the [[Casino]], [[JojaMart]], or other unique sources. These exceptions are listed in the tables below. | Some furniture can be obtained only by donating items to the [[Museum]], purchased at [[Festivals]], the [[Casino]], [[JojaMart]], or other unique sources. These exceptions are listed in the tables below. | ||
After the first [[Farmhouse]] upgrade, [[Robin]] also offers the [[Furniture Catalogue]] for sale at the [[Carpenter's Shop]]. Once placed, "using" the furniture catalogue allows you to purchase furniture items for {{ | After the first [[Farmhouse]] upgrade, [[Robin]] also offers the [[Furniture Catalogue]] for sale at the [[Carpenter's Shop]]. Once placed, "using" the furniture catalogue allows you to purchase furniture items for {{Price|0}} in unlimited quantity. | ||
There is a small chance of finding random furniture items when engaging in various tasks, such as slaying monsters, breaking open crates, shaking or chopping trees, tilling Artifact Spots, or panning. | |||
Players can sit in [[ | Most furniture can be placed outside.<ref name="placement" /> However, some items cannot be placed anywhere other than inside the [[Farmhouse]] or a [[Shed]]. Furniture will display a green square on tiles where it can be placed. The tile will turn red if the furniture cannot be placed. | ||
Players can sit in [[#Chairs|chairs]], [[#Benches|benches]], [[#Couches|couches]], and [[#Armchairs|armchairs]]. | |||
Furniture cannot be sold through the [[Shipping|Shipping Bin]] or to any merchant/shop, and cannot be gifted to [[villagers]]. | Furniture cannot be sold through the [[Shipping|Shipping Bin]] or to any merchant/shop, and cannot be gifted to [[villagers]]. | ||
==Controls== | ==Controls== | ||
*Computer: [[File:Right-Click.png|24px|link=]] Right-click on furniture while selected to rotate or place it, depending on the item. Some furniture can be easily picked up and moved by [[File:Left-Click.png|24px|link=]] left-clicking | *'''Computer:''' [[File:Right-Click.png|24px|link=]] Right-click on furniture while selected to rotate or place it, depending on the item. Some furniture can be easily picked up and moved by [[File:Left-Click.png|24px|link=]] left-clicking. | ||
*Nintendo Switch: Use the | *'''Nintendo Switch:''' Use the '''Y''' button to pick up and place furniture, the '''A''' button to rotate furniture, and the '''R Stick''' to choose where to place furniture. | ||
*Xbox: Press X or A to quick-place without placement guide and X to remove - it will not place if there’s not enough space. To remove item, stand in front of it and click X | *'''Xbox:''' Press '''X''' or '''A''' to quick-place without placement guide and '''X''' to remove - it will not place if there’s not enough space. To remove an item, stand in front of it and click '''X'''. For more control, use the right toggle to move the item around the room and press '''X''' to place/remove - this displays a faded image of the item and the placement guide to show where it can or cannot be placed. Some items can be rotated using '''A''' before placing. | ||
*On all systems, some furniture can only be picked up by using a [[Tools|tool]], or by holding the 'use tool' button (left-click on computer) to remove it once it is placed. | |||
==Chairs== | ==Chairs== | ||
Chairs can be | Chairs can be placed outside. | ||
All chairs available in the [[Furniture Catalogue]] can also be purchased from the [[Traveling Cart]] for {{ | All chairs available in the [[Furniture Catalogue]] can also be purchased from the [[Traveling Cart]] for {{Tprice|furniture}}. | ||
{| | {| | ||
|- | |- | ||
|style="vertical-align: top;"| | |style="vertical-align: top;"| | ||
{|class="wikitable | {|class="wikitable" | ||
!Item | !Item | ||
!Source | !Source | ||
! | !Price | ||
|- | |- | ||
|rowspan="2"|{{Name| | |rowspan="2"|{{Name|Oak Chair|size=24}} | ||
|[[File:Robin Icon.png|24px|link=]] [[Carpenter's Shop]] | |[[File:Robin Icon.png|24px|link=]] [[Carpenter's Shop]] | ||
|{{Price|350}} | |||
|- | |- | ||
|[[File:Furniture Catalogue.png|24px|link=]] [[Furniture Catalogue]] | |[[File:Furniture Catalogue.png|24px|link=]] [[Furniture Catalogue]] | ||
|{{Price|0}} | |||
|- | |- | ||
|rowspan="2"|{{Name| | |rowspan="2"|{{Name|Walnut Chair|size=24}} | ||
|[[File:Robin Icon.png|24px|link=]] [[Carpenter's Shop]] | |[[File:Robin Icon.png|24px|link=]] [[Carpenter's Shop]] | ||
|{{Price|350}} | |||
|- | |- | ||
|[[File:Furniture Catalogue.png|24px|link=]] [[Furniture Catalogue]] | |[[File:Furniture Catalogue.png|24px|link=]] [[Furniture Catalogue]] | ||
|{{Price|0}} | |||
|- | |- | ||
|rowspan="2"|{{Name| | |rowspan="2"|{{Name|Birch Chair|size=24}} | ||
|[[File:Robin Icon.png|24px|link=]] [[Carpenter's Shop]] | |[[File:Robin Icon.png|24px|link=]] [[Carpenter's Shop]] | ||
|{{Price|350}} | |||
|- | |- | ||
|[[File:Furniture Catalogue.png|24px|link=]] [[Furniture Catalogue]] | |[[File:Furniture Catalogue.png|24px|link=]] [[Furniture Catalogue]] | ||
|{{Price|0}} | |||
|- | |- | ||
|rowspan="2"|{{Name| | |rowspan="2"|{{Name|Mahogany Chair|size=24}} | ||
|[[File:Robin Icon.png|24px|link=]] [[Carpenter's Shop]] | |[[File:Robin Icon.png|24px|link=]] [[Carpenter's Shop]] | ||
|{{Price|1000}} | |||
|- | |- | ||
|[[File:Furniture Catalogue.png|24px|link=]] [[Furniture Catalogue]] | |[[File:Furniture Catalogue.png|24px|link=]] [[Furniture Catalogue]] | ||
|{{Price|0}} | |||
|- | |- | ||
|rowspan="2"|{{Name| | |rowspan="2"|{{Name|Red Diner Chair|size=24}} | ||
|[[File:Robin Icon.png|24px|link=]] [[Carpenter's Shop]] | |[[File:Robin Icon.png|24px|link=]] [[Carpenter's Shop]] | ||
|{{Price|750}} | |||
|- | |- | ||
|[[File:Furniture Catalogue.png|24px|link=]] [[Furniture Catalogue]] | |[[File:Furniture Catalogue.png|24px|link=]] [[Furniture Catalogue]] | ||
|{{Price|0}} | |||
|- | |- | ||
|rowspan="2"|{{Name| | |rowspan="2"|{{Name|Blue Diner Chair|size=24}} | ||
|[[File:Robin Icon.png|24px|link=]] [[Carpenter's Shop]] | |[[File:Robin Icon.png|24px|link=]] [[Carpenter's Shop]] | ||
|{{Price|750}} | |||
|- | |- | ||
|[[File:Furniture Catalogue.png|24px|link=]] [[Furniture Catalogue]] | |[[File:Furniture Catalogue.png|24px|link=]] [[Furniture Catalogue]] | ||
|{{Price|0}} | |||
|- | |- | ||
|rowspan="2"|{{Name| | |rowspan="2"|{{Name|Country Chair|size=24}} | ||
|[[File:Robin Icon.png|24px|link=]] [[Carpenter's Shop]] | |[[File:Robin Icon.png|24px|link=]] [[Carpenter's Shop]] | ||
|{{Price|750}} | |||
|- | |- | ||
|[[File:Furniture Catalogue.png|24px|link=]] [[Furniture Catalogue]] | |[[File:Furniture Catalogue.png|24px|link=]] [[Furniture Catalogue]] | ||
|{{Price|0}} | |||
|- | |- | ||
|rowspan="2"|{{Name| | |rowspan="2"|{{Name|Breakfast Chair|size=24}} | ||
|[[File:Robin Icon.png|24px|link=]] [[Carpenter's Shop]] | |[[File:Robin Icon.png|24px|link=]] [[Carpenter's Shop]] | ||
|{{Price|750}} | |||
|- | |- | ||
|[[File:Furniture Catalogue.png|24px|link=]] [[Furniture Catalogue]] | |[[File:Furniture Catalogue.png|24px|link=]] [[Furniture Catalogue]] | ||
|{{Price|0}} | |||
|- | |- | ||
|rowspan="2"|{{Name| | |rowspan="2"|{{Name|Pink Office Chair|size=24}} | ||
|[[File:Robin Icon.png|24px|link=]] [[Carpenter's Shop]] | |[[File:Robin Icon.png|24px|link=]] [[Carpenter's Shop]] | ||
|{{Price|500}} | |||
|- | |- | ||
|[[File:Furniture Catalogue.png|24px|link=]] [[Furniture Catalogue]] | |[[File:Furniture Catalogue.png|24px|link=]] [[Furniture Catalogue]] | ||
|{{Price|0}} | |||
|- | |- | ||
|rowspan="2"|{{Name| | |rowspan="2"|{{Name|Purple Office Chair|size=24}} | ||
|[[File:Robin Icon.png|24px|link=]] [[Carpenter's Shop]] | |[[File:Robin Icon.png|24px|link=]] [[Carpenter's Shop]] | ||
|{{Price|500}} | |||
|- | |- | ||
|[[File:Furniture Catalogue.png|24px|link=]] [[Furniture Catalogue]] | |[[File:Furniture Catalogue.png|24px|link=]] [[Furniture Catalogue]] | ||
|{{Price|0}} | |||
|- | |- | ||
|rowspan="2"|{{Name| | |rowspan="2"|{{Name|Green Office Stool|size=24}} | ||
|[[File:Robin Icon.png|24px|link=]] [[Carpenter's Shop]] | |[[File:Robin Icon.png|24px|link=]] [[Carpenter's Shop]] | ||
|{{Price|350}} | |||
|- | |- | ||
|[[File:Furniture Catalogue.png|24px|link=]] [[Furniture Catalogue]] | |[[File:Furniture Catalogue.png|24px|link=]] [[Furniture Catalogue]] | ||
|{{Price|0}} | |||
|- | |- | ||
|rowspan="2"|{{Name| | |rowspan="2"|{{Name|Orange Office Stool|size=24}} | ||
|[[File:Robin Icon.png|24px|link=]] [[Carpenter's Shop]] | |[[File:Robin Icon.png|24px|link=]] [[Carpenter's Shop]] | ||
|{{Price|350}} | |||
|- | |- | ||
|[[File:Furniture Catalogue.png|24px|link=]] [[Furniture Catalogue]] | |[[File:Furniture Catalogue.png|24px|link=]] [[Furniture Catalogue]] | ||
|{{Price|0}} | |||
|- | |- | ||
|rowspan="2"|{{Name| | |rowspan="2"|{{Name|Dark Throne|size=24}} | ||
|[[File:Robin Icon.png|24px|link=]] [[Carpenter's Shop]] | |[[File:Robin Icon.png|24px|link=]] [[Carpenter's Shop]] | ||
|{{Price|2000}} | |||
|- | |- | ||
|[[File:Furniture Catalogue.png|24px|link=]] [[Furniture Catalogue]] | |[[File:Furniture Catalogue.png|24px|link=]] [[Furniture Catalogue]] | ||
|{{Price|0}} | |||
|- | |- | ||
|rowspan="2"|{{Name| | |rowspan="2"|{{Name|Dining Chair (yellow)|size=24}} | ||
|[[File:Robin Icon.png|24px|link=]] [[Carpenter's Shop]] | |[[File:Robin Icon.png|24px|link=]] [[Carpenter's Shop]] | ||
|{{Price|1200}} | |||
|- | |- | ||
|[[File:Furniture Catalogue.png|24px|link=]] [[Furniture Catalogue]] | |[[File:Furniture Catalogue.png|24px|link=]] [[Furniture Catalogue]] | ||
| | |{{Price|0}} | ||
|- | |||
|rowspan="2"|{{Name|Dining Chair (red)|size=24}} | |||
|[[File:Robin Icon.png|24px|link=]] [[Carpenter's Shop]] | |||
|{{Price|1200}} | |||
|- | |||
|[[File:Furniture Catalogue.png|24px|link=]] [[Furniture Catalogue]] | |||
|{{Price|0}} | |||
|- | |- | ||
|rowspan="2"|{{Name|Green Plush Seat|size=24}} | |rowspan="2"|{{Name|Green Plush Seat|size=24}} | ||
|[[File:Robin Icon.png|24px|link=]] [[Carpenter's Shop]] | |[[File:Robin Icon.png|24px|link=]] [[Carpenter's Shop]] | ||
|{{Price|750}} | |||
|- | |- | ||
|[[File:Furniture Catalogue.png|24px|link=]] [[Furniture Catalogue]] | |[[File:Furniture Catalogue.png|24px|link=]] [[Furniture Catalogue]] | ||
|{{Price|0}} | |||
|- | |- | ||
|rowspan="2"|{{Name|Pink Plush Seat|size=24}} | |rowspan="2"|{{Name|Pink Plush Seat|size=24}} | ||
|[[File:Robin Icon.png|24px|link=]] [[Carpenter's Shop]] | |[[File:Robin Icon.png|24px|link=]] [[Carpenter's Shop]] | ||
|{{Price|750}} | |||
|- | |- | ||
|[[File:Furniture Catalogue.png|24px|link=]] [[Furniture Catalogue]] | |[[File:Furniture Catalogue.png|24px|link=]] [[Furniture Catalogue]] | ||
|{{Price|0}} | |||
|- | |- | ||
|rowspan="2"|{{Name| | |rowspan="2"|{{Name|Winter Chair|size=24}} | ||
|[[File:Robin Icon.png|24px|link=]] [[Carpenter's Shop]] | |[[File:Robin Icon.png|24px|link=]] [[Carpenter's Shop]] | ||
|{{Price|750}} | |||
|- | |- | ||
|[[File:Furniture Catalogue.png|24px|link=]] [[Furniture Catalogue]] | |[[File:Furniture Catalogue.png|24px|link=]] [[Furniture Catalogue]] | ||
| | |{{Price|0}} | ||
|} | |||
|style="vertical-align: top;"| | |||
{|class="wikitable" | |||
!Item | |||
!Source | |||
!Price | |||
|- | |- | ||
|rowspan="2"|{{Name| | |rowspan="2"|{{Name|Groovy Chair|size=24}} | ||
|[[File:Robin Icon.png|24px|link=]] [[Carpenter's Shop]] | |[[File:Robin Icon.png|24px|link=]] [[Carpenter's Shop]] | ||
|{{Price|750}} | |||
|- | |- | ||
|[[File:Furniture Catalogue.png|24px|link=]] [[Furniture Catalogue]] | |[[File:Furniture Catalogue.png|24px|link=]] [[Furniture Catalogue]] | ||
|{{Price|0}} | |||
|- | |- | ||
|rowspan="2"|{{Name| | |rowspan="2"|{{Name|Cute Chair|size=24}} | ||
|[[File:Robin Icon.png|24px|link=]] [[Carpenter's Shop]] | |[[File:Robin Icon.png|24px|link=]] [[Carpenter's Shop]] | ||
|{{Price|1200}} | |||
|- | |- | ||
|[[File:Furniture Catalogue.png|24px|link=]] [[Furniture Catalogue]] | |[[File:Furniture Catalogue.png|24px|link=]] [[Furniture Catalogue]] | ||
|{{Price|0}} | |||
|- | |- | ||
|rowspan="2"|{{Name| | |rowspan="2"|{{Name|Stump Seat|size=24}} | ||
|[[File:Robin Icon.png|24px|link=]] [[Carpenter's Shop]] | |[[File:Robin Icon.png|24px|link=]] [[Carpenter's Shop]] | ||
|{{Price|2000}} | |||
|- | |- | ||
|[[File:Furniture Catalogue.png|24px|link=]] [[Furniture Catalogue]] | |[[File:Furniture Catalogue.png|24px|link=]] [[Furniture Catalogue]] | ||
|{{Price|0}} | |||
|- | |- | ||
|rowspan="2"|{{Name| | |rowspan="2"|{{Name|Metal Chair|size=24}} | ||
|[[File:Robin Icon.png|24px|link=]] [[Carpenter's Shop]] | |[[File:Robin Icon.png|24px|link=]] [[Carpenter's Shop]] | ||
|{{Price|800}} | |||
|- | |- | ||
|[[File:Furniture Catalogue.png|24px|link=]] [[Furniture Catalogue]] | |[[File:Furniture Catalogue.png|24px|link=]] [[Furniture Catalogue]] | ||
|{{Price|0}} | |||
|- | |- | ||
|rowspan="2"|{{Name| | |rowspan="2"|{{Name|Green Stool|size=24}} | ||
|[[File:Robin Icon.png|24px|link=]] [[Carpenter's Shop]] | |[[File:Robin Icon.png|24px|link=]] [[Carpenter's Shop]] | ||
|{{Price|350}} | |||
|- | |- | ||
|[[File:Furniture Catalogue.png|24px|link=]] [[Furniture Catalogue]] | |[[File:Furniture Catalogue.png|24px|link=]] [[Furniture Catalogue]] | ||
|{{Price|0}} | |||
|- | |- | ||
|rowspan="2"|{{Name| | |rowspan="2"|{{Name|Blue Stool|size=24}} | ||
|[[File:Robin Icon.png|24px|link=]] [[Carpenter's Shop]] | |[[File:Robin Icon.png|24px|link=]] [[Carpenter's Shop]] | ||
|{{Price|350}} | |||
|- | |- | ||
|[[File:Furniture Catalogue.png|24px|link=]] [[Furniture Catalogue]] | |[[File:Furniture Catalogue.png|24px|link=]] [[Furniture Catalogue]] | ||
|{{Price|0}} | |||
|- | |- | ||
|rowspan="2"|{{Name| | |rowspan="2"|{{Name|King Chair|size=24}} | ||
|[[File:Robin Icon.png|24px|link=]] [[Carpenter's Shop]] | |[[File:Robin Icon.png|24px|link=]] [[Carpenter's Shop]] | ||
|{{Price|3000}} | |||
|- | |- | ||
|[[File:Furniture Catalogue.png|24px|link=]] [[Furniture Catalogue]] | |[[File:Furniture Catalogue.png|24px|link=]] [[Furniture Catalogue]] | ||
|{{Price|0}} | |||
| | |- | ||
| | |rowspan="2"|{{Name|Crystal Chair|size=24}} | ||
{| | |[[File:Gunther Icon.png|24px|link=]] [[Museum|Museum Donation]] | ||
|[[Minerals]] (41) | |||
|- | |||
|[[Night Market]] | |||
|{{Price|2500}} | |||
|- | |- | ||
|{{Name|Tropical Chair|size=24}} | |{{Name|Tropical Chair|size=24}} | ||
| | |{{NPC|Island Trader|size=24}} | ||
| | |{{Name|Lionfish|1}} | ||
|- | |- | ||
|{{Name|Desert Chair|size=24}} | |{{Name|Desert Chair|size=24}} | ||
| Line 216: | Line 232: | ||
|{{Name|Joja Chair|size=24}} | |{{Name|Joja Chair|size=24}} | ||
|[[File:Joja Furniture Catalogue.png|16px|link=]] [[Joja Furniture Catalogue]] | |[[File:Joja Furniture Catalogue.png|16px|link=]] [[Joja Furniture Catalogue]] | ||
|{{Price|0}} | |||
|- | |- | ||
|{{Name|Joja Stool|size=24}} | |{{Name|Joja Stool|size=24}} | ||
|[[File:Joja Furniture Catalogue.png|16px|link=]] [[Joja Furniture Catalogue]] | |[[File:Joja Furniture Catalogue.png|16px|link=]] [[Joja Furniture Catalogue]] | ||
|{{Price|0}} | |||
|- | |- | ||
|{{Name|Wizard Chair|size=24}} | |{{Name|Wizard Chair|size=24}} | ||
|[[File:Wizard Catalogue.png|16px|link=]] [[Wizard Catalogue]] | |[[File:Wizard Catalogue.png|16px|link=]] [[Wizard Catalogue]] | ||
|{{Price|0}} | |||
|- | |- | ||
|{{Name|Wizard Stool|size=24}} | |{{Name|Wizard Stool|size=24}} | ||
|[[File:Wizard Catalogue.png|16px|link=]] [[Wizard Catalogue]] | |[[File:Wizard Catalogue.png|16px|link=]] [[Wizard Catalogue]] | ||
|{{Price|0}} | |||
|- | |- | ||
|{{Name|Junimo Chair|size=24}} | |{{Name|Junimo Chair|size=24}} | ||
|[[File:Junimo Catalogue.png|16px|link=]] [[Junimo Catalogue]] | |[[File:Junimo Catalogue.png|16px|link=]] [[Junimo Catalogue]] | ||
|{{Price|0}} | |||
|- | |- | ||
|{{Name|Junimo Stool|size=24}} | |{{Name|Junimo Stool|size=24}} | ||
|[[File:Junimo Catalogue.png|16px|link=]] [[Junimo Catalogue]] | |[[File:Junimo Catalogue.png|16px|link=]] [[Junimo Catalogue]] | ||
|{{Price|0}} | |||
|- | |- | ||
|{{Name|Retro Chair|size=24}} | |{{Name|Retro Chair|size=24}} | ||
|[[File:Retro Catalogue.png|16px|link=]] [[Retro Catalogue]] | |[[File:Retro Catalogue.png|16px|link=]] [[Retro Catalogue]] | ||
|{{Price|0}} | |||
|- | |- | ||
|{{Name|Retro Stool|size=24}} | |{{Name|Retro Stool|size=24}} | ||
|[[File:Retro Catalogue.png|16px|link=]] [[Retro Catalogue]] | |[[File:Retro Catalogue.png|16px|link=]] [[Retro Catalogue]] | ||
|{{Price|0}} | |||
|- | |- | ||
|{{Name|Plastic Lawn Chair|size=24}} | |{{Name|Plastic Lawn Chair|size=24}} | ||
|[[File:Trash Catalogue.png|16px|link=]] [[Trash Catalogue]] | |[[File:Trash Catalogue.png|16px|link=]] [[Trash Catalogue]] | ||
|{{Price|0}} | |||
|- | |- | ||
|} | |} | ||
| Line 258: | Line 274: | ||
Benches can be placed outside. | Benches can be placed outside. | ||
All benches available in the [[Furniture Catalogue]] can also be purchased from the [[Traveling Cart]] for {{ | All benches available in the [[Furniture Catalogue]] can also be purchased from the [[Traveling Cart]] for {{Tprice|furniture}}. | ||
{|class="wikitable | {|class="wikitable" | ||
!Item | !Item | ||
!Source | !Source | ||
! | !Price | ||
|- | |- | ||
|rowspan="2"|{{Name| | |rowspan="2"|{{Name|Oak Bench|size=36}} | ||
|[[File:Robin Icon.png|24px|link=]] [[Carpenter's Shop]] | |[[File:Robin Icon.png|24px|link=]] [[Carpenter's Shop]] | ||
|{{Price|750}} | |||
|- | |- | ||
|[[File:Furniture Catalogue.png|24px|link=]] [[Furniture Catalogue]] | |[[File:Furniture Catalogue.png|24px|link=]] [[Furniture Catalogue]] | ||
|{{Price|0}} | |||
|- | |- | ||
|rowspan="2"|{{Name| | |rowspan="2"|{{Name|Walnut Bench|size=36}} | ||
|[[File:Robin Icon.png|24px|link=]] [[Carpenter's Shop]] | |[[File:Robin Icon.png|24px|link=]] [[Carpenter's Shop]] | ||
|{{Price|750}} | |||
|- | |- | ||
|[[File:Furniture Catalogue.png|24px|link=]] [[Furniture Catalogue]] | |[[File:Furniture Catalogue.png|24px|link=]] [[Furniture Catalogue]] | ||
|{{Price|0}} | |||
|- | |- | ||
|rowspan="2"|{{Name| | |rowspan="2"|{{Name|Birch Bench|size=36}} | ||
|[[File:Robin Icon.png|24px|link=]] [[Carpenter's Shop]] | |[[File:Robin Icon.png|24px|link=]] [[Carpenter's Shop]] | ||
|{{Price|750}} | |||
|- | |- | ||
|[[File:Furniture Catalogue.png|24px|link=]] [[Furniture Catalogue]] | |[[File:Furniture Catalogue.png|24px|link=]] [[Furniture Catalogue]] | ||
|{{Price|0}} | |||
|- | |- | ||
|rowspan="2"|{{Name| | |rowspan="2"|{{Name|Mahogany Bench|size=36}} | ||
|[[File:Robin Icon.png|24px|link=]] [[Carpenter's Shop]] | |[[File:Robin Icon.png|24px|link=]] [[Carpenter's Shop]] | ||
|{{Price|2000}} | |||
|- | |- | ||
|[[File:Furniture Catalogue.png|24px|link=]] [[Furniture Catalogue]] | |[[File:Furniture Catalogue.png|24px|link=]] [[Furniture Catalogue]] | ||
|{{Price|0}} | |||
|- | |- | ||
|rowspan="2"|{{Name|Modern Bench|size=36}} | |rowspan="2"|{{Name|Modern Bench|size=36}} | ||
|[[File:Robin Icon.png|24px|link=]] [[Carpenter's Shop]] | |[[File:Robin Icon.png|24px|link=]] [[Carpenter's Shop]] | ||
|{{Price|2000}} | |||
|- | |- | ||
|[[File:Furniture Catalogue.png|24px|link=]] [[Furniture Catalogue]] | |[[File:Furniture Catalogue.png|24px|link=]] [[Furniture Catalogue]] | ||
|{{Price|0}} | |||
|} | |} | ||
==Couches== | ==Couches== | ||
Couches cannot be placed outside. | Couches cannot be placed outside except for the [[Moldy Couch]]. | ||
All couches available in the [[Furniture Catalogue]] can also be purchased from the [[Traveling Cart]] for {{ | All couches available in the [[Furniture Catalogue]] can also be purchased from the [[Traveling Cart]] for {{Tprice|furniture}}. | ||
{| | {| | ||
|- | |- | ||
|style="vertical-align: top;"| | |style="vertical-align: top;"| | ||
{|class="wikitable | {|class="wikitable" | ||
!Item | !Item | ||
!Source | !Source | ||
! | !Price | ||
|- | |- | ||
|rowspan="2"|{{Name| | |rowspan="2"|{{Name|Blue Couch|size=72}} | ||
|[[File:Robin Icon.png|24px|link=]] [[Carpenter's Shop]] | |[[File:Robin Icon.png|24px|link=]] [[Carpenter's Shop]] | ||
|{{Price|1750}} | |||
|- | |- | ||
|[[File:Furniture Catalogue.png|24px|link=]] [[Furniture Catalogue]] | |[[File:Furniture Catalogue.png|24px|link=]] [[Furniture Catalogue]] | ||
|{{Price|0}} | |||
|- | |- | ||
|rowspan="2"|{{Name| | |rowspan="2"|{{Name|Red Couch|size=72}} | ||
|[[File:Robin Icon.png|24px|link=]] [[Carpenter's Shop]] | |[[File:Robin Icon.png|24px|link=]] [[Carpenter's Shop]] | ||
|{{Price|1750}} | |||
|- | |- | ||
|[[File:Furniture Catalogue.png|24px|link=]] [[Furniture Catalogue]] | |[[File:Furniture Catalogue.png|24px|link=]] [[Furniture Catalogue]] | ||
|{{Price|0}} | |||
|- | |- | ||
|rowspan="2"|{{Name|Green Couch|size=72}} | |rowspan="2"|{{Name|Green Couch|size=72}} | ||
|[[File:Robin Icon.png|24px|link=]] [[Carpenter's Shop]] | |[[File:Robin Icon.png|24px|link=]] [[Carpenter's Shop]] | ||
|{{Price|1750}} | |||
|- | |- | ||
|[[File:Furniture Catalogue.png|24px|link=]] [[Furniture Catalogue]] | |[[File:Furniture Catalogue.png|24px|link=]] [[Furniture Catalogue]] | ||
|{{Price|0}} | |||
|- | |- | ||
|rowspan="2"|{{Name| | |rowspan="2"|{{Name|Yellow Couch|size=72}} | ||
|[[File:Robin Icon.png|24px|link=]] [[Carpenter's Shop]] | |[[File:Robin Icon.png|24px|link=]] [[Carpenter's Shop]] | ||
|{{Price|1750}} | |||
|- | |- | ||
|[[File:Furniture Catalogue.png|24px|link=]] [[Furniture Catalogue]] | |[[File:Furniture Catalogue.png|24px|link=]] [[Furniture Catalogue]] | ||
|{{Price|0}} | |||
|- | |- | ||
|rowspan="2"|{{Name|Brown Couch|size=72}} | |rowspan="2"|{{Name|Brown Couch|size=72}} | ||
|[[File:Robin Icon.png|24px|link=]] [[Carpenter's Shop]] | |[[File:Robin Icon.png|24px|link=]] [[Carpenter's Shop]] | ||
|{{Price|1750}} | |||
|- | |- | ||
|[[File:Furniture Catalogue.png|24px|link=]] [[Furniture Catalogue]] | |[[File:Furniture Catalogue.png|24px|link=]] [[Furniture Catalogue]] | ||
|{{Price|0}} | |||
|- | |- | ||
|rowspan="2"|{{Name|Dark Couch|size=72}} | |rowspan="2"|{{Name|Dark Couch|size=72}} | ||
|[[File:Robin Icon.png|24px|link=]] [[Carpenter's Shop]] | |[[File:Robin Icon.png|24px|link=]] [[Carpenter's Shop]] | ||
|{{Price|2500}} | |||
|- | |- | ||
|[[File:Furniture Catalogue.png|24px|link=]] [[Furniture Catalogue]] | |[[File:Furniture Catalogue.png|24px|link=]] [[Furniture Catalogue]] | ||
| | |{{Price|0}} | ||
|} | |||
|style="vertical-align: top;"| | |||
{|class="wikitable" | |||
!Item | |||
!Source | |||
!Price | |||
|- | |- | ||
|rowspan="2"|{{Name|Wizard Couch|size=72}} | |rowspan="2"|{{Name|Wizard Couch|size=72}} | ||
|[[File:Robin Icon.png|24px|link=]] [[Carpenter's Shop]] | |[[File:Robin Icon.png|24px|link=]] [[Carpenter's Shop]] | ||
|{{Price|4000}} | |||
|- | |- | ||
|[[File:Furniture Catalogue.png|24px|link=]] [[Furniture Catalogue]] | |[[File:Furniture Catalogue.png|24px|link=]] [[Furniture Catalogue]] | ||
|{{Price|0}} | |||
|- | |- | ||
|rowspan="2"|{{Name|Woodsy Couch|size=72}} | |rowspan="2"|{{Name|Woodsy Couch|size=72}} | ||
|[[File:Robin Icon.png|24px|link=]] [[Carpenter's Shop]] | |[[File:Robin Icon.png|24px|link=]] [[Carpenter's Shop]] | ||
|{{Price|3000}} | |||
|- | |- | ||
|[[File:Furniture Catalogue.png|24px|link=]] [[Furniture Catalogue]] | |[[File:Furniture Catalogue.png|24px|link=]] [[Furniture Catalogue]] | ||
|{{Price|0}} | |||
|- | |- | ||
|{{Name|Large Brown Couch|size=96}} | |rowspan="2"|{{Name|Large Brown Couch|size=96}} | ||
|[[File:Sandy Icon.png|24px|link=]] [[Oasis]] | |[[File:Sandy Icon.png|24px|link=]] [[Oasis]] | ||
|{{Price|3000}} | |||
|- | |||
| | |[[File:Furniture Catalogue.png|24px|link=]] [[Furniture Catalogue]] | ||
|{{Price|0}} | |||
|- | |- | ||
|{{Name|Joja Couch|size=72}} | |{{Name|Joja Couch|size=72}} | ||
|[[File:Joja Furniture Catalogue.png|16px|link=]] [[Joja Furniture Catalogue]] | |[[File:Joja Furniture Catalogue.png|16px|link=]] [[Joja Furniture Catalogue]] | ||
|{{Price|0}} | |||
|- | |- | ||
|{{Name|Junimo Couch|size=72}} | |{{Name|Junimo Couch|size=72}} | ||
|[[File:Junimo Catalogue.png|16px|link=]] [[Junimo Catalogue]] | |[[File:Junimo Catalogue.png|16px|link=]] [[Junimo Catalogue]] | ||
|{{Price|0}} | |||
|- | |- | ||
|{{Name|Retro Couch|size=72}} | |{{Name|Retro Couch|size=72}} | ||
|[[File:Retro Catalogue.png|16px|link=]] [[Retro Catalogue]] | |[[File:Retro Catalogue.png|16px|link=]] [[Retro Catalogue]] | ||
|{{Price|0}} | |||
|- | |- | ||
|{{Name|Moldy Couch|size=72}} | |{{Name|Moldy Couch|size=72}} | ||
|[[File:Trash Catalogue.png|16px|link=]] [[Trash Catalogue]] | |[[File:Trash Catalogue.png|16px|link=]] [[Trash Catalogue]] | ||
|{{Price|0}} | |||
|- | |||
|} | |||
|- | |- | ||
|} | |} | ||
| Line 402: | Line 421: | ||
Armchairs cannot be placed outside. | Armchairs cannot be placed outside. | ||
All armchairs available in the [[Furniture Catalogue]] can also be purchased from the [[Traveling Cart]] for {{ | All armchairs available in the [[Furniture Catalogue]] can also be purchased from the [[Traveling Cart]] for {{Tprice|furniture}}. | ||
{|class="wikitable | {|class="wikitable" | ||
!Item | !Item | ||
!Source | !Source | ||
! | !Price | ||
|- | |- | ||
|rowspan="2"|{{Name| | |rowspan="2"|{{Name|Blue Armchair|size=36}} | ||
|[[File:Robin Icon.png|24px|link=]] [[Carpenter's Shop]] | |[[File:Robin Icon.png|24px|link=]] [[Carpenter's Shop]] | ||
|{{Price|1000}} | |||
|- | |- | ||
|[[File:Furniture Catalogue.png|24px|link=]] [[Furniture Catalogue]] | |[[File:Furniture Catalogue.png|24px|link=]] [[Furniture Catalogue]] | ||
|{{Price|0}} | |||
|- | |- | ||
|rowspan="2"|{{Name| | |rowspan="2"|{{Name|Red Armchair|size=36}} | ||
|[[File:Robin Icon.png|24px|link=]] [[Carpenter's Shop]] | |[[File:Robin Icon.png|24px|link=]] [[Carpenter's Shop]] | ||
|{{Price|1000}} | |||
|- | |- | ||
|[[File:Furniture Catalogue.png|24px|link=]] [[Furniture Catalogue]] | |[[File:Furniture Catalogue.png|24px|link=]] [[Furniture Catalogue]] | ||
|{{Price|0}} | |||
|- | |- | ||
|rowspan="2"|{{Name|Green Armchair|size=36}} | |rowspan="2"|{{Name|Green Armchair|size=36}} | ||
|[[File:Robin Icon.png|24px|link=]] [[Carpenter's Shop]] | |[[File:Robin Icon.png|24px|link=]] [[Carpenter's Shop]] | ||
|{{Price|1000}} | |||
|- | |- | ||
|[[File:Furniture Catalogue.png|24px|link=]] [[Furniture Catalogue]] | |[[File:Furniture Catalogue.png|24px|link=]] [[Furniture Catalogue]] | ||
|{{Price|0}} | |||
|- | |- | ||
|rowspan="2"|{{Name| | |rowspan="2"|{{Name|Yellow Armchair|size=36}} | ||
|[[File:Robin Icon.png|24px|link=]] [[Carpenter's Shop]] | |[[File:Robin Icon.png|24px|link=]] [[Carpenter's Shop]] | ||
|{{Price|1000}} | |||
|- | |- | ||
|[[File:Furniture Catalogue.png|24px|link=]] [[Furniture Catalogue]] | |[[File:Furniture Catalogue.png|24px|link=]] [[Furniture Catalogue]] | ||
|{{Price|0}} | |||
|- | |- | ||
|rowspan="2"|{{Name|Brown Armchair|size=36}} | |rowspan="2"|{{Name|Brown Armchair|size=36}} | ||
|[[File:Robin Icon.png|24px|link=]] [[Carpenter's Shop]] | |[[File:Robin Icon.png|24px|link=]] [[Carpenter's Shop]] | ||
|{{Price|1000}} | |||
|- | |- | ||
|[[File:Furniture Catalogue.png|24px|link=]] [[Furniture Catalogue]] | |[[File:Furniture Catalogue.png|24px|link=]] [[Furniture Catalogue]] | ||
|{{Price|0}} | |||
|- | |- | ||
|} | |} | ||
| Line 452: | Line 471: | ||
While holding an item, right-click on the table to display it. For large tables you need to stand near the center of the table to display an item on it, otherwise you will pick up the table instead. | While holding an item, right-click on the table to display it. For large tables you need to stand near the center of the table to display an item on it, otherwise you will pick up the table instead. | ||
All tables available in the [[Furniture Catalogue]] can also be purchased from the [[Traveling Cart]] for {{ | All tables available in the [[Furniture Catalogue]] can also be purchased from the [[Traveling Cart]] for {{Tprice|furniture}}. | ||
{| | {| | ||
|- | |- | ||
|style="vertical-align: top;"| | |style="vertical-align: top;"| | ||
{|class="wikitable | {|class="wikitable" | ||
!Item | !Item | ||
!Source | !Source | ||
! | !Price | ||
|- | |- | ||
|rowspan="2"|{{Name| | |rowspan="2"|{{Name|Oak Table|size=48}} | ||
|[[File:Robin Icon.png|24px|link=]] [[Carpenter's Shop]] | |[[File:Robin Icon.png|24px|link=]] [[Carpenter's Shop]] | ||
|{{Price|750}} | |||
|- | |- | ||
|[[File:Furniture Catalogue.png|24px|link=]] [[Furniture Catalogue]] | |[[File:Furniture Catalogue.png|24px|link=]] [[Furniture Catalogue]] | ||
|{{Price|0}} | |||
|- | |- | ||
|rowspan="2"|{{Name| | |rowspan="2"|{{Name|Oak Tea-Table|size=48}} | ||
|[[File:Robin Icon.png|24px|link=]] [[Carpenter's Shop]] | |[[File:Robin Icon.png|24px|link=]] [[Carpenter's Shop]] | ||
|{{Price|750}} | |||
|- | |- | ||
|[[File:Furniture Catalogue.png|24px|link=]] [[Furniture Catalogue]] | |[[File:Furniture Catalogue.png|24px|link=]] [[Furniture Catalogue]] | ||
|{{Price|0}} | |||
|- | |- | ||
|rowspan="2"|{{Name| | |rowspan="2"|{{Name|Oak End Table|size=24}} | ||
|[[File:Robin Icon.png|24px|link=]] [[Carpenter's Shop]] | |[[File:Robin Icon.png|24px|link=]] [[Carpenter's Shop]] | ||
| | |{{Price|500}} | ||
|- | |- | ||
|[[File:Furniture Catalogue.png|24px|link=]] [[Furniture Catalogue]] | |[[File:Furniture Catalogue.png|24px|link=]] [[Furniture Catalogue]] | ||
|{{Price|0}} | |||
|- | |- | ||
|rowspan="2"|{{Name| | |rowspan="2"|{{Name|Walnut Table|size=48}} | ||
|[[File:Robin Icon.png|24px|link=]] [[Carpenter's Shop]] | |[[File:Robin Icon.png|24px|link=]] [[Carpenter's Shop]] | ||
|{{Price|750}} | |||
|- | |- | ||
|[[File:Furniture Catalogue.png|24px|link=]] [[Furniture Catalogue]] | |[[File:Furniture Catalogue.png|24px|link=]] [[Furniture Catalogue]] | ||
|{{Price|0}} | |||
|- | |- | ||
|rowspan="2"|{{Name| | |rowspan="2"|{{Name|Walnut Tea-Table|size=48}} | ||
|[[File:Robin Icon.png|24px|link=]] [[Carpenter's Shop]] | |[[File:Robin Icon.png|24px|link=]] [[Carpenter's Shop]] | ||
|{{Price|750}} | |||
|- | |- | ||
|[[File:Furniture Catalogue.png|24px|link=]] [[Furniture Catalogue]] | |[[File:Furniture Catalogue.png|24px|link=]] [[Furniture Catalogue]] | ||
|{{Price|0}} | |||
|- | |- | ||
|rowspan="2"|{{Name| | |rowspan="2"|{{Name|Walnut End Table|size=24}} | ||
|[[File:Robin Icon.png|24px|link=]] [[Carpenter's Shop]] | |[[File:Robin Icon.png|24px|link=]] [[Carpenter's Shop]] | ||
|{{Price|500}} | |||
|- | |- | ||
|[[File:Furniture Catalogue.png|24px|link=]] [[Furniture Catalogue]] | |[[File:Furniture Catalogue.png|24px|link=]] [[Furniture Catalogue]] | ||
|{{Price|0}} | |||
|- | |- | ||
|rowspan="2"|{{Name| | |rowspan="2"|{{Name|Birch Table|size=48}} | ||
|[[File:Robin Icon.png|24px|link=]] [[Carpenter's Shop]] | |[[File:Robin Icon.png|24px|link=]] [[Carpenter's Shop]] | ||
| | |{{Price|750}} | ||
|- | |- | ||
|[[File:Furniture Catalogue.png|24px|link=]] [[Furniture Catalogue]] | |[[File:Furniture Catalogue.png|24px|link=]] [[Furniture Catalogue]] | ||
|{{Price|0}} | |||
|- | |- | ||
|rowspan="2"|{{Name| | |rowspan="2"|{{Name|Birch Tea-Table|size=48}} | ||
|[[File:Robin Icon.png|24px|link=]] [[Carpenter's Shop]] | |||
|{{Price|750}} | |||
|- | |||
|[[File:Furniture Catalogue.png|24px|link=]] [[Furniture Catalogue]] | |||
|{{Price|0}} | |||
|- | |||
|rowspan="2"|{{Name|Birch End Table|size=24}} | |||
|[[File:Robin Icon.png|24px|link=]] [[Carpenter's Shop]] | |[[File:Robin Icon.png|24px|link=]] [[Carpenter's Shop]] | ||
|{{Price|500}} | |||
|- | |- | ||
|[[File:Furniture Catalogue.png|24px|link=]] [[Furniture Catalogue]] | |[[File:Furniture Catalogue.png|24px|link=]] [[Furniture Catalogue]] | ||
|{{Price|0}} | |||
|- | |- | ||
|rowspan="2"|{{Name|Mahogany Table|size=48}} | |rowspan="2"|{{Name|Mahogany Table|size=48}} | ||
|[[File:Robin Icon.png|24px|link=]] [[Carpenter's Shop]] | |[[File:Robin Icon.png|24px|link=]] [[Carpenter's Shop]] | ||
|{{Price|1500}} | |||
|- | |- | ||
|[[File:Furniture Catalogue.png|24px|link=]] [[Furniture Catalogue]] | |[[File:Furniture Catalogue.png|24px|link=]] [[Furniture Catalogue]] | ||
|{{Price|0}} | |||
|- | |- | ||
|rowspan="2"|{{Name|Mahogany Tea-Table|size=48}} | |rowspan="2"|{{Name|Mahogany Tea-Table|size=48}} | ||
|[[File:Robin Icon.png|24px|link=]] [[Carpenter's Shop]] | |[[File:Robin Icon.png|24px|link=]] [[Carpenter's Shop]] | ||
|{{Price|1500}} | |||
|- | |- | ||
|[[File:Furniture Catalogue.png|24px|link=]] [[Furniture Catalogue]] | |[[File:Furniture Catalogue.png|24px|link=]] [[Furniture Catalogue]] | ||
|{{Price|0}} | |||
|- | |- | ||
|rowspan="2"|{{Name|Mahogany | |rowspan="2"|{{Name|Mahogany End Table|size=24}} | ||
|[[File:Robin Icon.png|24px|link=]] [[Carpenter's Shop]] | |[[File:Robin Icon.png|24px|link=]] [[Carpenter's Shop]] | ||
| | |{{Price|1000}} | ||
|- | |- | ||
|[[File:Furniture Catalogue.png|24px|link=]] [[Furniture Catalogue]] | |[[File:Furniture Catalogue.png|24px|link=]] [[Furniture Catalogue]] | ||
|{{Price|0}} | |||
|- | |- | ||
|rowspan="2"|{{Name| | |rowspan="2"|{{Name|Modern Table|size=48}} | ||
|[[File:Robin Icon.png|24px|link=]] [[Carpenter's Shop]] | |[[File:Robin Icon.png|24px|link=]] [[Carpenter's Shop]] | ||
|{{Price|1250}} | |||
|- | |- | ||
|[[File:Furniture Catalogue.png|24px|link=]] [[Furniture Catalogue]] | |[[File:Furniture Catalogue.png|24px|link=]] [[Furniture Catalogue]] | ||
|{{Price|0}} | |||
|- | |- | ||
|rowspan="2"|{{Name| | |rowspan="2"|{{Name|Modern Tea-Table|size=48}} | ||
|[[File:Robin Icon.png|24px|link=]] [[Carpenter's Shop]] | |[[File:Robin Icon.png|24px|link=]] [[Carpenter's Shop]] | ||
|{{Price|1000}} | |||
|- | |- | ||
|[[File:Furniture Catalogue.png|24px|link=]] [[Furniture Catalogue]] | |[[File:Furniture Catalogue.png|24px|link=]] [[Furniture Catalogue]] | ||
|{{Price|0}} | |||
|- | |- | ||
|rowspan="2"|{{Name| | |rowspan="2"|{{Name|Modern End Table|size=24}} | ||
|[[File:Robin Icon.png|24px|link=]] [[Carpenter's Shop]] | |[[File:Robin Icon.png|24px|link=]] [[Carpenter's Shop]] | ||
|{{Price|800}} | |||
|- | |- | ||
|[[File:Furniture Catalogue.png|24px|link=]] [[Furniture Catalogue]] | |[[File:Furniture Catalogue.png|24px|link=]] [[Furniture Catalogue]] | ||
|{{Price|0}} | |||
|- | |- | ||
|rowspan="2"|{{Name| | |rowspan="2"|{{Name|Winter Table|size=48}} | ||
|[[File:Robin Icon.png|24px|link=]] [[Carpenter's Shop]] | |[[File:Robin Icon.png|24px|link=]] [[Carpenter's Shop]] | ||
| | |{{Price|1250}} | ||
|- | |- | ||
|[[File:Furniture Catalogue.png|24px|link=]] [[Furniture Catalogue]] | |[[File:Furniture Catalogue.png|24px|link=]] [[Furniture Catalogue]] | ||
|{{Price|0}} | |||
|- | |- | ||
|rowspan="2"|{{Name| | |rowspan="2"|{{Name|Winter End Table|size=24}} | ||
|[[File:Robin Icon.png|24px|link=]] [[Carpenter's Shop]] | |[[File:Robin Icon.png|24px|link=]] [[Carpenter's Shop]] | ||
|{{Price|800}} | |||
|- | |- | ||
|[[File:Furniture Catalogue.png|24px|link=]] [[Furniture Catalogue]] | |[[File:Furniture Catalogue.png|24px|link=]] [[Furniture Catalogue]] | ||
|{{Price|0}} | |||
|- | |- | ||
|rowspan="2"|{{Name| | |rowspan="2"|{{Name|Sun Table|size=48}} | ||
|[[File:Robin Icon.png|24px|link=]] [[Carpenter's Shop]] | |[[File:Robin Icon.png|24px|link=]] [[Carpenter's Shop]] | ||
|{{Price|2500}} | |||
|- | |- | ||
|[[File:Furniture Catalogue.png|24px|link=]] [[Furniture Catalogue]] | |[[File:Furniture Catalogue.png|24px|link=]] [[Furniture Catalogue]] | ||
|{{Price|0}} | |||
|- | |- | ||
|rowspan="2"|{{Name| | |rowspan="2"|{{Name|Moon Table|size=48}} | ||
|[[File:Robin Icon.png|24px|link=]] [[Carpenter's Shop]] | |[[File:Robin Icon.png|24px|link=]] [[Carpenter's Shop]] | ||
|{{Price|2500}} | |||
|- | |- | ||
|[[File:Furniture Catalogue.png|24px|link=]] [[Furniture Catalogue]] | |[[File:Furniture Catalogue.png|24px|link=]] [[Furniture Catalogue]] | ||
|{{Price|0}} | |||
|- | |- | ||
|rowspan="2"|{{Name| | |rowspan="2"|{{Name|Puzzle Table|size=48}} | ||
|[[File:Robin Icon.png|24px|link=]] [[Carpenter's Shop]] | |[[File:Robin Icon.png|24px|link=]] [[Carpenter's Shop]] | ||
|{{Price|1500}} | |||
|- | |- | ||
|[[File:Furniture Catalogue.png|24px|link=]] [[Furniture Catalogue]] | |[[File:Furniture Catalogue.png|24px|link=]] [[Furniture Catalogue]] | ||
|{{Price|0}} | |||
|- | |- | ||
|rowspan="2"|{{Name| | |rowspan="2"|{{Name|Candy Table|size=48}} | ||
|[[File:Robin Icon.png|24px|link=]] [[Carpenter's Shop]] | |[[File:Robin Icon.png|24px|link=]] [[Carpenter's Shop]] | ||
|{{Price|1000}} | |||
|- | |- | ||
|[[File:Furniture Catalogue.png|24px|link=]] [[Furniture Catalogue]] | |[[File:Furniture Catalogue.png|24px|link=]] [[Furniture Catalogue]] | ||
|{{Price|0}} | |||
|- | |- | ||
|rowspan="2"|{{Name| | |rowspan="2"|{{Name|Luau Table|size=48}} | ||
|[[File:Robin Icon.png|24px|link=]] [[Carpenter's Shop]] | |[[File:Robin Icon.png|24px|link=]] [[Carpenter's Shop]] | ||
|{{Price|1000}} | |||
|- | |- | ||
|[[File:Furniture Catalogue.png|24px|link=]] [[Furniture Catalogue]] | |[[File:Furniture Catalogue.png|24px|link=]] [[Furniture Catalogue]] | ||
|{{Price|0}} | |||
|- | |- | ||
|rowspan="2"|{{Name| | |rowspan="2"|{{Name|Dark Table|size=48}} | ||
|[[File:Robin Icon.png|24px|link=]] [[Carpenter's Shop]] | |[[File:Robin Icon.png|24px|link=]] [[Carpenter's Shop]] | ||
|{{Price|2000}} | |||
|- | |- | ||
|[[File:Furniture Catalogue.png|24px|link=]] [[Furniture Catalogue]] | |[[File:Furniture Catalogue.png|24px|link=]] [[Furniture Catalogue]] | ||
| | |{{Price|0}} | ||
|} | |||
|style="vertical-align: top;"| | |||
{|class="wikitable" | |||
!Item | |||
!Source | |||
!Price | |||
|- | |- | ||
|rowspan="2"|{{Name| | |rowspan="2"|{{Name|Diviner Table|size=48}} | ||
|[[File:Robin Icon.png|24px|link=]] [[Carpenter's Shop]] | |[[File:Robin Icon.png|24px|link=]] [[Carpenter's Shop]] | ||
|{{Price|2250}} | |||
|- | |- | ||
|[[File:Furniture Catalogue.png|24px|link=]] [[Furniture Catalogue]] | |[[File:Furniture Catalogue.png|24px|link=]] [[Furniture Catalogue]] | ||
|{{Price|0}} | |||
|- | |- | ||
|rowspan="2"|{{Name| | |rowspan="2"|{{Name|Grandmother End Table|size=24}} | ||
|[[File:Robin Icon.png|24px|link=]] [[Carpenter's Shop]] | |[[File:Robin Icon.png|24px|link=]] [[Carpenter's Shop]] | ||
|{{Price|1000}} | |||
|- | |- | ||
|[[File:Furniture Catalogue.png|24px|link=]] [[Furniture Catalogue]] | |[[File:Furniture Catalogue.png|24px|link=]] [[Furniture Catalogue]] | ||
|{{Price|0}} | |||
|- | |- | ||
|rowspan="2"|{{Name| | |rowspan="2"|{{Name|Pub Table|size=48}} | ||
|[[File:Robin Icon.png|24px|link=]] [[Carpenter's Shop]] | |[[File:Robin Icon.png|24px|link=]] [[Carpenter's Shop]] | ||
|{{Price|800}} | |||
|- | |- | ||
|[[File:Furniture Catalogue.png|24px|link=]] [[Furniture Catalogue]] | |[[File:Furniture Catalogue.png|24px|link=]] [[Furniture Catalogue]] | ||
|{{Price|0}} | |||
|- | |- | ||
|rowspan="2"|{{Name| | |rowspan="2"|{{Name|Luxury Table|size=48}} | ||
|[[File:Robin Icon.png|24px|link=]] [[Carpenter's Shop]] | |[[File:Robin Icon.png|24px|link=]] [[Carpenter's Shop]] | ||
|{{Price|2000}} | |||
|- | |- | ||
|[[File:Furniture Catalogue.png|24px|link=]] [[Furniture Catalogue]] | |[[File:Furniture Catalogue.png|24px|link=]] [[Furniture Catalogue]] | ||
|{{Price|0}} | |||
|- | |- | ||
|rowspan="2"|{{Name| | |rowspan="2"|{{Name|Neolithic Table|size=48}} | ||
|[[File:Robin Icon.png|24px|link=]] [[Carpenter's Shop]] | |[[File:Robin Icon.png|24px|link=]] [[Carpenter's Shop]] | ||
|{{Price|1800}} | |||
|- | |- | ||
|[[File:Furniture Catalogue.png|24px|link=]] [[Furniture Catalogue]] | |[[File:Furniture Catalogue.png|24px|link=]] [[Furniture Catalogue]] | ||
|{{Price|0}} | |||
|- | |- | ||
|rowspan="2"|{{Name| | |rowspan="2"|{{Name|Coffee Table|size=48}} | ||
|[[File:Robin Icon.png|24px|link=]] [[Carpenter's Shop]] | |[[File:Robin Icon.png|24px|link=]] [[Carpenter's Shop]] | ||
|{{Price|1250}} | |||
|- | |- | ||
|[[File:Furniture Catalogue.png|24px|link=]] [[Furniture Catalogue]] | |[[File:Furniture Catalogue.png|24px|link=]] [[Furniture Catalogue]] | ||
|{{Price|0}} | |||
|- | |- | ||
|rowspan="2"|{{Name| | |rowspan="2"|{{Name|Stone Slab|size=48}} | ||
|[[File:Robin Icon.png|24px|link=]] [[Carpenter's Shop]] | |[[File:Robin Icon.png|24px|link=]] [[Carpenter's Shop]] | ||
|{{Price|1000}} | |||
|- | |- | ||
|[[File:Furniture Catalogue.png|24px|link=]] [[Furniture Catalogue]] | |[[File:Furniture Catalogue.png|24px|link=]] [[Furniture Catalogue]] | ||
|{{Price|0}} | |||
|- | |- | ||
|{{Name|Wine Table|size=48}} | |||
|[[File: | |[[File:Furniture Catalogue.png|24px|link=]] [[Furniture Catalogue]] | ||
|{{Price|0}} | |||
|- | |- | ||
|{{Name|Spirits Table|size=48}} | |||
|[[File:Furniture Catalogue.png|24px|link=]] [[Furniture Catalogue]] | |[[File:Furniture Catalogue.png|24px|link=]] [[Furniture Catalogue]] | ||
|{{Price|0}} | |||
|- | |- | ||
|{{Name|Desert Table|size=48}} | |||
|[[ | |[[Desert Festival]] | ||
|{{Price|25|Calico}} | |||
|- | |- | ||
| | |{{Name|Desert End Table|size=24}} | ||
|[[Desert Festival]] | |||
|{{Price|20|Calico}} | |||
|- | |- | ||
|{{Name|Joja Table|size=48}} | |||
|[[File: | |[[File:Joja Furniture Catalogue.png|16px|link=]] [[Joja Furniture Catalogue]] | ||
|{{Price|0}} | |||
|- | |- | ||
|[[File:Furniture Catalogue.png| | |{{Name|Joja Cola Tea Table|size=48}} | ||
|[[File:Joja Furniture Catalogue.png|16px|link=]] [[Joja Furniture Catalogue]] | |||
|{{Price|0}} | |||
|- | |- | ||
|{{Name|Joja Coffee Table|size=48}} | |||
|[[File: | |[[File:Joja Furniture Catalogue.png|16px|link=]] [[Joja Furniture Catalogue]] | ||
| | |{{Price|0}} | ||
|- | |- | ||
|[[File:Furniture Catalogue.png| | |{{Name|Gray Joja Coffee Table|size=48}} | ||
|[[File:Joja Furniture Catalogue.png|16px|link=]] [[Joja Furniture Catalogue]] | |||
|{{Price|0}} | |||
|- | |- | ||
|{{Name|Joja End Table|size=24}} | |||
|[[File: | |[[File:Joja Furniture Catalogue.png|16px|link=]] [[Joja Furniture Catalogue]] | ||
| | |{{Price|0}} | ||
|- | |- | ||
|[[File:Furniture Catalogue.png| | |{{Name|Gray Joja End Table|size=24}} | ||
|[[File:Joja Furniture Catalogue.png|16px|link=]] [[Joja Furniture Catalogue]] | |||
|{{Price|0}} | |||
|- | |- | ||
|{{Name|Wizard Table|size=48}} | |||
|[[File: | |[[File:Wizard Catalogue.png|16px|link=]] [[Wizard Catalogue]] | ||
|{{Price|0}} | |||
|- | |- | ||
|[[File: | |{{Name|Wizard Tea Table|size=48}} | ||
|[[File:Wizard Catalogue.png|16px|link=]] [[Wizard Catalogue]] | |||
|{{Price|0}} | |||
|- | |- | ||
|{{Name|Wizard End Table|size=24}} | |||
|[[File: | |[[File:Wizard Catalogue.png|16px|link=]] [[Wizard Catalogue]] | ||
|{{Price|0}} | |||
|- | |- | ||
|[[File: | |{{Name|Elixir Table|size=48}} | ||
|[[File:Wizard Catalogue.png|16px|link=]] [[Wizard Catalogue]] | |||
|{{Price|0}} | |||
|- | |- | ||
|{{Name|Long Elixir Table|size=48}} | |||
|[[File:Wizard Catalogue.png|16px|link=]] [[Wizard Catalogue]] | |||
|{{Price|0}} | |||
|- | |- | ||
|[[ | |{{Name|Junimo Table|size=48}} | ||
|[[File:Junimo Catalogue.png|16px|link=]] [[Junimo Catalogue]] | |||
|{{Price|0}} | |||
|- | |- | ||
|{{Name|Junimo Tea Table|size=48}} | |||
|[[File:Junimo Catalogue.png|16px|link=]] [[Junimo Catalogue]] | |||
|{{Price|0}} | |||
|- | |- | ||
|[[ | |{{Name|Junimo End Table|size=24}} | ||
|[[File:Junimo Catalogue.png|16px|link=]] [[Junimo Catalogue]] | |||
|{{Price|0}} | |||
|- | |- | ||
|{{Name|Retro Table|size=48}} | |||
|[[File:Retro Catalogue.png|16px|link=]] [[Retro Catalogue]] | |||
|{{Price|0}} | |||
|- | |- | ||
|[[File: | |{{Name|Retro Tea Table|size=48}} | ||
|[[File:Retro Catalogue.png|16px|link=]] [[Retro Catalogue]] | |||
|{{Price|0}} | |||
|- | |- | ||
|{{Name|Retro End Table|size=24}} | |||
|[[File:Retro Catalogue.png|16px|link=]] [[Retro Catalogue]] | |||
|{{Price|0}} | |||
|- | |- | ||
|[[File: | |{{Name|Plastic Lawn End Table|size=24}} | ||
|[[File:Trash Catalogue.png|16px|link=]] [[Trash Catalogue]] | |||
|{{Price|0}} | |||
|- | |- | ||
| | |} | ||
|- | |- | ||
|[[ | |} | ||
==Long Tables== | |||
| | |||
Long tables can be placed outside. They can also be used to display items. | |||
While holding an item, right-click on the long table to display it. For long tables you need to stand near the center of the table to display an item on it, otherwise you will pick up the table instead. | |||
All long tables available in the [[Furniture Catalogue]] can also be purchased from the [[Traveling Cart]] for {{Tprice|furniture}}. | |||
{|class="wikitable" | |||
!Item | |||
!Source | |||
!Price | |||
|- | |- | ||
|rowspan="2"|{{Name| | |rowspan="2"|{{Name|Winter Dining Table|size=64}} | ||
|[[File:Robin Icon.png|24px|link=]] [[Carpenter's Shop]] | |||
|{{Price|3500}} | |||
|- | |- | ||
|[[File: | |[[File:Furniture Catalogue.png|24px|link=]] [[Furniture Catalogue]] | ||
|{{Price|0}} | |||
|- | |- | ||
|rowspan="2"|{{Name| | |rowspan="2"|{{Name|Festive Dining Table|size=64}} | ||
|[[File:Robin Icon.png|24px|link=]] [[Carpenter's Shop]] | |||
|{{Price|3500}} | |||
|- | |- | ||
|[[File: | |[[File:Furniture Catalogue.png|24px|link=]] [[Furniture Catalogue]] | ||
|{{Price|0}} | |||
|- | |- | ||
|rowspan="2"|{{Name| | |rowspan="2"|{{Name|Mahogany Dining Table|size=64}} | ||
|[[File:Robin Icon.png|24px|link=]] [[Carpenter's Shop]] | |||
|{{Price|3000}} | |||
|- | |- | ||
|[[File: | |[[File:Furniture Catalogue.png|24px|link=]] [[Furniture Catalogue]] | ||
|{{Price|0}} | |||
|- | |- | ||
|rowspan="2"|{{Name| | |rowspan="2"|{{Name|Modern Dining Table|size=64}} | ||
|[[File:Robin Icon.png|24px|link=]] [[Carpenter's Shop]] | |||
|{{Price|2700}} | |||
|- | |- | ||
|[[File: | |[[File:Furniture Catalogue.png|24px|link=]] [[Furniture Catalogue]] | ||
|{{Price|0}} | |||
|- | |- | ||
|{{Name|Bountiful Dining Table|size=64}} | |||
|[[File:Furniture Catalogue.png|24px|link=]] [[Furniture Catalogue]] | |||
|{{Price|0}} | |||
|- | |- | ||
|[[ | |} | ||
==Bookcases== | |||
Bookcases cannot be placed outside. | |||
All bookcases available in the [[Furniture Catalogue]] can also be purchased from the [[Traveling Cart]] for {{Tprice|furniture}}. | |||
{| | |||
|- | |- | ||
| | |style="vertical-align: top;"| | ||
| | {|class="wikitable" | ||
!Item | |||
!Source | |||
!Price | |||
|- | |- | ||
|rowspan="2"|{{Name| | |rowspan="2"|{{Name|Artist Bookcase|size=48}} | ||
|[[File:Robin Icon.png|24px|link=]] [[Carpenter's Shop]] | |||
|{{Price|1200}} | |||
|- | |- | ||
|[[File: | |[[File:Furniture Catalogue.png|24px|link=]] [[Furniture Catalogue]] | ||
|{{Price|0}} | |||
|- | |- | ||
|rowspan="2"|{{Name| | |rowspan="2"|{{Name|Luxury Bookcase|size=48}} | ||
|[[File:Robin Icon.png|24px|link=]] [[Carpenter's Shop]] | |||
|{{Price|2000}} | |||
|- | |- | ||
|[[File: | |[[File:Furniture Catalogue.png|24px|link=]] [[Furniture Catalogue]] | ||
|{{Price|0}} | |||
|- | |- | ||
|rowspan="2"|{{Name| | |rowspan="2"|{{Name|Modern Bookcase|size=48}} | ||
|[[File:Robin Icon.png|24px|link=]] [[Carpenter's Shop]] | |||
|{{Price|1600}} | |||
|- | |- | ||
|[[File: | |[[File:Furniture Catalogue.png|24px|link=]] [[Furniture Catalogue]] | ||
|{{Price|0}} | |||
|- | |- | ||
|rowspan="2"|{{Name| | |rowspan="2"|{{Name|Dark Bookcase|size=48}} | ||
|[[File:Robin Icon.png|24px|link=]] [[Carpenter's Shop]] | |||
|{{Price|2000}} | |||
|- | |- | ||
|[[File: | |[[File:Furniture Catalogue.png|24px|link=]] [[Furniture Catalogue]] | ||
|{{Price|0}} | |||
|- | |- | ||
|{{Name|Short Bookcase|size=48}} | |||
| | |[[Desert Festival]] | ||
|{{Price|20|Calico}} | |||
|- | |- | ||
|{{Name|Joja Bookcase|size=48}} | |||
|[[File:Joja Furniture Catalogue.png|16px|link=]] [[Joja Furniture Catalogue]] | |||
|{{Price|0}} | |||
|- | |- | ||
|[[File: | |{{Name|Gray Joja Bookcase|size=48}} | ||
|[[File:Joja Furniture Catalogue.png|16px|link=]] [[Joja Furniture Catalogue]] | |||
|{{Price|0}} | |||
|} | |||
|style="vertical-align: top;"| | |||
{|class="wikitable" | |||
!Item | |||
!Source | |||
!Price | |||
|- | |- | ||
|{{Name|Large Wizard Bookcase|size=72}} | |||
|[[File:Wizard Catalogue.png|16px|link=]] [[Wizard Catalogue]] | |||
|{{Price|0}} | |||
|- | |- | ||
|[[File: | |{{Name|Wizard Bookcase|size=48}} | ||
|[[File:Wizard Catalogue.png|16px|link=]] [[Wizard Catalogue]] | |||
|{{Price|0}} | |||
|- | |- | ||
|{{Name|Short Wizard Bookcase|size=48}} | |||
|[[File:Wizard Catalogue.png|16px|link=]] [[Wizard Catalogue]] | |||
|{{Price|0}} | |||
|- | |- | ||
|[[File: | |{{Name|Small Wizard Bookcase|size=24}} | ||
|[[File:Wizard Catalogue.png|16px|link=]] [[Wizard Catalogue]] | |||
|{{Price|0}} | |||
|- | |- | ||
|} | |{{Name|Junimo Bookcase|size=48}} | ||
|[[File:Junimo Catalogue.png|16px|link=]] [[Junimo Catalogue]] | |||
== | |{{Price|0}} | ||
|- | |||
|{{Name|Retro Bookcase|size=48}} | |||
|[[File:Retro Catalogue.png|16px|link=]] [[Retro Catalogue]] | |||
|{{Price|0}} | |||
|- | |||
|} | |||
|- | |||
|} | |||
==Dressers== | |||
Dressers cannot be placed outside. | |||
Dressers can be used to store [[clothing]], [[hats]], [[footwear|shoes]], and [[rings]]. They cannot be deleted from the inventory with a [[Trash Cans|trash can]] as long as they contain items. | |||
All | All dressers available in the [[Furniture Catalogue]] can be also purchased from the [[Traveling Cart]] for {{Tprice|furniture}}. | ||
{| | |||
{|class="wikitable | |- | ||
|style="vertical-align: top;"| | |||
{|class="wikitable" | |||
!Item | !Item | ||
!Source | !Source | ||
! | !Price | ||
|- | |- | ||
|rowspan="2"|{{Name| | |rowspan="2"|{{Name|Oak Dresser|size=48}} | ||
|[[File:Robin Icon.png|24px|link=]] [[Carpenter's Shop]] | |[[File:Robin Icon.png|24px|link=]] [[Carpenter's Shop]] | ||
|{{Price|5000}} | |||
|- | |- | ||
|[[File:Furniture Catalogue.png|24px|link=]] [[Furniture Catalogue]] | |[[File:Furniture Catalogue.png|24px|link=]] [[Furniture Catalogue]] | ||
|{{Price|0}} | |||
|- | |- | ||
|rowspan="2"|{{Name| | |rowspan="2"|{{Name|Walnut Dresser|size=48}} | ||
|[[File:Robin Icon.png|24px|link=]] [[Carpenter's Shop]] | |[[File:Robin Icon.png|24px|link=]] [[Carpenter's Shop]] | ||
|{{Price|5000}} | |||
|- | |- | ||
|[[File:Furniture Catalogue.png|24px|link=]] [[Furniture Catalogue]] | |[[File:Furniture Catalogue.png|24px|link=]] [[Furniture Catalogue]] | ||
|{{Price|0}} | |||
|- | |- | ||
|rowspan="2"|{{Name| | |rowspan="2"|{{Name|Birch Dresser|size=48}} | ||
|[[File:Robin Icon.png|24px|link=]] [[Carpenter's Shop]] | |[[File:Robin Icon.png|24px|link=]] [[Carpenter's Shop]] | ||
|{{Price|5000}} | |||
|- | |- | ||
|[[File:Furniture Catalogue.png|24px|link=]] [[Furniture Catalogue]] | |[[File:Furniture Catalogue.png|24px|link=]] [[Furniture Catalogue]] | ||
|{{Price|0}} | |||
|- | |- | ||
|rowspan="2"|{{Name| | |rowspan="2"|{{Name|Mahogany Dresser|size=48}} | ||
|[[File:Robin Icon.png|24px|link=]] [[Carpenter's Shop]] | |[[File:Robin Icon.png|24px|link=]] [[Carpenter's Shop]] | ||
|{{Price|7500}} | |||
|- | |- | ||
|[[File:Furniture Catalogue.png|24px|link=]] [[Furniture Catalogue]] | |[[File:Furniture Catalogue.png|24px|link=]] [[Furniture Catalogue]] | ||
| | |{{Price|0}} | ||
|} | |||
|style="vertical-align: top;"| | |||
{|class="wikitable" | |||
!Item | |||
!Source | |||
!Price | |||
|- | |||
|{{Name|Joja Dresser|size=48}} | |||
|[[File:Joja Furniture Catalogue.png|16px|link=]] [[Joja Furniture Catalogue]] | |||
|{{Price|0}} | |||
|- | |||
|{{Name|Gray Joja Dresser|size=48}} | |||
|[[File:Joja Furniture Catalogue.png|16px|link=]] [[Joja Furniture Catalogue]] | |||
|{{Price|0}} | |||
|- | |- | ||
| | |{{Name|Wizard Dresser|size=48}} | ||
|[[File: | |[[File:Wizard Catalogue.png|16px|link=]] [[Wizard Catalogue]] | ||
| | |{{Price|0}} | ||
|- | |||
|{{Name|Junimo Dresser|size=48}} | |||
|[[File:Junimo Catalogue.png|16px|link=]] [[Junimo Catalogue]] | |||
|{{Price|0}} | |||
|- | |- | ||
|[[File: | |{{Name|Retro Dresser|size=48}} | ||
|[[File:Retro Catalogue.png|16px|link=]] [[Retro Catalogue]] | |||
|{{Price|0}} | |||
|- | |||
|} | |||
|- | |- | ||
|} | |} | ||
== | ==Fireplaces== | ||
Fireplaces cannot be placed outside. | |||
Once placed, right-clicking on fireplaces will turn the fire on or off. | |||
All | All fireplaces available in the [[Furniture Catalogue]] cannot be purchased from the [[Traveling Cart]]. | ||
{| | {| | ||
|- | |- | ||
|style="vertical-align: top;"| | |style="vertical-align: top;"| | ||
{|class="wikitable | {|class="wikitable" | ||
!Item | !Item | ||
!Source | !Source | ||
! | !Price | ||
|- | |- | ||
|rowspan="2"|{{Name| | |rowspan="2"|{{Name|Brick Fireplace|size=48}} | ||
|[[File:Robin Icon.png|24px|link=]] [[Carpenter's Shop]] | |[[File:Robin Icon.png|24px|link=]] [[Carpenter's Shop]] | ||
|{{Price|1000}} | |||
|- | |- | ||
|[[File:Furniture Catalogue.png|24px|link=]] [[Furniture Catalogue]] | |[[File:Furniture Catalogue.png|24px|link=]] [[Furniture Catalogue]] | ||
|{{Price|0}} | |||
|- | |- | ||
|rowspan="2"|{{Name| | |rowspan="2"|{{Name|Stone Fireplace|size=48}} | ||
|[[File:Robin Icon.png|24px|link=]] [[Carpenter's Shop]] | |[[File:Robin Icon.png|24px|link=]] [[Carpenter's Shop]] | ||
|{{Price|1500}} | |||
|- | |- | ||
|[[File:Furniture Catalogue.png|24px|link=]] [[Furniture Catalogue]] | |[[File:Furniture Catalogue.png|24px|link=]] [[Furniture Catalogue]] | ||
|{{Price|0}} | |||
|- | |- | ||
|rowspan="2"|{{Name| | |{{Name|Iridium Fireplace|size=48}} | ||
|[[Night Market]] | |||
|{{Price|15000}} | |||
|- | |||
|rowspan="2"|{{Name|Stove Fireplace|size=48}} | |||
|[[File:Robin Icon.png|24px|link=]] [[Carpenter's Shop]] | |[[File:Robin Icon.png|24px|link=]] [[Carpenter's Shop]] | ||
|{{Price|3000}} | |||
|- | |- | ||
|[[File: | |[[File:Penny Icon.png|24px|link=]] [[Penny#Fourteen Hearts|Penny's 14-Heart event]] | ||
| | |N/A | ||
|- | |||
|{{Name|Monster Fireplace|size=48}} | |||
|[[File:Krobus Icon.png|24px|link=]] [[Krobus#Krobus Shop|Krobus' Shop]] | |||
|{{Price|20000}} | |||
|- | |- | ||
|rowspan="2"|{{Name| | |rowspan="2"|{{Name|Elegant Fireplace|size=48}} | ||
|[[File: | |[[File:Penny Icon.png|24px|link=]] [[Penny#Fourteen Hearts|Penny's 14-Heart event]] | ||
| | |N/A | ||
|- | |- | ||
|[[File:Furniture Catalogue.png|24px|link=]] [[Furniture Catalogue]] | |[[File:Furniture Catalogue.png|24px|link=]] [[Furniture Catalogue]] | ||
|{{Price|0}} | |||
|} | |} | ||
|style="vertical-align: top;"| | |style="vertical-align: top;"| | ||
{|class="wikitable | {|class="wikitable" | ||
!Item | !Item | ||
!Source | !Source | ||
! | !Price | ||
|- | |- | ||
|{{Name| | |{{Name|Desert Fireplace|size=48}} | ||
|[[Desert Festival]] | |[[Desert Festival]] | ||
|{{Price|20|Calico}} | |{{Price|20|Calico}} | ||
|- | |- | ||
|{{Name|Joja | |{{Name|Joja Fireplace|size=48}} | ||
|[[File:Joja Furniture Catalogue.png|16px|link=]] [[Joja Furniture Catalogue]] | |[[File:Joja Furniture Catalogue.png|16px|link=]] [[Joja Furniture Catalogue]] | ||
| | ||{{Price|0}} | ||
|- | |- | ||
|{{Name| | |{{Name|Wizard Fireplace|size=48}} | ||
|[[File:Wizard Catalogue.png|16px|link=]] [[Wizard Catalogue]] | |[[File:Wizard Catalogue.png|16px|link=]] [[Wizard Catalogue]] | ||
|{{Price|0}} | |||
|- | |- | ||
|{{Name|Junimo Fireplace|size=48}} | |||
|{{Name|Junimo | |||
|[[File:Junimo Catalogue.png|16px|link=]] [[Junimo Catalogue]] | |[[File:Junimo Catalogue.png|16px|link=]] [[Junimo Catalogue]] | ||
|{{Price|0}} | |||
|- | |- | ||
|{{Name|Retro | |{{Name|Retro Fireplace|size=48}} | ||
|[[File:Retro Catalogue.png|16px|link=]] [[Retro Catalogue]] | |[[File:Retro Catalogue.png|16px|link=]] [[Retro Catalogue]] | ||
|{{Price|0}} | |||
|- | |||
|} | |} | ||
|- | |- | ||
|} | |} | ||
== | ==Rugs== | ||
Rugs cannot be placed outside. | |||
All | All rugs available in the [[Furniture Catalogue]] cannot be purchased from the [[Traveling Cart]]. | ||
{| | {| | ||
|- | |- | ||
|style="vertical-align: top;"| | |style="vertical-align: top;"| | ||
{|class="wikitable | {|class="wikitable" | ||
!Item | !Item | ||
!Source | !Source | ||
! | !Price | ||
!Size | |||
|- | |- | ||
|rowspan="2"|{{Name| | |rowspan="2"|{{Name|Bamboo Mat|size=64}} | ||
|[[File:Robin Icon.png|24px|link=]] [[Carpenter's Shop]] | |[[File:Robin Icon.png|24px|link=]] [[Carpenter's Shop]] | ||
|{{Price|250}} | |||
|rowspan="2"|2 x 1 | |||
|- | |- | ||
|[[File:Furniture Catalogue.png|24px|link=]] [[Furniture Catalogue]] | |[[File:Furniture Catalogue.png|24px|link=]] [[Furniture Catalogue]] | ||
|{{Price|0}} | |||
|- | |- | ||
|rowspan="2"|{{Name| | |rowspan="2"|{{Name|Burlap Rug|size=64}} | ||
|[[File:Robin Icon.png|24px|link=]] [[Carpenter's Shop]] | |[[File:Robin Icon.png|24px|link=]] [[Carpenter's Shop]] | ||
|{{Price|350}} | |||
|rowspan="2"|2 x 2 | |||
|- | |- | ||
|[[File:Furniture Catalogue.png|24px|link=]] [[Furniture Catalogue]] | |[[File:Furniture Catalogue.png|24px|link=]] [[Furniture Catalogue]] | ||
|{{Price|0}} | |||
|- | |- | ||
|rowspan="2"|{{Name| | |rowspan="2"|{{Name|Woodcut Rug|size=64}} | ||
|[[File:Robin Icon.png|24px|link=]] [[Carpenter's Shop]] | |[[File:Robin Icon.png|24px|link=]] [[Carpenter's Shop]] | ||
|{{Price|800}} | |||
|rowspan="2"|2 x 2 | |||
|- | |- | ||
|[[File:Furniture Catalogue.png|24px|link=]] [[Furniture Catalogue]] | |[[File:Furniture Catalogue.png|24px|link=]] [[Furniture Catalogue]] | ||
|{{Price|0}} | |||
|- | |- | ||
|{{Name|Monster Rug|size=64}} | |||
|[[File: | |[[File:Furniture Catalogue.png|24px|link=]] [[Furniture Catalogue]] | ||
|{{Price|0}} | |||
|2 x 2 | |||
|- | |- | ||
| | |rowspan="3"|{{Name|Oceanic Rug|size=64}} | ||
|{{NPC|Island Trader|size=24}} | |||
|{{Name|Blue Discus|3}} | |||
| | |rowspan="3"|3 x 2 | ||
|- | |- | ||
|[[File:Robin Icon.png|24px|link=]] [[Carpenter's Shop]] | |||
|[[File: | |{{Price|800|}} | ||
|- | |- | ||
|[[File:Furniture Catalogue.png|24px|link=]] [[Furniture Catalogue]] | |||
|[[File: | |{{Price|0}} | ||
|- | |- | ||
|{{Name| | |rowspan="2"|{{Name|Red Rug|size=64}} | ||
|[[File: | |[[File:Robin Icon.png|24px|link=]] [[Carpenter's Shop]] | ||
|{{Price|1000}} | |||
|rowspan="2"|3 x 2 | |||
|- | |- | ||
|[[File:Furniture Catalogue.png|24px|link=]] [[Furniture Catalogue]] | |||
|[[File: | |{{Price|0}} | ||
|- | |- | ||
|{{Name| | |rowspan="2"|{{Name|Patchwork Rug|size=64}} | ||
|[[File: | |[[File:Robin Icon.png|24px|link=]] [[Carpenter's Shop]] | ||
|{{Price|800|}} | |||
|rowspan="2"|3 x 2 | |||
|- | |- | ||
| | |[[File:Furniture Catalogue.png|24px|link=]] [[Furniture Catalogue]] | ||
|{{Price|0}} | |||
{| | |||
|- | |- | ||
| | |rowspan="2"|{{Name|Dark Rug|size=64}} | ||
{| | |[[File:Robin Icon.png|24px|link=]] [[Carpenter's Shop]] | ||
|{{Price|2000}} | |||
|rowspan="2"|3 x 2 | |||
|- | |- | ||
|[[File:Furniture Catalogue.png|24px|link=]] [[Furniture Catalogue]] | |||
|[[File: | |{{Price|0}} | ||
|{{ | |||
|- | |- | ||
|{{Name|Red Cottage Rug|size=64}} | |||
|[[File:Furniture Catalogue.png|24px|link=]] [[Furniture Catalogue]] | |[[File:Furniture Catalogue.png|24px|link=]] [[Furniture Catalogue]] | ||
|{{ | |{{Price|0}} | ||
|3 x 2 | |||
|- | |- | ||
|{{Name|Green Cottage Rug|size=64}} | |||
|[[File: | |[[File:Furniture Catalogue.png|24px|link=]] [[Furniture Catalogue]] | ||
|{{ | |{{Price|0}} | ||
|3 x 2 | |||
|- | |- | ||
|{{Name|Mystic Rug|size=64}} | |||
|[[File:Furniture Catalogue.png|24px|link=]] [[Furniture Catalogue]] | |[[File:Furniture Catalogue.png|24px|link=]] [[Furniture Catalogue]] | ||
|{{ | |{{Price|0}} | ||
|3 x 2 | |||
|- | |- | ||
|{{ | |rowspan="2"|{{Name|Nautical Rug|size=64}} | ||
|[[ | |[[File:Robin Icon.png|24px|link=]] [[Carpenter's Shop]] | ||
|{{ | |{{Price|1250}} | ||
|rowspan="2"|3 x 2 | |||
|- | |- | ||
|[[File:Furniture Catalogue.png|24px|link=]] [[Furniture Catalogue]] | |||
|[[File: | |{{Price|0}} | ||
|{{ | |||
|- | |- | ||
|[[ | |{{Name|Pirate Rug|size=64}} | ||
| | |[[File:Penny Icon.png|24px|link=]] [[Penny#Fourteen Hearts|Penny's 14-Heart event]] | ||
|{{Price|0}} | |||
|3 x 2 | |||
|- | |- | ||
|{{Name|Fruit Salad Rug|size=64}} | |||
|[[File:Penny Icon.png|24px|link=]] [[Penny#Fourteen Hearts|Penny's 14-Heart event]] | |[[File:Penny Icon.png|24px|link=]] [[Penny#Fourteen Hearts|Penny's 14-Heart event]] | ||
| | |{{Price|0}} | ||
|3 x 2 | |||
|- | |- | ||
|{{Name|Bone Rug|size=64}} | |||
|[[File:Furniture Catalogue.png|24px|link=]] [[Furniture Catalogue]] | |[[File:Furniture Catalogue.png|24px|link=]] [[Furniture Catalogue]] | ||
|{{ | |{{Price|0}} | ||
|3 x 2 | |||
|- | |- | ||
|{{ | |{{Name|Snowy Rug|size=64}} | ||
|[[File: | |[[File:Furniture Catalogue.png|24px|link=]] [[Furniture Catalogue]] | ||
|{{ | |{{Price|0}} | ||
|3 x 2 | |||
| | |- | ||
|rowspan="2"|{{Name|Light Green Rug|size=64}} | |||
|[[Stardew Valley Fair]] | |||
|{{Price|500|Token}} | |||
|rowspan="2"|3 x 2 | |||
|- | |- | ||
| | |[[File:Furniture Catalogue.png|24px|link=]] [[Furniture Catalogue]] | ||
|{{Price|0}} | |||
|{{ | |||
|- | |- | ||
|{{ | |rowspan="2"|{{Name|Large Green Rug|size=64}} | ||
|[[File: | |[[File:Sandy Icon.png|24px|link=]] [[Oasis]] | ||
|{{Price|2500|}} | |||
|rowspan="2"|4 x 3 | |||
|- | |- | ||
|[[File:Furniture Catalogue.png|24px|link=]] [[Furniture Catalogue]] | |||
|[[File: | |||
|{{Price|0}} | |{{Price|0}} | ||
|- | |- | ||
|{{ | |rowspan="2"|{{Name|Icy Rug|size=64}} | ||
|[[File: | |[[Festival of Ice]] | ||
|{{Price|4000|}} | |||
|rowspan="2"|4 x 3 | |||
|- | |||
|[[File:Furniture Catalogue.png|24px|link=]] [[Furniture Catalogue]] | |||
|{{Price|0}} | |{{Price|0}} | ||
|- | |- | ||
|{{ | |rowspan="2"|{{Name|Old World Rug|size=64}} | ||
|[[File: | |[[File:Sandy Icon.png|24px|link=]] [[Oasis]] | ||
|{{Price|2500|}} | |||
|rowspan="2"|4 x 3 | |||
|- | |||
|[[File:Furniture Catalogue.png|24px|link=]] [[Furniture Catalogue]] | |||
|{{Price|0}} | |{{Price|0}} | ||
|- | |- | ||
| | |rowspan="2"|{{Name|Large Red Rug|size=64}} | ||
|[[Feast of the Winter Star]] | |||
|{{Price|1000}} | |||
|rowspan="2"|4 x 3 | |||
|- | |- | ||
|[[File:Furniture Catalogue.png|24px|link=]] [[Furniture Catalogue]] | |||
|{{Price|0}} | |||
|} | |||
|style="vertical-align: top;"| | |style="vertical-align: top;"| | ||
{|class="wikitable | {|class="wikitable" | ||
!Item | !Item | ||
!Source | !Source | ||
! | !Price | ||
!Size | !Size | ||
|- | |- | ||
|rowspan="2"|{{Name| | |rowspan="2"|{{Name|Large Cottage Rug|size=64}} | ||
|[[File: | |[[File:Sandy Icon.png|24px|link=]] [[Oasis]] | ||
|{{Price|2000|}} | |||
| | |rowspan="2"|4 x 3 | ||
|- | |- | ||
|[[File:Furniture Catalogue.png|24px|link=]] [[Furniture Catalogue]] | |[[File:Furniture Catalogue.png|24px|link=]] [[Furniture Catalogue]] | ||
|{{Price|0}} | |||
|- | |- | ||
|rowspan="2"|{{Name| | |rowspan="2"|{{Name|Funky Rug|size=64}} | ||
|[[ | |[[Spirit's Eve]] | ||
|{{Price|4000|}} | |||
|2 x | |rowspan="2"|5 x 4 | ||
|- | |- | ||
|[[File:Furniture Catalogue.png|24px|link=]] [[Furniture Catalogue]] | |[[File:Furniture Catalogue.png|24px|link=]] [[Furniture Catalogue]] | ||
|{{Price|0}} | |||
|- | |- | ||
|rowspan="2"|{{Name| | |rowspan="2"|{{Name|Modern Rug|size=64}} | ||
|[[ | |[[Dance of the Moonlight Jellies]] | ||
|{{Price|4000|}} | |||
|2 x | |rowspan="2"|5 x 4 | ||
|- | |- | ||
|[[File:Furniture Catalogue.png|24px|link=]] [[Furniture Catalogue]] | |[[File:Furniture Catalogue.png|24px|link=]] [[Furniture Catalogue]] | ||
|{{Price|0}} | |||
|- | |- | ||
|{{Name|Blossom Rug|size=64}} | |||
|[[File:Furniture Catalogue.png|24px|link=]] [[Furniture Catalogue]] | |[[File:Furniture Catalogue.png|24px|link=]] [[Furniture Catalogue]] | ||
|{{Price|0}} | |||
|6 x 4 | |||
|- | |- | ||
|{{Name|Sandy Rug|size=64}} | |||
|[[ | |[[Desert Festival]] | ||
|{{Price|20|Calico}} | |||
|3 x | |3 x 3 | ||
|- | |- | ||
| | |{{Name|Desert Rug|size=64}} | ||
|[[Desert Festival]] | |||
|{{Price|25|Calico}} | |||
|4 x 3 | |||
|- | |- | ||
|{{Name|Large Joja Rug|size=64}} | |||
|[[File: | |[[File:Joja Furniture Catalogue.png|16px|link=]] [[Joja Furniture Catalogue]] | ||
|{{Price|0}} | |||
|3 | |5 x 3 | ||
|- | |- | ||
|[[File:Furniture Catalogue.png| | |{{Name|Square Joja Rug|size=64}} | ||
|[[File:Joja Furniture Catalogue.png|16px|link=]] [[Joja Furniture Catalogue]] | |||
|{{Price|0}} | |||
|2 x 2 | |||
|- | |- | ||
|{{Name|Small Joja Rug|size=64}} | |||
|[[ | |[[File:Joja Furniture Catalogue.png|16px|link=]] [[Joja Furniture Catalogue]] | ||
|{{Price|0}} | |||
| | |2 x 1 | ||
|- | |- | ||
|[[File:Furniture Catalogue.png| | |{{Name|Joja Rug|size=64}} | ||
|[[File:Joja Furniture Catalogue.png|16px|link=]] [[Joja Furniture Catalogue]] | |||
|{{Price|0}} | |||
|3 x 2 | |||
|- | |- | ||
|{{Name|Rune Rug|size=64}} | |||
|[[File:Wizard Catalogue.png|16px|link=]] [[Wizard Catalogue]] | |||
|[[File: | |{{Price|0}} | ||
|2 x 2 | |2 x 2 | ||
|- | |- | ||
|{{Name|Swirl Rug|size=64}} | |||
|[[ | |[[File:Wizard Catalogue.png|16px|link=]] [[Wizard Catalogue]] | ||
|{{Price|0}} | |||
|3 x 2 | |3 x 2 | ||
|- | |- | ||
|[[File: | |{{Name|Starry Moon Rug|size=64}} | ||
|[[File:Wizard Catalogue.png|16px|link=]] [[Wizard Catalogue]] | |||
|{{Price|0}} | |||
|5 x 3 | |||
|- | |- | ||
|{{Name|Stone Flooring|size=64}} | |||
|[[File: | |[[File:Wizard Catalogue.png|16px|link=]] [[Wizard Catalogue]] | ||
|{{Price|0}} | |||
| | |4 x 4 | ||
|- | |- | ||
|[[File: | |{{Name|Square Junimo Rug|size=64}} | ||
|[[File:Junimo Catalogue.png|16px|link=]] [[Junimo Catalogue]] | |||
|{{Price|0}} | |||
|2 x 2 | |||
|- | |- | ||
|{{Name|Circular Junimo Rug|size=64}} | |||
|[[File:Junimo Catalogue.png|16px|link=]] [[Junimo Catalogue]] | |||
|{{Price|0}} | |||
|3 x 3 | |||
|- | |- | ||
|{{Name|Junimo Rug|size=64}} | |||
|[[File:Junimo Catalogue.png|16px|link=]] [[Junimo Catalogue]] | |||
|{{Price|0}} | |||
|[[File: | |||
|4 x 3 | |4 x 3 | ||
|- | |- | ||
|[[File: | |{{Name|Junimo Mat|size=64}} | ||
|[[File:Junimo Catalogue.png|16px|link=]] [[Junimo Catalogue]] | |||
|{{Price|0}} | |||
|3 x 2 | |||
|- | |- | ||
|{{Name|Small Junimo Mat|size=64}} | |||
|[[File: | |[[File:Junimo Catalogue.png|16px|link=]] [[Junimo Catalogue]] | ||
|{{Price|0}} | |||
| | |2 x 1 | ||
|- | |- | ||
|{{Name|Large Retro Rug|size=64}} | |||
|[[File:Retro Catalogue.png|16px|link=]] [[Retro Catalogue]] | |||
|{{Price|0}} | |||
|[[File: | |||
|4 x 3 | |4 x 3 | ||
|- | |- | ||
|[[File: | |{{Name|Retro Rug|size=64}} | ||
|[[File:Retro Catalogue.png|16px|link=]] [[Retro Catalogue]] | |||
|{{Price|0}} | |||
|3 x 2 | |||
|- | |- | ||
|{{Name|Retro Square Rug|size=64}} | |||
|[[File:Retro Catalogue.png|16px|link=]] [[Retro Catalogue]] | |||
|{{Price|0}} | |||
|2 x 2 | |||
|- | |- | ||
|[[File: | |{{Name|Retro Mat|size=64}} | ||
|[[File:Retro Catalogue.png|16px|link=]] [[Retro Catalogue]] | |||
| | |{{Price|0}} | ||
|2 x 1 | |||
|- | |||
|} | |||
|- | |- | ||
| | |} | ||
==Floor Dividers== | |||
Floor dividers cannot be placed outside. | |||
All floor dividers available in the [[Furniture Catalogue]] cannot be purchased from the [[Traveling Cart]]. | |||
{| | |||
|- | |- | ||
|style="vertical-align: top;"| | |||
{|class="wikitable" | |||
!Item | |||
!Source | |||
!Price | |||
!Size | |||
|- | |||
|[[File:Floor Divider R 1.png|32px]][[File:Floor Divider L 1.png|32px]] [[Floor Divider|Floor Divider 1]] | |||
|[[File:Furniture Catalogue.png|24px|link=]] [[Furniture Catalogue]] | |[[File:Furniture Catalogue.png|24px|link=]] [[Furniture Catalogue]] | ||
|{{Price|0}} | |||
| | |1 x 1 | ||
|- | |- | ||
| | |[[File:Floor Divider R 2.png|32px]][[File:Floor Divider L 2.png|32px]] [[Floor Divider|Floor Divider 2]] | ||
|[[File:Furniture Catalogue.png|24px|link=]] [[Furniture Catalogue]] | |||
|{{Price|0}} | |||
|1 x 1 | |||
|- | |- | ||
|[[File:Floor Divider R 3.png|32px]][[File:Floor Divider L 3.png|32px]] [[Floor Divider|Floor Divider 3]] | |||
|[[File:Furniture Catalogue.png|24px|link=]] [[Furniture Catalogue]] | |[[File:Furniture Catalogue.png|24px|link=]] [[Furniture Catalogue]] | ||
|{{Price|0}} | |||
| | |1 x 1 | ||
|- | |- | ||
|[[File:Floor Divider R 4.png|32px]][[File:Floor Divider L 4.png|32px]] [[Floor Divider|Floor Divider 4]] | |||
|[[File:Furniture Catalogue.png|24px|link=]] [[Furniture Catalogue]] | |[[File:Furniture Catalogue.png|24px|link=]] [[Furniture Catalogue]] | ||
|{{Price|0}} | |||
| | |1 x 1 | ||
|- | |- | ||
| | |[[File:Floor Divider R 5.png|32px]][[File:Floor Divider L 5.png|32px]] [[Floor Divider|Floor Divider 5]] | ||
|[[File:Furniture Catalogue.png|24px|link=]] [[Furniture Catalogue]] | |||
|{{Price|0}} | |||
|1 x 1 | |||
|- | |- | ||
|[[File:Floor Divider R 6.png|32px]][[File:Floor Divider L 6.png|32px]] [[Floor Divider|Floor Divider 6]] | |||
|[[File:Furniture Catalogue.png|24px|link=]] [[Furniture Catalogue]] | |[[File:Furniture Catalogue.png|24px|link=]] [[Furniture Catalogue]] | ||
|{{Price|0}} | |||
| | |1 x 1 | ||
|- | |- | ||
| | |[[File:Floor Divider R 7.png|32px]][[File:Floor Divider L 7.png|32px]] [[Floor Divider|Floor Divider 7]] | ||
|[[File:Furniture Catalogue.png|24px|link=]] [[Furniture Catalogue]] | |||
|{{Price|0}} | |||
|1 x 1 | |||
|- | |- | ||
| | |[[File:Floor Divider R 8.png|32px]][[File:Floor Divider L 8.png|32px]] [[Floor Divider|Floor Divider 8]] | ||
| | |[[File:Furniture Catalogue.png|24px|link=]] [[Furniture Catalogue]] | ||
| | |{{Price|0}} | ||
|1 x 1 | |||
|- | |||
|} | |||
|- | |- | ||
| | |} | ||
==Cushions== | |||
Cushions cannot be placed outside. | |||
All cushions available in the [[Furniture Catalogue]] cannot be purchased from the [[Traveling Cart]]. | |||
{| | |||
|- | |- | ||
| | |style="vertical-align: top;"| | ||
| | {|class="wikitable" | ||
!Item | |||
!Source | |||
!Price | |||
|- | |- | ||
|{{Name|Blue Cushion|size=32}} | |||
|[[File: | |[[File:Furniture Catalogue.png|24px|link=]] [[Furniture Catalogue]] | ||
|{{Price|0}} | |||
|- | |- | ||
|{{Name|Yellow Cushion|size=32}} | |||
|[[File:Furniture Catalogue.png|24px|link=]] [[Furniture Catalogue]] | |[[File:Furniture Catalogue.png|24px|link=]] [[Furniture Catalogue]] | ||
|{{Price|0}} | |||
|- | |- | ||
|{{Name|Green Cushion|size=32}} | |||
|[[ | |[[File:Furniture Catalogue.png|24px|link=]] [[Furniture Catalogue]] | ||
|{{Price|0}} | |||
|- | |- | ||
|{{Name|Red Cushion|size=32}} | |||
|[[File:Furniture Catalogue.png|24px|link=]] [[Furniture Catalogue]] | |[[File:Furniture Catalogue.png|24px|link=]] [[Furniture Catalogue]] | ||
|{{Price|0}} | |||
|- | |- | ||
|{{Name|Brown Cushion|size=32}} | |||
|[[ | |[[File:Furniture Catalogue.png|24px|link=]] [[Furniture Catalogue]] | ||
|{{Price|0}} | |||
|- | |- | ||
|{{Name|Black Cushion|size=32}} | |||
|[[File:Furniture Catalogue.png|24px|link=]] [[Furniture Catalogue]] | |[[File:Furniture Catalogue.png|24px|link=]] [[Furniture Catalogue]] | ||
|{{Price|0}} | |||
|- | |- | ||
|{{Name|Joja Cushion|size=32}} | |||
|[[File:Joja Furniture Catalogue.png|16px|link=]] [[Joja Furniture Catalogue]] | |||
|{{Price|0}} | |||
|} | |||
|[[File:Furniture Catalogue.png| | |||
|style="vertical-align: top;"| | |style="vertical-align: top;"| | ||
{|class="wikitable | {|class="wikitable" | ||
!Item | !Item | ||
!Source | !Source | ||
! | !Price | ||
|- | |||
| | |{{Name|Gray Joja Cushion|size=32}} | ||
| | |[[File:Joja Furniture Catalogue.png|16px|link=]] [[Joja Furniture Catalogue]] | ||
|- | |{{Price|0}} | ||
|[[ | |- | ||
| | |{{Name|Wizard Cushion|size=32}} | ||
| | |[[File:Wizard Catalogue.png|16px|link=]] [[Wizard Catalogue]] | ||
|- | |{{Price|0}} | ||
|- | |||
| | |{{Name|Dark Wizard Cushion|size=32}} | ||
|[[ | |[[File:Wizard Catalogue.png|16px|link=]] [[Wizard Catalogue]] | ||
| | |{{Price|0}} | ||
| | |- | ||
|{{Name|Junimo Cushion|size=32}} | |||
|[[File:Junimo Catalogue.png|16px|link=]] [[Junimo Catalogue]] | |||
|{{Price|0}} | |||
|- | |||
|{{Name|Dark Junimo Cushion|size=32}} | |||
|[[File:Junimo Catalogue.png|16px|link=]] [[Junimo Catalogue]] | |||
|{{Price|0}} | |||
|- | |||
|{{Name|Retro Cushion|size=32}} | |||
|[[File:Retro Catalogue.png|16px|link=]] [[Retro Catalogue]] | |||
|{{Price|0}} | |||
|- | |||
|{{Name|Dark Retro Cushion|size=32}} | |||
|[[File:Retro Catalogue.png|16px|link=]] [[Retro Catalogue]] | |||
|{{Price|0}} | |||
|- | |||
|} | |||
|- | |- | ||
| | |} | ||
==Lamps & Wall Sconces== | |||
Lamps and wall sconces cannot be placed outside. Lamps can also be placed inside [[coop]]s and [[barn]]s. | |||
At night, all lamps listed below provide light in a radius of about 6 tiles, and all wall sconces provide light in a radius of about 2 tiles. | |||
All lamps and wall sconces available in the [[Furniture Catalogue]] can also be purchased from the [[Traveling Cart]] for {{Tprice|furniture}}. | |||
{| | |||
|- | |- | ||
| | |style="vertical-align: top;"| | ||
| | {|class="wikitable" | ||
!Item | |||
!Source | |||
!Price | |||
|- | |- | ||
|rowspan="2"|{{Name| | |rowspan="2"|{{Name|Country Lamp|size=24}} | ||
|[[File:Robin Icon.png|24px|link=]] [[Carpenter's Shop]] | |||
|{{Price|500}} | |||
|- | |- | ||
|[[File: | |[[File:Furniture Catalogue.png|24px|link=]] [[Furniture Catalogue]] | ||
|{{Price|0}} | |||
|- | |- | ||
|rowspan="2"|{{Name| | |rowspan="2"|{{Name|Box Lamp|size=24}} | ||
|[[File:Robin Icon.png|24px|link=]] [[Carpenter's Shop]] | |||
|{{Price|750}} | |||
|- | |- | ||
|[[File: | |[[File:Furniture Catalogue.png|24px|link=]] [[Furniture Catalogue]] | ||
|{{Price|0}} | |||
|- | |- | ||
|rowspan="2"|{{Name| | |rowspan="2"|{{Name|Modern Lamp|size=24}} | ||
|[[File:Robin Icon.png|24px|link=]] [[Carpenter's Shop]] | |||
|{{Price|750}} | |||
|- | |- | ||
|[[File: | |[[File:Furniture Catalogue.png|24px|link=]] [[Furniture Catalogue]] | ||
|{{Price|0}} | |||
|- | |- | ||
|rowspan="2"|{{Name| | |rowspan="2"|{{Name|Classic Lamp|size=24}} | ||
|[[File:Robin Icon.png|24px|link=]] [[Carpenter's Shop]] | |||
|{{Price|1000}} | |||
|- | |- | ||
|[[File: | |[[File:Furniture Catalogue.png|24px|link=]] [[Furniture Catalogue]] | ||
|{{Price|0}} | |||
|- | |- | ||
|rowspan="2"|{{Name| | |rowspan="2"|{{Name|Candle Lamp|size=24}} | ||
|[[File:Robin Icon.png|24px|link=]] [[Carpenter's Shop]] | |||
|{{Price|1000}} | |||
|- | |- | ||
|[[File: | |[[File:Furniture Catalogue.png|24px|link=]] [[Furniture Catalogue]] | ||
|{{Price|0}} | |||
|- | |- | ||
|rowspan="2"|{{Name| | |rowspan="2"|{{Name|Ornate Lamp|size=24}} | ||
|[[File:Robin Icon.png|24px|link=]] [[Carpenter's Shop]] | |||
|{{Price|1050}} | |||
|- | |- | ||
|[[File: | |[[File:Furniture Catalogue.png|24px|link=]] [[Furniture Catalogue]] | ||
|{{Price|0}} | |||
|- | |- | ||
|{{Name|Oak Lamp End Table|size=24}} | |||
|[[File:Furniture Catalogue.png|24px|link=]] [[Furniture Catalogue]] | |||
|{{Price|0}} | |||
|- | |- | ||
|[[File: | |{{Name|Walnut Lamp End Table|size=24}} | ||
|[[File:Furniture Catalogue.png|24px|link=]] [[Furniture Catalogue]] | |||
|{{Price|0}} | |||
|- | |- | ||
|{{Name|Birch Lamp End Table|size=24}} | |||
|[[File:Furniture Catalogue.png|24px|link=]] [[Furniture Catalogue]] | |||
|{{Price|0}} | |||
|- | |- | ||
|[[File: | |{{Name|Mahogany Lamp End Table|size=24}} | ||
|[[File:Furniture Catalogue.png|24px|link=]] [[Furniture Catalogue]] | |||
| | |{{Price|0}} | ||
|} | |||
|style="vertical-align: top;"| | |||
{|class="wikitable" | |||
!Item | |||
!Source | |||
!Price | |||
|- | |- | ||
|{{Name|Joja Lamp|size=24}} | |||
|[[File:Joja Furniture Catalogue.png|16px|link=]] [[Joja Furniture Catalogue]] | |||
|{{Price|0}} | |||
|- | |- | ||
|[[File: | |{{Name|Wizard Lamp|size=24}} | ||
|[[File:Wizard Catalogue.png|16px|link=]] [[Wizard Catalogue]] | |||
|{{Price|0}} | |||
|- | |- | ||
|{{Name|Junimo Lamp|size=24}} | |||
|[[File:Junimo Catalogue.png|16px|link=]] [[Junimo Catalogue]] | |||
|{{Price|0}} | |||
|- | |- | ||
|[[File:Retro Catalogue.png|16px|link=]] [[Retro Catalogue]] | |{{Name|Retro Lamp|size=24}} | ||
|[[File:Retro Catalogue.png|16px|link=]] [[Retro Catalogue]] | |||
|{{Price|0}} | |||
|- | |- | ||
|rowspan="2"|{{ | |rowspan="2"|[[File:Wall Sconce 1.png|24px|link=]] [[Wall Sconce|Wall Sconce 1]] | ||
|[[File:Sandy Icon.png|24px|link=]] [[Oasis]] | |||
|{{Price|500}} | |||
|- | |- | ||
|[[File: | |[[File:Furniture Catalogue.png|24px|link=]] [[Furniture Catalogue]] | ||
|{{Price|0}} | |||
|- | |- | ||
|rowspan="2"|{{ | |rowspan="2"|[[File:Wall Sconce 2.png|24px|link=]] [[Wall Sconce|Wall Sconce 2]] | ||
|[[File:Sandy Icon.png|24px|link=]] [[Oasis]] | |||
|{{Price|500}} | |||
|- | |- | ||
|[[File: | |[[File:Furniture Catalogue.png|24px|link=]] [[Furniture Catalogue]] | ||
|{{Price|0}} | |||
|- | |- | ||
|rowspan="2"|{{ | |rowspan="2"|[[File:Wall Sconce 3.png|24px|link=]] [[Wall Sconce|Wall Sconce 3]] | ||
|[[File:Sandy Icon.png|24px|link=]] [[Oasis]] | |||
|{{Price|500}} | |||
|- | |- | ||
| | |[[File:Furniture Catalogue.png|24px|link=]] [[Furniture Catalogue]] | ||
| | |{{Price|0}} | ||
| | |||
|- | |- | ||
|rowspan="2"|{{ | |rowspan="2"|[[File:Wall Sconce 4.png|24px|link=]] [[Wall Sconce|Wall Sconce 4]] | ||
|[[File:Sandy Icon.png|24px|link=]] [[Oasis]] | |||
|{{Price|500}} | |||
|- | |- | ||
| | |[[File:Furniture Catalogue.png|24px|link=]] [[Furniture Catalogue]] | ||
| | |{{Price|0}} | ||
| | |||
|- | |- | ||
|rowspan="2"|{{ | |rowspan="2"|[[File:Wall Sconce 5.png|24px|link=]] [[Wall Sconce|Wall Sconce 5]] | ||
|[[File:Sandy Icon.png|24px|link=]] [[Oasis]] | |||
|{{Price|500}} | |||
|- | |- | ||
| | |[[File:Furniture Catalogue.png|24px|link=]] [[Furniture Catalogue]] | ||
| | |{{Price|0}} | ||
| | |||
|- | |- | ||
|rowspan="2"|{{ | |rowspan="2"|[[File:Wall Sconce 6.png|24px|link=]] [[Wall Sconce|Wall Sconce 6]] | ||
|[[Festival of Ice]] | |||
|{{Price|1000}} | |||
|- | |- | ||
| | |[[File:Furniture Catalogue.png|24px|link=]] [[Furniture Catalogue]] | ||
| | |{{Price|0}} | ||
| | |||
|- | |- | ||
|rowspan="2"|{{ | |rowspan="2"|[[File:Wall Sconce 7.png|24px|link=]] [[Wall Sconce|Wall Sconce 7]] | ||
|[[File:Sandy Icon.png|24px|link=]] [[Oasis]] | |||
|{{Price|500}} | |||
|- | |- | ||
| | |[[File:Furniture Catalogue.png|24px|link=]] [[Furniture Catalogue]] | ||
| | |{{Price|0}} | ||
| | |||
|- | |- | ||
| | |} | ||
|- | |- | ||
|} | |||
==Windows== | |||
Windows cannot be placed outside. | |||
|} | |||
== | |||
All | All windows available in the [[Furniture Catalogue]] cannot be purchased from the [[Traveling Cart]]. | ||
{| | {| | ||
|- | |- | ||
|style="vertical-align: top;"| | |style="vertical-align: top;"| | ||
{|class="wikitable | {|class="wikitable" | ||
!Item | !Item | ||
!Source | !Source | ||
! | !Price | ||
|- | |- | ||
|rowspan="2"|[[File: | |rowspan="2"|{{Name|Basic Window|size=24}} | ||
|[[File:Robin Icon.png|24px|link=]] [[Carpenter's Shop]] | |||
|{{Price|300}} | |||
|- | |- | ||
|[[File:Furniture Catalogue.png|24px|link=]] [[Furniture Catalogue]] | |[[File:Furniture Catalogue.png|24px|link=]] [[Furniture Catalogue]] | ||
|{{Price|0}} | |||
|- | |- | ||
|rowspan="2"|[[File: | |rowspan="2"|{{Name|Small Window|size=24}} | ||
|[[File:Robin Icon.png|24px|link=]] [[Carpenter's Shop]] | |||
|{{Price|300}} | |||
|- | |- | ||
|[[File:Furniture Catalogue.png|24px|link=]] [[Furniture Catalogue]] | |[[File:Furniture Catalogue.png|24px|link=]] [[Furniture Catalogue]] | ||
|{{Price|0}} | |||
|- | |- | ||
|rowspan="2"|[[File: | |rowspan="2"|{{Name|Porthole|size=24}} | ||
|[[File:Robin Icon.png|24px|link=]] [[Carpenter's Shop]] | |||
|{{Price|700}} | |||
|- | |- | ||
|[[File:Furniture Catalogue.png|24px|link=]] [[Furniture Catalogue]] | |[[File:Furniture Catalogue.png|24px|link=]] [[Furniture Catalogue]] | ||
|{{Price|0}} | |||
|- | |- | ||
|rowspan="2"|[[File: | |rowspan="2"|{{Name|Boarded Window|size=24}} | ||
|[[File:Robin Icon.png|24px|link=]] [[Carpenter's Shop]] | |||
|{{Price|400}} | |||
|- | |- | ||
|[[File:Furniture Catalogue.png|24px|link=]] [[Furniture Catalogue]] | |[[File:Furniture Catalogue.png|24px|link=]] [[Furniture Catalogue]] | ||
|{{Price|0}} | |||
| | |} | ||
|style="vertical-align: top;"| | |||
{|class="wikitable" | |||
!Item | |||
!Source | |||
!Price | |||
|- | |- | ||
|rowspan="2"|[[File: | |rowspan="2"|{{Name|Ornate Window|size=24}} | ||
|[[File:Robin Icon.png|24px|link=]] [[Carpenter's Shop]] | |||
|{{Price|1000}} | |||
|- | |- | ||
|[[File:Furniture Catalogue.png|24px|link=]] [[Furniture Catalogue]] | |[[File:Furniture Catalogue.png|24px|link=]] [[Furniture Catalogue]] | ||
|{{Price|0}} | |||
|- | |- | ||
|rowspan="2"|[[File: | |rowspan="2"|{{Name|Carved Window|size=24}} | ||
|[[File:Robin Icon.png|24px|link=]] [[Carpenter's Shop]] | |||
|{{Price|900}} | |||
|- | |- | ||
|[[File:Furniture Catalogue.png|24px|link=]] [[Furniture Catalogue]] | |[[File:Furniture Catalogue.png|24px|link=]] [[Furniture Catalogue]] | ||
|{{Price|0}} | |||
|- | |- | ||
|rowspan="2"|[[File: | |rowspan="2"|{{Name|Metal Window|size=24}} | ||
|[[File:Robin Icon.png|24px|link=]] [[Carpenter's Shop]] | |||
|{{Price|800}} | |||
|- | |- | ||
|[[File:Furniture Catalogue.png|24px|link=]] [[Furniture Catalogue]] | |[[File:Furniture Catalogue.png|24px|link=]] [[Furniture Catalogue]] | ||
|{{Price|0}} | |||
|- | |- | ||
| | |{{Name|Triangle Window|size=24}} | ||
|[[File:Furniture Catalogue.png|24px|link=]] [[Furniture Catalogue]] | |||
|{{Price|0}} | |||
|- | |- | ||
|} | |||
|- | |- | ||
|} | |} | ||
== | ==TVs== | ||
TVs cannot be placed outside except for the [[Broken Television]]. | |||
TVs can be used for watching [[Television|television channels]]. However, the [[Broken Television]] does not function. | |||
All televisions available in the [[Furniture Catalogue]] can also be purchased from the [[Traveling Cart]] for {{Tprice|furniture}}. | |||
{| | {| | ||
|- | |- | ||
|style="vertical-align: top;"| | |style="vertical-align: top;"| | ||
{|class="wikitable | {|class="wikitable" | ||
!Item | !Item | ||
!Source | !Source | ||
! | !Price | ||
|- | |- | ||
|rowspan="2"|{{Name|Budget TV|size=48}} | |||
|[[File:Robin Icon.png|24px|link=]] [[Carpenter's Shop]] | |||
|{{Price|750}} | |||
|- | |||
|[[File:Furniture Catalogue.png|24px|link=]] [[Furniture Catalogue]] | |||
|{{Price|0}} | |||
|- | |||
|rowspan="2"|{{Name|Plasma TV|size=48}} | |||
|[[File:Robin Icon.png|24px|link=]] [[Carpenter's Shop]] | |||
|{{Price|4500}} | |||
|- | |||
|[[File:Furniture Catalogue.png|24px|link=]] [[Furniture Catalogue]] | |||
|{{Price|0}} | |||
|- | |||
|rowspan="2"|{{Name|Floor TV|size=48}} | |||
|[[File:Robin Icon.png|24px|link=]] [[Carpenter's Shop]] | |||
|{{Price|700}} | |||
|- | |||
|[[File:Furniture Catalogue.png|24px|link=]] [[Furniture Catalogue]] | |||
|{{Price|0}} | |||
|} | |} | ||
|style="vertical-align: top;"| | |style="vertical-align: top;"| | ||
{|class="wikitable | {|class="wikitable" | ||
!Item | !Item | ||
!Source | !Source | ||
! | !Price | ||
|- | |||
|{{Name|Tropical TV|size=48}} | |||
|{{NPC|Island Trader|size=24}} | |||
|{{Name|Taro Root|30}} | |||
|- | |||
|{{Name|Retro TV|size=48}} | |||
|[[Desert Festival]] | |||
|{{Price|200|Calico}} | |||
|- | |||
|{{Name|Broken Television|size=48}} | |||
|[[File:Trash Catalogue.png|16px|link=]] [[Trash Catalogue]] | |||
|{{Price|0}} | |||
|- | |||
|} | |||
|- | |- | ||
|} | |} | ||
== | ==Beds== | ||
Beds cannot be placed outside and can only be placed in any constructed building that allows furniture. | |||
The player can sleep in a bed to [[Day Cycle|end the day]] and restore [[Energy]] and [[Health]]. Players cannot sleep in [[Child Bed]]s. | |||
All | All beds available in the [[Furniture Catalogue]] can also be purchased from the [[Traveling Cart]] for {{Tprice|furniture}}. | ||
{| | {| | ||
|- | |- | ||
|style="vertical-align: top;"| | |style="vertical-align: top;"| | ||
{|class="wikitable | {|class="wikitable" | ||
!Item | !Item | ||
!Source | !Source | ||
! | !Price | ||
|- | |- | ||
|rowspan="2"|{{Name| | |rowspan="2"|{{Name|Single Bed|size=48|link=Child Bed}} | ||
|[[File:Robin Icon.png|24px|link=]] [[Carpenter's Shop]] | |[[File:Robin Icon.png|24px|link=]] [[Carpenter's Shop]] | ||
|{{Price|2000}} | |||
|- | |- | ||
|[[File:Furniture Catalogue.png|24px|link=]] [[Furniture Catalogue]] | |[[File:Furniture Catalogue.png|24px|link=]] [[Furniture Catalogue]] | ||
|{{Price|0}} | |||
|- | |- | ||
|rowspan="2"|{{Name| | |rowspan="2"|{{Name|Single Bed|size=48}} | ||
|[[File:Robin Icon.png|24px|link=]] [[Carpenter's Shop]] | |[[File:Robin Icon.png|24px|link=]] [[Carpenter's Shop]] | ||
|{{Price|500}} | |||
|- | |- | ||
|[[File:Furniture Catalogue.png|24px|link=]] [[Furniture Catalogue]] | |[[File:Furniture Catalogue.png|24px|link=]] [[Furniture Catalogue]] | ||
|{{Price|0}} | |||
|- | |- | ||
|rowspan="2"|{{Name| | |rowspan="2"|{{Name|Double Bed|size=72}} | ||
|[[File:Robin Icon.png|24px|link=]] [[Carpenter's Shop]] | |[[File:Robin Icon.png|24px|link=]] [[Carpenter's Shop]] | ||
|{{Price|2000}} | |||
|- | |- | ||
|[[File:Furniture Catalogue.png|24px|link=]] [[Furniture Catalogue]] | |[[File:Furniture Catalogue.png|24px|link=]] [[Furniture Catalogue]] | ||
|{{Price|0}} | |||
|- | |- | ||
|{{Name|Starry Double Bed|size=72}} | |||
|[[File: | |[[File:Penny Icon.png|24px|link=]] [[Penny#Fourteen Hearts|Penny's 14-Heart event]] | ||
| | |N/A | ||
|- | |||
|{{Name|Strawberry Double Bed|size=72}} | |||
|[[File:Penny Icon.png|24px|link=]] [[Penny#Fourteen Hearts|Penny's 14-Heart event]] | |||
|N/A | |||
|- | |- | ||
|[[File: | |{{Name|Pirate Double Bed|size=72}} | ||
| | |[[File:Penny Icon.png|24px|link=]] [[Penny#Fourteen Hearts|Penny's 14-Heart event]] | ||
|N/A | |||
|- | |- | ||
|rowspan="2"|{{Name| | |rowspan="2"|{{Name|Tropical Bed|size=48}} | ||
| | |{{NPC|Island Trader|size=24}} | ||
|{{Name|Ginger|20}} | |||
|- | |- | ||
|[[File:Furniture Catalogue.png|24px|link=]] [[Furniture Catalogue]] | |[[File:Furniture Catalogue.png|24px|link=]] [[Furniture Catalogue]] | ||
|{{Price|0}} | |||
|- | |- | ||
|rowspan="2"|{{Name| | |rowspan="2"|{{Name|Tropical Double Bed|size=72}} | ||
| | |{{NPC|Island Trader|size=24}} | ||
|{{Name|Banana|5}} | |||
|- | |- | ||
|[[File:Furniture Catalogue.png|24px|link=]] [[Furniture Catalogue]] | |[[File:Furniture Catalogue.png|24px|link=]] [[Furniture Catalogue]] | ||
|{{Price|0}} | |||
|- | |- | ||
| | |{{Name|Deluxe Red Double Bed|size=72}} | ||
|[[File:Robin Icon.png|24px|link=]] [[Carpenter's Shop]]<br />''Only available after completing [[Quests#Robin's Project|"Robin's Project"]]'' | |||
|{{Price|6000}} | |||
|- | |- | ||
|[[File: | |{{Name|Modern Double Bed|size=72}} | ||
|[[File:Mr. Qi Icon.png|24px|link=]] [[Casino]] | |||
|{{Price|8000|Qi}} | |||
|- | |- | ||
|{{Name|Wild Double Bed|size=72}} | |||
|{{NPC|Island Trader|size=24}} | |||
|{{Name|Cinder Shard|200}} | |||
|} | |||
|} | |||
|style="vertical-align: top;"| | |style="vertical-align: top;"| | ||
{|class="wikitable | {|class="wikitable" | ||
!Item | !Item | ||
!Source | !Source | ||
! | !Price | ||
|- | |- | ||
|{{Name|Fisher Double Bed|size=72}} | |||
|[[File: | |[[File:Willy Icon.png|24px|link=]] [[Fish Shop]] | ||
|{{Price|25000}} | |||
|- | |- | ||
| | |{{Name|Birch Double Bed|size=72}} | ||
| | |{{NPC|Desert Trader|size=24}} | ||
|{{Name|Pearl|1}} | |||
|- | |- | ||
|{{Name|Exotic Double Bed|size=72}} | |||
|[[File: | |[[File:Mr. Qi Icon.png|24px|link=]] [[Qi's Walnut Room]] | ||
|{{Price|50|gem}} | |||
|- | |- | ||
|[[File: | |rowspan="2"|{{Name|Blue Pinstripe Bed|size=48}} | ||
|[[File:Robin Icon.png|24px|link=]] [[Carpenter's Shop]] | |||
|{{Price|500}} | |||
|- | |- | ||
|[[Mayor's Manor#Prize Machine|Prize Machine]] | |||
|[[ | ||{{Name|Prize Ticket|1}} | ||
| | |||
|- | |- | ||
|[[File: | |rowspan="2"|{{Name|Blue Pinstripe Double Bed|size=72}} | ||
|[[File:Robin Icon.png|24px|link=]] [[Carpenter's Shop]] | |||
|{{Price|500}} | |||
|- | |- | ||
|[[Mayor's Manor#Prize Machine|Prize Machine]] | |||
|[[ | ||{{Name|Prize Ticket|1}} | ||
| | |||
|- | |- | ||
| | |{{Name|Midnight Beach Bed|size=48}} | ||
| | |{{NPC|Desert Trader|size=24}} | ||
|{{Name|Iridium Bar|15}} | |||
|- | |- | ||
|{{Name|Midnight Beach Double Bed|size=72}} | |||
| | |{{NPC|Desert Trader|size=24}} | ||
|{{Name|Iridium Bar|30}} | |||
|- | |- | ||
|[[File:Furniture Catalogue.png| | |{{Name|Joja Bed|size=72}} | ||
|[[File:Joja Furniture Catalogue.png|16px|link=]] [[Joja Furniture Catalogue]] | |||
|{{Price|0}} | |||
|- | |- | ||
|{{Name|Wizard Bed|size=72}} | |||
|[[ | |[[File:Wizard Catalogue.png|16px|link=]] [[Wizard Catalogue]] | ||
|{{Price|0}} | |||
|- | |- | ||
|[[File: | |{{Name|Junimo Bed|size=72}} | ||
|[[File:Junimo Catalogue.png|16px|link=]] [[Junimo Catalogue]] | |||
|{{Price|0}} | |||
|- | |- | ||
|{{Name|Retro Bed|size=72}} | |||
|[[File: | |[[File:Retro Catalogue.png|16px|link=]] [[Retro Catalogue]] | ||
|{{Price|0}} | |||
|- | |- | ||
| | |} | ||
|- | |- | ||
|} | |} | ||
| | |||
==Decorative Plants== | |||
===House Plants=== | |||
[[House Plant|House plants]] can be placed outside. | |||
All 15 of the house plants are available in the [[Furniture Catalogue]] and can also be purchased from the [[Traveling Cart]] for {{Tprice|furniture}}. In addition, they can be purchased from the [[Carpenter's Shop]] for {{Price|250}}. | |||
{|class="wikitable" style="margin-left: 4px;" | |||
|- | |- | ||
!colspan="15"|[[House Plant]]s | |||
|[[ | |||
|- | |- | ||
|[[File: | |[[File:House Plant.png|36px]] | ||
| | |[[File:House Plant 2.png|36px]] | ||
| | |[[File:House Plant 3.png|36px]] | ||
| | |[[File:House Plant 4.png|36px]] | ||
|[[File: | |[[File:House Plant 5.png|36px]] | ||
| | |[[File:House Plant 6.png|36px]] | ||
|[[File:House Plant 7.png|36px]] | |||
|[[File:House Plant 8.png|36px]] | |||
|[[File:House Plant 9.png|36px]] | |||
|[[File:House Plant 10.png|36px]] | |||
|[[File:House Plant 11.png|36px]] | |||
|[[File:House Plant 12.png|36px]] | |||
|[[File:House Plant 13.png|36px]] | |||
|[[File:House Plant 14.png|36px]] | |||
|[[File:House Plant 15.png|36px]] | |||
|- | |- | ||
| | |} | ||
===Freestanding Decorative Plants=== | |||
Freestanding decorative plants can be placed outside. | |||
{| | |||
|- | |- | ||
| | |style="vertical-align: top;"| | ||
{|class="wikitable" | |||
!Item | |||
!Source | |||
!Price | |||
|- | |- | ||
| | |{{Name|Long Cactus|size=24}} | ||
|[[Crane Game]] during [[Summer]]<br />''Only available if [[Movie Theater#Movies|Journey Of The Prairie King: The Motion Picture]] is playing'' | |||
|{{Price|500}} | |||
|- | |- | ||
|{{Name|Long Palm|size=24}} | |||
|[[ | |[[Crane Game]] during [[Summer]]<br />''Only available if [[Movie Theater#Movies|Journey Of The Prairie King: The Motion Picture]] is playing'' | ||
|{{Price|500}} | |||
|- | |- | ||
| | |{{Name|Exotic Tree|size=48}} | ||
|[[Crane Game]] during any [[Season]] | |||
|{{Price|500}} | |||
|- | |- | ||
|rowspan=" | |{{Name|Deluxe Tree|size=48}} | ||
|[[Crane Game]] during any [[Season]] | |||
|{{Price|500}} | |||
|- | |||
|rowspan="5"|{{Name|Indoor Palm|size=24}} | |||
|[[File:Robin Icon.png|24px|link=]] [[Carpenter's Shop]] | |[[File:Robin Icon.png|24px|link=]] [[Carpenter's Shop]] | ||
|{{Price|600}} | |||
|- | |- | ||
|[[ | |[[Crane Game]] during [[Summer]] | ||
|{{Price|500}} | |||
|- | |- | ||
|[[File:Penny Icon.png|24px|link=]] [[Penny#Fourteen Hearts|Penny's 14-Heart event]] | |||
|[[File: | |N/A | ||
|- | |- | ||
|[[File:Furniture Catalogue.png|24px|link=]] [[Furniture Catalogue]] | |[[File:Furniture Catalogue.png|24px|link=]] [[Furniture Catalogue]] | ||
| | |{{Price|0}} | ||
|- | |||
|[[File:Traveling Cart Icon.png|24px|link=]] [[Traveling Cart]] | |||
|{{Tprice|furniture}} | |||
|- | |- | ||
|rowspan=" | |rowspan="3"|{{Name|Manicured Pine|size=24}} | ||
|[[File:Robin Icon.png|24px|link=]] [[Carpenter's Shop]] | |[[File:Robin Icon.png|24px|link=]] [[Carpenter's Shop]] | ||
|{{Price|500}} | |||
|- | |- | ||
|[[File:Furniture Catalogue.png|24px|link=]] [[Furniture Catalogue]] | |[[File:Furniture Catalogue.png|24px|link=]] [[Furniture Catalogue]] | ||
|{{Price|0}} | |||
|- | |- | ||
|rowspan=" | |[[File:Traveling Cart Icon.png|24px|link=]] [[Traveling Cart]] | ||
|{{Tprice|furniture}} | |||
|- | |||
|rowspan="3"|{{Name|Topiary Tree|size=24}} | |||
|[[File:Robin Icon.png|24px|link=]] [[Carpenter's Shop]] | |[[File:Robin Icon.png|24px|link=]] [[Carpenter's Shop]] | ||
|{{Price|500}} | |||
|- | |- | ||
|[[File:Furniture Catalogue.png|24px|link=]] [[Furniture Catalogue]] | |[[File:Furniture Catalogue.png|24px|link=]] [[Furniture Catalogue]] | ||
|{{Price|0}} | |||
|- | |||
|[[File:Traveling Cart Icon.png|24px|link=]] [[Traveling Cart]] | |||
|{{Tprice|furniture}} | |||
|- | |- | ||
| | |rowspan="2"|{{Name|Dried Sunflowers|size=24}} | ||
|[[Stardew Valley Fair]] | |||
= | |{{Price|100|token}} | ||
{| | |||
|- | |- | ||
| | |[[Crane Game]] during [[Fall]] | ||
{| | |{{Price|500}} | ||
|- | |- | ||
|rowspan=" | |rowspan="3"|{{Name|Small Plant|size=24}} | ||
|[[File:Robin Icon.png|24px|link=]] [[Carpenter's Shop]] | |[[File:Robin Icon.png|24px|link=]] [[Carpenter's Shop]] | ||
|{{Price|250}} | |||
|- | |- | ||
|[[File:Furniture Catalogue.png|24px|link=]] [[Furniture Catalogue]] | |[[File:Furniture Catalogue.png|24px|link=]] [[Furniture Catalogue]] | ||
|{{Price|0}} | |||
|- | |- | ||
|rowspan=" | |[[File:Traveling Cart Icon.png|24px|link=]] [[Traveling Cart]] | ||
|{{Tprice|furniture}} | |||
|- | |||
|rowspan="3"|{{Name|Table Plant|size=24}} | |||
|[[File:Robin Icon.png|24px|link=]] [[Carpenter's Shop]] | |[[File:Robin Icon.png|24px|link=]] [[Carpenter's Shop]] | ||
|{{Price|250}} | |||
|- | |- | ||
|[[File:Furniture Catalogue.png|24px|link=]] [[Furniture Catalogue]] | |[[File:Furniture Catalogue.png|24px|link=]] [[Furniture Catalogue]] | ||
|{{Price|0}} | |||
|- | |- | ||
|rowspan=" | |[[File:Traveling Cart Icon.png|24px|link=]] [[Traveling Cart]] | ||
|{{Tprice|furniture}} | |||
|- | |||
|rowspan="5"|{{Name|Tree of the Winter Star|size=48}} | |||
|[[File:Robin Icon.png|24px|link=]] [[Carpenter's Shop]] | |[[File:Robin Icon.png|24px|link=]] [[Carpenter's Shop]] | ||
| | |{{Price|5000}} | ||
|- | |||
|[[Crane Game]] during [[Winter]] | |||
|{{Price|500}} | |||
|- | |||
|[[Festival of Ice]] | |||
|{{Price|5000}} | |||
|- | |- | ||
|[[File:Furniture Catalogue.png|24px|link=]] [[Furniture Catalogue]] | |[[File:Furniture Catalogue.png|24px|link=]] [[Furniture Catalogue]] | ||
| | |{{Price|0}} | ||
|- | |||
|[[File:Traveling Cart Icon.png|24px|link=]] [[Traveling Cart]] | |||
|{{Tprice|furniture}} | |||
|} | |||
|style="vertical-align: top;"| | |style="vertical-align: top;"| | ||
{|class="wikitable | {|class="wikitable" | ||
!Item | !Item | ||
!Source | !Source | ||
! | !Price | ||
|- | |- | ||
|rowspan="2"|{{Name| | |rowspan="2"|{{Name|Tree Column|size=24}} | ||
|[[File:Robin Icon.png|24px|link=]] [[Carpenter's Shop]] | |||
|{{Price|1000}} | |||
|- | |- | ||
|[[File:Furniture Catalogue.png|24px|link=]] [[Furniture Catalogue]] | |||
|[[File: | |{{Price|0}} | ||
|- | |- | ||
|rowspan="2"|{{Name| | |rowspan="2"|{{Name|S. Pine|size=24}} | ||
|[[File:Robin Icon.png|24px|link=]] [[Carpenter's Shop]] | |||
|{{Price|800}} | |||
|- | |- | ||
|[[ | |[[File:Furniture Catalogue.png|24px|link=]] [[Furniture Catalogue]] | ||
|{{Price|0}} | |||
|- | |- | ||
|rowspan="2"|{{Name| | |rowspan="2"|{{Name|Bonsai Tree|size=24}} | ||
|[[File:Robin Icon.png|24px|link=]] [[Carpenter's Shop]] | |||
|{{Price|800}} | |||
|- | |- | ||
|[[File: | |[[File:Furniture Catalogue.png|24px|link=]] [[Furniture Catalogue]] | ||
|{{Price|0}} | |||
|- | |- | ||
|} | |{{Name|Tall House Plant|size=24}} | ||
|[[File:Furniture Catalogue.png|24px|link=]] [[Furniture Catalogue]] | |||
|{{Price|0}} | |||
|- | |- | ||
|} | |{{Name|Corn Plant|size=24}} | ||
|[[File:Furniture Catalogue.png|24px|link=]] [[Furniture Catalogue]] | |||
|{{Price|0}} | |||
|- | |- | ||
| | |{{Name|Plastic Plant|size=24}} | ||
|[[File:Joja Furniture Catalogue.png|16px|link=]] [[Joja Furniture Catalogue]] | |||
|{{Price|0}} | |||
|- | |- | ||
|{{Name|Plastic Sapling|size=24}} | |||
|[[File: | |[[File:Joja Furniture Catalogue.png|16px|link=]] [[Joja Furniture Catalogue]] | ||
|{{Price|0}} | |||
|- | |- | ||
|[[File: | |{{Name|Potted Red Mushroom|size=24}} | ||
|[[File:Wizard Catalogue.png|16px|link=]] [[Wizard Catalogue]] | |||
|{{Price|0}} | |||
|- | |- | ||
|{{Name|Curly Tree|size=24}} | |||
|[[File: | |[[File:Wizard Catalogue.png|16px|link=]] [[Wizard Catalogue]] | ||
|{{Price|0}} | |||
|- | |- | ||
|[[File: | |{{Name|Swamp Plant|size=24}} | ||
|[[File:Wizard Catalogue.png|16px|link=]] [[Wizard Catalogue]] | |||
|{{Price|0}} | |||
|- | |- | ||
|{{Name|Junimo Flower|size=24}} | |||
|[[File: | |[[File:Junimo Catalogue.png|16px|link=]] [[Junimo Catalogue]] | ||
|{{Price|0}} | |||
|- | |- | ||
|[[File: | |{{Name|Junimo Plant|size=32}} | ||
|[[File:Junimo Catalogue.png|16px|link=]] [[Junimo Catalogue]] | |||
|{{Price|0}} | |||
|- | |- | ||
|{{Name| | |{{Name|Junimo Tree|size=48}} | ||
|[[File: | |[[File:Junimo Catalogue.png|16px|link=]] [[Junimo Catalogue]] | ||
| | |{{Price|0}} | ||
|- | |||
|{{Name|Retro Flower|size=24}} | |||
|[[File:Retro Catalogue.png|16px|link=]] [[Retro Catalogue]] | |||
|{{Price|0}} | |||
|- | |||
|{{Name|Retro Plant|size=24}} | |||
|[[File:Retro Catalogue.png|16px|link=]] [[Retro Catalogue]] | |||
|{{Price|0}} | |||
|- | |||
|} | |||
|- | |||
|} | |||
===Decorative Hanging Plants=== | |||
Wall hanging plants cannot be placed outside. | |||
All decorative hanging plants available in the [[Furniture Catalogue]] can also be purchased from the [[Traveling Cart]] for {{Tprice|furniture}}. | |||
{| | |||
|- | |||
|style="vertical-align: top;"| | |||
{|class="wikitable" | |||
!Item | |||
!Source | |||
!Price | |||
|- | |- | ||
|rowspan="2"| | |rowspan="2"|[[File:Ceiling Leaves 1.png|24px]] [[File:Ceiling Leaves 2.png|24px]] [[File:Ceiling Leaves 3.png|24px]] [[Ceiling Leaves]] | ||
|[[File: | |[[Luau]] | ||
| | |{{Price|400}} | ||
|- | |- | ||
|[[File:Furniture Catalogue.png|24px|link=]] [[Furniture Catalogue]] | |[[File:Furniture Catalogue.png|24px|link=]] [[Furniture Catalogue]] | ||
|{{Price|0}} | |||
|- | |- | ||
|rowspan="2"| | |rowspan="2"|[[File:Ceiling Leaves 4.png|24px]] [[File:Ceiling Leaves 5.png|24px]] [[Ceiling Leaves]] | ||
|[[File: | |[[Flower Dance]] | ||
| | |{{Price|400}} | ||
|- | |- | ||
|[[File:Furniture Catalogue.png|24px|link=]] [[Furniture Catalogue]] | |[[File:Furniture Catalogue.png|24px|link=]] [[Furniture Catalogue]] | ||
|{{Price|0}} | |||
|- | |- | ||
|rowspan="2"| | |rowspan="2"|[[File:Jungle Decal 1.png|24px]] [[File:Jungle Decal 2.png|24px]] [[File:Jungle Decal 3.png|24px]] [[File:Jungle Decal 4.png|24px]] [[Jungle Decal]]s | ||
|[[File: | |[[Luau]] | ||
| | |{{Price|800}} | ||
|- | |- | ||
|[[File:Furniture Catalogue.png|24px|link=]] [[Furniture Catalogue]] | |[[File:Furniture Catalogue.png|24px|link=]] [[Furniture Catalogue]] | ||
|{{Price|0}} | |||
|- | |- | ||
|{{Name| | |rowspan="2"|{{Name|L. Light String|size=48}} | ||
|[[File:Robin Icon.png|24px|link=]] [[Carpenter's Shop]] | |||
|[[File: | |{{Price|400}} | ||
| | |||
|- | |- | ||
|{{Name| | |[[File:Furniture Catalogue.png|24px|link=]] [[Furniture Catalogue]] | ||
|[[File: | |{{Price|0}} | ||
|- | |||
|{{Name|Indoor Hanging Basket|size=24}} | |||
|[[Crane Game]] during [[Spring]] | |||
|{{Price|500}} | |||
|- | |||
|{{Name|Winter Tree Decal}} | |||
|[[Crane Game]] during [[Winter]] | |||
|{{Price|500}} | |||
|- | |||
|rowspan="2"|{{Name|Wall Flower|size=24}} | |||
|[[Flower Dance]] | |||
|{{Price|800}} | |||
|- | |||
|[[File:Furniture Catalogue.png|24px|link=]] [[Furniture Catalogue]] | |||
|{{Price|0}} | |||
|} | |} | ||
|style="vertical-align: top;"| | |style="vertical-align: top;"| | ||
{|class="wikitable | {|class="wikitable" | ||
!Item | !Item | ||
!Source | !Source | ||
! | !Price | ||
|- | |- | ||
|rowspan="2"|{{Name| | |rowspan="2"|{{Name|S. Wall Flower|size=24}} | ||
|[[ | |[[Flower Dance]] | ||
| | |{{Price|800}} | ||
|- | |- | ||
|[[File:Furniture Catalogue.png|24px|link=]] [[Furniture Catalogue]] | |[[File:Furniture Catalogue.png|24px|link=]] [[Furniture Catalogue]] | ||
|{{Price|0}} | |||
|- | |- | ||
|{{Name|Palm Wall Ornament|size=24}} | |||
| | |{{NPC|Island Trader|size=24}} | ||
| | |{{Name|Pineapple|1}} | ||
|- | |- | ||
| | |{{Name|Wall Basket|size=48}} | ||
| | |[[Fishing]] at the [[Secret Woods]] pond | ||
|N/A | |||
|- | |- | ||
|rowspan="2"|{{Name|Wall Palm|size=24}} | |||
|[[Luau]] | |||
|{{Price|1000}} | |||
|rowspan="2"|{{Name| | |||
|[[ | |||
|{{Price| | |||
|- | |- | ||
|[[File:Furniture Catalogue.png|24px|link=]] [[Furniture Catalogue]] | |[[File:Furniture Catalogue.png|24px|link=]] [[Furniture Catalogue]] | ||
|{{Price|0}} | |||
|- | |- | ||
|{{Name| | |rowspan="2"|{{Name|Wall Cactus|size=24}} | ||
|[[File: | |[[File:Sandy Icon.png|24px|link=]] [[Oasis]] | ||
| | |{{Price|700}} | ||
|- | |- | ||
|[[File:Furniture Catalogue.png|24px|link=]] [[Furniture Catalogue]] | |||
|[[File: | |{{Price|0}} | ||
| | |||
|- | |- | ||
|{{Name| | |{{Name|Leafy Wall Panel|size=24}} | ||
|[[File: | |[[File:Junimo Catalogue.png|16px|link=]] [[Junimo Catalogue]] | ||
| | |{{Price|0}} | ||
|- | |- | ||
|{{Name| | |{{Name|Dark Leafy Wall Panel|size=24}} | ||
|[[File: | |[[File:Junimo Catalogue.png|16px|link=]] [[Junimo Catalogue]] | ||
| | |{{Price|0}} | ||
|- | |- | ||
|{{Name| | |{{Name|Light Leafy Wall Panel|size=24}} | ||
|[[File:Junimo Catalogue.png|16px|link=]] [[Junimo Catalogue]] | |[[File:Junimo Catalogue.png|16px|link=]] [[Junimo Catalogue]] | ||
|{{Price|0}} | |||
|- | |- | ||
|} | |} | ||
| Line 2,003: | Line 2,238: | ||
|} | |} | ||
== | ===Seasonal Plants=== | ||
= | [[Seasonal Plant|Seasonal plants]] can be placed outside. Once placed, their appearance changes with the season. | ||
Seasonal plants are not available in the [[Furniture Catalogue]] and cannot be purchased from the [[Traveling Cart]]. | |||
{|class="wikitable" | {|class="wikitable" | ||
|- | |||
!Spring<br />Appearance | |||
!Summer<br />Appearance | |||
!Fall<br />Appearance | |||
!Winter<br />Appearance | |||
!Source | |||
!Price | |||
|- | |||
|rowspan="2"|[[File:Seasonal Plant 1 Spring.png|center|32px]] | |||
|rowspan="2"|[[File:Seasonal Plant 1 Summer.png|center|32px]] | |||
|rowspan="2"|[[File:Seasonal Plant 1 Fall.png|center|32px]] | |||
|rowspan="2"|[[File:Seasonal Plant 1 Winter.png|center|32px]] | |||
|[[Egg Festival]] | |||
|{{Price|350}} | |||
|- | |- | ||
|[[Night Market]] | |||
|{{Price|500}} | |||
|- | |- | ||
|[[File: | |rowspan="2"|[[File:Seasonal Plant 2 Spring.png|center|32px]] | ||
|[[File: | |rowspan="2"|[[File:Seasonal Plant 2 Summer.png|center|32px]] | ||
|[[File: | |rowspan="2"|[[File:Seasonal Plant 2 Fall.png|center|32px]] | ||
|[[File: | |rowspan="2"|[[File:Seasonal Plant 2 Winter.png|center|32px]] | ||
|[[File: | |[[Egg Festival]] | ||
|[[File: | |{{Price|350}} | ||
|[[File: | |- | ||
|[[File: | |[[Night Market]] | ||
|[[File: | |{{Price|500}} | ||
|[[File: | |- | ||
|[[File: | |rowspan="2"|[[File:Seasonal Plant 3 Spring.png|center|32px]] | ||
|[[File: | |rowspan="2"|[[File:Seasonal Plant 3 Summer.png|center|32px]] | ||
|[[File: | |rowspan="2"|[[File:Seasonal Plant 3 Fall.png|center|32px]] | ||
|[[File: | |rowspan="2"|[[File:Seasonal Plant 3 Winter.png|center|32px]] | ||
|[[File: | |[[Flower Dance]] | ||
|{{Price|350}} | |||
|- | |||
|[[Night Market]] | |||
|{{Price|500}} | |||
|- | |||
|rowspan="2"|[[File:Seasonal Plant 4 Spring.png|center|32px]] | |||
|rowspan="2"|[[File:Seasonal Plant 4 Summer.png|center|32px]] | |||
|rowspan="2"|[[File:Seasonal Plant 4 Fall.png|center|32px]] | |||
|rowspan="2"|[[File:Seasonal Plant 4 Winter.png|center|32px]] | |||
|[[File:Sandy Icon.png|24px|link=]] [[Oasis]] | |||
|{{Price|100}} | |||
|- | |||
|[[Night Market]] | |||
|{{Price|500}} | |||
|- | |||
|rowspan="2"|[[File:Seasonal Plant 5 Spring.png|center|32px]] | |||
|rowspan="2"|[[File:Seasonal Plant 5 Summer.png|center|32px]] | |||
|rowspan="2"|[[File:Seasonal Plant 5 Fall.png|center|32px]] | |||
|rowspan="2"|[[File:Seasonal Plant 5 Winter.png|center|32px]] | |||
|[[File:Robin Icon.png|24px|link=]] [[Carpenter's Shop]] | |||
|{{Price|400}} | |||
|- | |||
|[[Night Market]] | |||
|{{Price|500}} | |||
|- | |||
|rowspan="2"|[[File:Seasonal Plant 6 Spring.png|center|32px]] | |||
|rowspan="2"|[[File:Seasonal Plant 6 Summer.png|center|32px]] | |||
|rowspan="2"|[[File:Seasonal Plant 6 Fall.png|center|32px]] | |||
|rowspan="2"|[[File:Seasonal Plant 6 Winter.png|center|32px]] | |||
|[[Flower Dance]] | |||
|{{Price|350}} | |||
|- | |- | ||
|[[Night Market]] | |||
|{{Price|500}} | |||
|} | |} | ||
=== | ===Fancy House Plants=== | ||
[[ | Each of the [[Fancy House Plant#Fancy House Plants|Fancy House Plants]] and the first three [[Fancy House Plant#House Plants|House Plants]] can all be obtained from the Prize Machine inside the [[Mayor's Manor]], while the last two [[Fancy House Plant#House Plants|House Plants]] can be obtained from the Crane Machine inside the [[Movie Theater]]. | ||
{| | {| | ||
|- | |- | ||
|style="vertical-align: top;"| | |style="vertical-align: top;"| | ||
{|class="wikitable" | |||
|- | |||
!colspan="3"|Fancy House Plants | |||
|- | |||
|[[File:Fancy House Plant.png|48px]] | |||
|[[File:Fancy House Plant 2.png|48px]] | |||
|[[File:Fancy House Plant 3.png|48px]] | |||
|- | |||
|} | |||
|style="vertical-align: top;"| | |style="vertical-align: top;"| | ||
{|class="wikitable" style="margin-left: 4px;" | |||
|- | |||
!colspan="5"|House Plants | |||
|- | |||
|[[File:Fancy House Plant 2 1.png|36px]] | |||
|[[File:Fancy House Plant 2 2.png|36px]] | |||
|[[File:Fancy House Plant 2 3.png|36px]] | |||
|[[File:Fancy House Plant 2 4.png|36px]] | |||
|[[File:Fancy House Plant 2 5.png|36px]] | |||
|- | |||
|} | |||
|- | |- | ||
|} | |} | ||
=== | ==Paintings== | ||
Paintings cannot be placed outside. | |||
All paintings available in the [[Furniture Catalogue]] can also be purchased from the [[Traveling Cart]] for {{Tprice|furniture}}. | |||
{| | |||
{|class="wikitable | |- | ||
|style="vertical-align: top;"| | |||
{|class="wikitable" | |||
!Item | !Item | ||
!Source | !Source | ||
!Price | !Price | ||
|- | |- | ||
| | |{{Name|'The Muzzamaroo'|size=48}} | ||
|[[File:Furniture Catalogue.png|24px|link=]] [[Furniture Catalogue]] | |||
|{{Price|0}} | |||
|- | |- | ||
|[[File: | |{{Name|'A Night On Eco-Hill'|size=48}} | ||
|[[File:Gunther Icon.png|24px|link=]] [[Museum|Museum Donation]] | |||
|Total Items (20) | |||
|- | |- | ||
| | |{{Name|'Pathways'|size=48}} | ||
|[[File:Furniture Catalogue.png|24px|link=]] [[Furniture Catalogue]] | |||
|{{Price|0}} | |||
|- | |- | ||
|{{ | |{{Name|'Queen of the Gem Sea'|size=64}} | ||
|[[File:Furniture Catalogue.png|24px|link=]] [[Furniture Catalogue]] | |||
|{{Price|0}} | |||
|- | |- | ||
|{{ | |{{Name|'Vanilla Villa'|size=48}} | ||
|[[File:Furniture Catalogue.png|24px|link=]] [[Furniture Catalogue]] | |||
|{{Price|0}} | |||
|- | |- | ||
|{{ | |rowspan="2"|{{Name|'Primal Motion'|size=48}} | ||
|[[File:Mr. Qi Icon.png|24px|link=]] [[Casino]] | |||
|{{Price|5000|Qi}} | |||
|- | |- | ||
| | |[[File:Furniture Catalogue.png|24px|link=]] [[Furniture Catalogue]] | ||
|{{Price|0}} | |||
|- | |- | ||
|{{ | |{{Name|'Jade Hills'|size=64}} | ||
|[[File:Gunther Icon.png|24px|link=]] [[Museum|Museum Donation]] | |||
|Total Items (25) | |||
|- | |- | ||
|{{ | |{{Name|'Sun 44'|size=48|link='Sun 44'{{!}}'Sun #44'}} | ||
||[[File:Furniture Catalogue.png|24px|link=]] [[Furniture Catalogue]] | |||
|{{Price|0}} | |||
|- | |- | ||
|{{ | |rowspan="3"|{{Name|'Spires'|size=48}} | ||
|[[File:Robin Icon.png|24px|link=]] [[Carpenter's Shop]] | |||
|{{Price|800}} | |||
|- | |||
|[[File:Mr. Qi Icon.png|24px|link=]] [[Casino]] | |||
|{{Price|3000|Qi}} | |||
|- | |- | ||
| | |[[File:Furniture Catalogue.png|24px|link=]] [[Furniture Catalogue]] | ||
|{{Price|0}} | |||
|- | |- | ||
| | |rowspan="2"|{{Name|'Highway 89'|size=48}} | ||
|[[File:Mr. Qi Icon.png|24px|link=]] [[Casino]] | |||
= | |{{Price|4000|Qi}} | ||
{| | |||
|- | |- | ||
|[[File:Furniture Catalogue.png|24px|link=]] [[Furniture Catalogue]] | |||
|{{Price|0}} | |||
|- | |- | ||
| | |rowspan="2"|{{Name|Calico Falls|size=48}} | ||
|[[File:Robin Icon.png|24px|link=]] [[Carpenter's Shop]] | |||
|[[File: | |{{Price|750}} | ||
| | |||
|{{ | |||
|- | |- | ||
|[[File: | |[[File:Furniture Catalogue.png|24px|link=]] [[Furniture Catalogue]] | ||
|{{Price|0}} | |||
|{{ | |||
|- | |- | ||
| | |rowspan="2"|{{Name|Needlepoint Flower|size=36}} | ||
|[[File:Robin Icon.png|24px|link=]] [[Carpenter's Shop]] | |||
|{{Price|500}} | |||
|[[File: | |||
| | |||
|{{ | |||
|- | |- | ||
|[[File: | |[[File:Furniture Catalogue.png|24px|link=]] [[Furniture Catalogue]] | ||
|{{Price|0}} | |||
|{{ | |||
|- | |- | ||
| | |rowspan="2"|{{Name|'Sun 45'|size=36|link='Sun 45'{{!}}'Sun #45'}} | ||
| | |[[File:Robin Icon.png|24px|link=]] [[Carpenter's Shop]] | ||
|[[File: | |{{Price|350}} | ||
| | |||
|{{ | |||
|- | |- | ||
|[[File: | |[[File:Furniture Catalogue.png|24px|link=]] [[Furniture Catalogue]] | ||
| | |{{Price|0}} | ||
| | |- | ||
|[[File: | |rowspan="2"|{{Name|'Little Tree'|size=36}} | ||
|[[File:Robin Icon.png|24px|link=]] [[Carpenter's Shop]] | |||
|{{ | |{{Price|350}} | ||
| | |- | ||
|[[File:Furniture Catalogue.png|24px|link=]] [[Furniture Catalogue]] | |||
|{{Price|0}} | |||
{| | |||
|- | |- | ||
| | |rowspan="2"|{{Name|'Blueberries'|size=36}} | ||
|[[File:Robin Icon.png|24px|link=]] [[Carpenter's Shop]] | |||
|{{Price|250}} | |||
|- | |||
|[[File:Furniture Catalogue.png|24px|link=]] [[Furniture Catalogue]] | |||
|{{Price|0}} | |||
|- | |||
|rowspan="2"|{{Name|'Blue City'|size=36}} | |||
|[[File:Robin Icon.png|24px|link=]] [[Carpenter's Shop]] | |||
|{{Price|250}} | |||
|- | |||
| | |[[File:Furniture Catalogue.png|24px|link=]] [[Furniture Catalogue]] | ||
|{{Price|0}} | |||
|- | |- | ||
| | |rowspan="2"|{{Name|'Dancing Grass'|size=36}} | ||
|[[File:Robin Icon.png|24px|link=]] [[Carpenter's Shop]] | |||
|{{Price|400}} | |||
|- | |||
|[[File:Furniture Catalogue.png|24px|link=]] [[Furniture Catalogue]] | |||
|{{Price|0}} | |||
|- | |||
|{{Name|'VGA Paradise'|size=48}} | |||
|[[File:Furniture Catalogue.png|24px|link=]] [[Furniture Catalogue]] | |||
[[ | |{{Price|0}} | ||
|- | |||
|{{Name|'Kitemaster '95'|size=48}} | |||
|[[File:Furniture Catalogue.png|24px|link=]] [[Furniture Catalogue]] | |||
|{{Price|0}} | |||
|- | |||
|rowspan="3"|{{Name|Colorful Set|size=36}} | |||
|[[File:Robin Icon.png|24px|link=]] [[Carpenter's Shop]] | |||
|{{Price|500}} | |||
|- | |||
|[[Egg Festival]] | |||
|{{Price|500}} | |||
|- | |||
|[[File:Furniture Catalogue.png|24px|link=]] [[Furniture Catalogue]] | |||
|{{Price|0}} | |||
{| | |- | ||
|{{Name|My First Painting|size=36}} | |||
|[[File:Leah Icon.png|24px|link=]] [[Leah#Fourteen Hearts|Leah's 14-Heart event]] | |||
|N/A | |||
|- | |||
|{{Name|'Volcano' Photo|size=36}} | |||
|{{NPC|Island Trader|size=24}} | |||
|{{Name|Mango|5}} | |||
|- | |- | ||
|{{Name|Foliage Print|size=48}} | |||
|[[Fishing]] at [[Ginger Island#Island North|Island North]] | |||
|N/A | |||
|} | |||
|style="vertical-align: top;"| | |style="vertical-align: top;"| | ||
{|class="wikitable | {|class="wikitable" | ||
!Item | !Item | ||
!Source | |||
!Price | |||
|- | |||
|{{Name|'Boat'|size=48}} | |||
|[[Fishing]] at the [[Farm Maps#Beach|Beach Farm]] | |||
|N/A | |||
|- | |||
|{{Name|'Vista'|size=48}} | |||
|[[Fishing]] at the [[Spa]] | |||
|N/A | |||
|- | |||
|rowspan="2"|{{Name|'Jade Hills Extended'|size=64}} | |||
|[[File:Sandy Icon.png|24px|link=]] [[Oasis]] | |||
|{{Price|5000}} | |||
|- | |||
|[[File:Furniture Catalogue.png|24px|link=]] [[Furniture Catalogue]] | |||
|{{Price|0}} | |||
|- | |- | ||
|rowspan="2"|{{Name|'Frozen Dreams'|size=48}} | |||
|[[Festival of Ice]] | |||
|{{Price|2000}} | |||
|- | |- | ||
|[[File:Furniture Catalogue.png|24px|link=]] [[Furniture Catalogue]] | |||
|{{Price|0}} | |||
|- | |- | ||
|} | |{{Name|'Physics 101'|size=36}} | ||
|[[Fishing]] at the top of the [[Volcano Dungeon]] | |||
|N/A | |||
[[ | |||
|- | |- | ||
|{{ | |{{Name|Mounted Trout|size=48}} | ||
|[[Trout Derby#Prizes|Prize]] from the [[Trout Derby]] | |||
|N/A | |||
|- | |- | ||
|{{ | |{{Name|'Squid Kid'|size=48}} | ||
|[[SquidFest#Prizes|Prize]] from the [[SquidFest]] | |||
|N/A | |||
|- | |- | ||
|{{ | |{{Name|Pig Painting|size=48}} | ||
|[[Mayor's Manor#Prize Machine|Prize Machine]] | |||
|{{Name|Prize Ticket|1}} | |||
|- | |- | ||
|{{ | |{{Name|Sun Dunes|size=32}} | ||
|[[Desert Festival]] | |||
|{{Price|30|Calico}} | |||
|- | |- | ||
|{{ | |{{Name|J. Painting|size=32}} | ||
|[[File:Joja Furniture Catalogue.png|16px|link=]] [[Joja Furniture Catalogue]] | |||
|{{Price|0}} | |||
|- | |- | ||
|{{ | |{{Name|Joja Cola Painting|size=32}} | ||
|[[File:Joja Furniture Catalogue.png|16px|link=]] [[Joja Furniture Catalogue]] | |||
|{{Price|0}} | |||
|- | |- | ||
|{{ | |{{Name|Joja HQ Painting|size=32}} | ||
|[[File:Joja Furniture Catalogue.png|16px|link=]] [[Joja Furniture Catalogue]] | |||
|{{Price|0}} | |||
|- | |- | ||
|{{ | |{{Name|'Runes'|size=32}} | ||
|[[File:Wizard Catalogue.png|16px|link=]] [[Wizard Catalogue]] | |||
|{{Price|0}} | |||
|- | |- | ||
|{{ | |{{Name|'Wizard's Tower'|size=32}} | ||
| | |[[File:Wizard Catalogue.png|16px|link=]] [[Wizard Catalogue]] | ||
|{{Price|0}} | |||
|- | |- | ||
|{{Name|'Void Swirls'|size=32}} | |||
|[[File:Wizard Catalogue.png|16px|link=]] [[Wizard Catalogue]] | |||
|{{Price|0}} | |||
|- | |- | ||
|} | |{{Name|Glyph|size=32}} | ||
|[[File:Wizard Catalogue.png|16px|link=]] [[Wizard Catalogue]] | |||
== | |{{Price|0}} | ||
|- | |||
|{{Name|'Community Center'|size=32}} | |||
|[[File:Junimo Catalogue.png|16px|link=]] [[Junimo Catalogue]] | |||
{| | |{{Price|0}} | ||
|- | |||
|{{Name|'Little Buddies'|size=32}} | |||
|[[File:Junimo Catalogue.png|16px|link=]] [[Junimo Catalogue]] | |||
|{{Price|0}} | |||
|- | |||
|{{Name|'Stardrop'|size=32}} | |||
|[[File:Junimo Catalogue.png|16px|link=]] [[Junimo Catalogue]] | |||
|{{Price|0}} | |||
|- | |||
|{{Name|'Hut'|size=32}} | |||
|[[File:Junimo Catalogue.png|16px|link=]] [[Junimo Catalogue]] | |||
|{{Price|0}} | |||
|- | |||
|{{Name|'Groovy'|size=32}} | |||
|[[File:Retro Catalogue.png|16px|link=]] [[Retro Catalogue]] | |||
|{{Price|0}} | |||
|- | |- | ||
| | |{{Name|'Abstract'|size=32}} | ||
|[[File:Retro Catalogue.png|16px|link=]] [[Retro Catalogue]] | |||
|{{Price|0}} | |||
|- | |- | ||
|} | |{{Name|'Starship'|size=32}} | ||
|[[File:Retro Catalogue.png|16px|link=]] [[Retro Catalogue]] | |||
|{{Price|0}} | |||
{| | |||
|- | |- | ||
| | |{{Name|'Binary'|size=32}} | ||
|[[File:Retro Catalogue.png|16px|link=]] [[Retro Catalogue]] | |||
|{{Price|0}} | |||
|- | |- | ||
|{{Name|'Checkers'|size=32}} | |||
|[[File:Retro Catalogue.png|16px|link=]] [[Retro Catalogue]] | |||
|{{Price|0}} | |||
|- | |- | ||
| | |{{Name|'UFO'|size=32}} | ||
| | |[[File:Retro Catalogue.png|16px|link=]] [[Retro Catalogue]] | ||
|{{Price|0}} | |||
|- | |- | ||
| | |} | ||
|- | |- | ||
| | |} | ||
| | ===Small Painting Position=== | ||
Note that some small paintings hang higher or lower on the wall than others. | |||
[[File:SmallPaintingsPosition.png]]{{clear}} | |||
===Night Market Paintings=== | |||
Famous Painter Lupini sells a different painting each day of the [[Night Market]] for {{Price|1200}}. The paintings rotate over a 3-year schedule, for a total of 9 paintings. | |||
{| | |||
|- | |- | ||
| | |style="vertical-align: top;"| | ||
{|class="wikitable" | |||
!Item | |||
!Day | |||
!Years | |||
!Price | |||
|- | |- | ||
| | |{{Name|'Red Eagle'|size=36}} || [[Winter]] 15 || 1, 4, 7, etc. ||{{Price|1200}} | ||
| | |||
|- | |- | ||
|{{Name|'Portrait Of A Mermaid'|size=36}} || [[Winter]] 16 || 1, 4, 7, etc. ||{{Price|1200}} | |||
|- | |- | ||
| | |{{Name|'Solar Kingdom'|size=36}} || [[Winter]] 17 || 1, 4, 7, etc. ||{{Price|1200}} | ||
| | |||
|- | |- | ||
| | |{{Name|'Clouds'|size=36}} || [[Winter]] 15 || 2, 5, 8, etc. ||{{Price|1200}} | ||
|- | |- | ||
| | |{{Name|'1000 Years From Now'|size=36}} || [[Winter]] 16 || 2, 5, 8, etc. ||{{Price|1200}} | ||
| | |||
|- | |- | ||
| | |{{Name|'Three Trees'|size=36}} || [[Winter]] 17 || 2, 5, 8, etc. ||{{Price|1200}} | ||
|- | |- | ||
| | |{{Name|'The Serpent'|size=36}} || [[Winter]] 15 || 3, 6, 9, etc. ||{{Price|1200}} | ||
| | |||
| | |||
|- | |- | ||
| | |{{Name|'Tropical Fish 173'|size=36|link='Tropical Fish 173'{{!}}'Tropical Fish #173'}} || [[Winter]] 16 || 3, 6, 9, etc. ||{{Price|1200}} | ||
|- | |- | ||
|{{Name|'Land Of Clay'|size=36}} || [[Winter]] 17 || 3, 6, 9, etc. ||{{Price|1200}} | |||
|} | |||
| | ===Portraits=== | ||
| | |||
|[[ | |||
| | |||
| | |||
Portraits cannot be placed outside. | |||
Once you have 14 hearts with a villager, their portrait will show up every time the [[Traveling Cart]] visits. | |||
{| | {| | ||
|- | |- | ||
|style="vertical-align: top;"| | |style="vertical-align: top;"| | ||
{|class="wikitable | {|class="wikitable" | ||
!Item | !Item | ||
!How to Obtain | |||
!Source | !Source | ||
! | !Price | ||
|- | |- | ||
|{{Name|Abigail Portrait}} | |||
|[[ | |[[File:Abigail Icon.png|24px|link=]] [[Abigail#Fourteen Hearts|Abigail's 14-Heart event]] | ||
| | |[[File:Traveling Cart Icon.png|24px|link=]] [[Traveling Cart]] | ||
|{{Price|30000}} | |||
|- | |- | ||
|[[File: | |{{Name|Emily Portrait}} | ||
| | |[[File:Emily Icon.png|24px|link=]] [[Emily#Fourteen Hearts|Emily's 14-Heart event]] | ||
|[[File:Traveling Cart Icon.png|24px|link=]] [[Traveling Cart]] | |||
|{{Price|30000}} | |||
|- | |- | ||
| | |{{Name|Haley Portrait}} | ||
|[[File:Haley Icon.png|24px|link=]] [[Haley#Fourteen Hearts|Haley's 14-Heart event]] | |||
|[[File:Traveling Cart Icon.png|24px|link=]] [[Traveling Cart]] | |||
|{{Price|30000}} | |||
|- | |- | ||
|[[ | |{{Name|Leah Portrait}} | ||
| | |[[File:Leah Icon.png|24px|link=]] [[Leah#Fourteen Hearts|Leah's 14-Heart event]] | ||
|[[File:Traveling Cart Icon.png|24px|link=]] [[Traveling Cart]] | |||
|{{Price|30000}} | |||
|- | |- | ||
| | |{{Name|Maru Portrait}} | ||
|[[File:Maru Icon.png|24px|link=]] [[Maru#Fourteen Hearts|Maru's 14-Heart event]] | |||
|[[File:Traveling Cart Icon.png|24px|link=]] [[Traveling Cart]] | |||
|{{Price|30000}} | |||
|- | |- | ||
|[[ | |{{Name|Penny Portrait}} | ||
| | |[[File:Penny Icon.png|24px|link=]] [[Penny#Fourteen Hearts|Penny's 14-Heart event]] | ||
|[[File:Traveling Cart Icon.png|24px|link=]] [[Traveling Cart]] | |||
|{{Price|30000}} | |||
|- | |- | ||
| | |{{Name|Alex Portrait}} | ||
|[[File:Alex Icon.png|24px|link=]] [[Alex#Fourteen Hearts|Alex's 14-Heart event]] | |||
|[[File:Traveling Cart Icon.png|24px|link=]] [[Traveling Cart]] | |||
|{{Price|30000}} | |||
|- | |- | ||
|[[ | |{{Name|Elliott Portrait}} | ||
| | |[[File:Elliott Icon.png|24px|link=]] [[Elliott#Fourteen Hearts|Elliott's 14-Heart event]] | ||
|[[File:Traveling Cart Icon.png|24px|link=]] [[Traveling Cart]] | |||
|{{Price|30000}} | |||
|- | |- | ||
| | |{{Name|Harvey Portrait}} | ||
|[[File:Harvey Icon.png|24px|link=]] [[Harvey#Fourteen Hearts|Harvey's 14-Heart event]] | |||
|[[File:Traveling Cart Icon.png|24px|link=]] [[Traveling Cart]] | |||
|{{Price|30000}} | |||
|- | |- | ||
|[[ | |{{Name|Sam Portrait}} | ||
| | |[[File:Sam Icon.png|24px|link=]] [[Sam#Fourteen Hearts|Sam's 14-Heart event]] | ||
|[[File:Traveling Cart Icon.png|24px|link=]] [[Traveling Cart]] | |||
| | |{{Price|30000}} | ||
|- | |||
|{{Name|Sebastian Portrait}} | |||
|[[File:Sebastian Icon.png|24px|link=]] [[Sebastian#Fourteen Hearts|Sebastian's 14-Heart event]] | |||
|[[File:Traveling Cart Icon.png|24px|link=]] [[Traveling Cart]] | |||
|{{Price|30000}} | |||
|- | |- | ||
| | |{{Name|Shane Portrait}} | ||
|[[File:Shane Icon.png|24px|link=]] [[Shane#Fourteen Hearts|Shane's 14-Heart event]] | |||
|[[File:Traveling Cart Icon.png|24px|link=]] [[Traveling Cart]] | |||
|{{Price|30000}} | |||
|- | |- | ||
|[[File: | |{{Name|Krobus Portrait}} | ||
| | |[[File:Krobus Icon.png|24px|link=]] [[Krobus#Fourteen Hearts|Krobus' 14-Heart event]] | ||
|[[File:Traveling Cart Icon.png|24px|link=]] [[Traveling Cart]] | |||
|{{Price|30000}} | |||
|} | |||
|- | |- | ||
|} | |} | ||
== | ==Movie Posters== | ||
Movie posters cannot be placed outside. | |||
Movie Posters can be obtained only by playing the Crane Game inside the [[Movie Theater]]. Each poster will randomly appear in the Crane Game only during the time when its movie is playing at the Theater. | |||
{| | {| | ||
|- | |- | ||
|style="vertical-align: top;"| | |style="vertical-align: top;"| | ||
{|class="wikitable | {|class="wikitable" style="margin-top: 0; margin-bottom: 0; padding-top: 0; padding-bottom: 0;" | ||
! | |- | ||
! | !Image | ||
!Name | |||
|- | |- | ||
|[[File:'It Howls In The Rain'.png|36px|center]] | |||
|[[File: | |[['It Howls In The Rain']] | ||
| | |- | ||
|- | |[[File:'Journey Of The Prairie King The Motion Picture'.png|36px|center]] | ||
|[[File: | |[['Journey Of The Prairie King: The Motion Picture']] | ||
| | |- | ||
|[[File:'Mysterium'.png|36px|center]] | |||
|[['Mysterium']] | |||
|- | |||
|[[File:'Natural Wonders Exploring Our Vibrant World'.png|36px|center]] | |||
|[['Natural Wonders: Exploring Our Vibrant World']] | |||
|- | |||
|} | |||
|style="vertical-align: top;"| | |||
{|class="wikitable" style="margin-top: 0; margin-bottom: 0; padding-top: 0; padding-bottom: 0;" | |||
|- | |||
!Image | |||
!Name | |||
|- | |||
|[[File:'The Brave Little Sapling'.png|36px|center]] | |||
|[['The Brave Little Sapling']] | |||
|- | |||
|[[File:'The Miracle At Coldstar Ranch'.png|36px|center]] | |||
|[['The Miracle At Coldstar Ranch']] | |||
|- | |||
|[[File:'The Zuzu City Express'.png|36px|center]] | |||
|[['The Zuzu City Express']] | |||
|- | |||
|[[File:'Wumbus'.png|36px|center]] | |||
|[['Wumbus']] | |||
|- | |||
|} | |||
|- | |- | ||
| | |} | ||
==Decorative Doors== | |||
Decorative doors cannot be placed outside. | |||
All decorative doors available in the [[Furniture Catalogue]] cannot be purchased from the [[Traveling Cart]]. | |||
{| | |||
|- | |- | ||
|style="vertical-align: top;"| | |||
{|class="wikitable" | |||
!Item | |||
!Source | |||
!Price | |||
|- | |||
|[[File:Decorative Door 1.png|40px|link=]] [[Decorative Door|Decorative Door 1]] | |||
|[[File:Furniture Catalogue.png|24px|link=]] [[Furniture Catalogue]] | |[[File:Furniture Catalogue.png|24px|link=]] [[Furniture Catalogue]] | ||
|{{Price|0}} | |||
|- | |- | ||
|[[File:Decorative Door 2.png|40px|link=]] [[Decorative Door|Decorative Door 2]] | |||
|[[File:Furniture Catalogue.png|24px|link=]] [[Furniture Catalogue]] | |[[File:Furniture Catalogue.png|24px|link=]] [[Furniture Catalogue]] | ||
|{{Price|0}} | |||
|- | |- | ||
|[[File:Decorative Door 3.png|40px|link=]] [[Decorative Door|Decorative Door 3]] | |||
|[[File:Furniture Catalogue.png|24px|link=]] [[Furniture Catalogue]] | |[[File:Furniture Catalogue.png|24px|link=]] [[Furniture Catalogue]] | ||
|{{Price|0}} | |||
|- | |- | ||
|[[File:Decorative Door 4.png|40px|link=]] [[Decorative Door|Decorative Door 4]] | |||
|[[File:Furniture Catalogue.png|24px|link=]] [[Furniture Catalogue]] | |[[File:Furniture Catalogue.png|24px|link=]] [[Furniture Catalogue]] | ||
|{{Price|0}} | |||
|- | |- | ||
|[[File:Decorative Door 5.png|40px|link=]] [[Decorative Door|Decorative Door 5]] | |||
|[[File:Furniture Catalogue.png|24px|link=]] [[Furniture Catalogue]] | |[[File:Furniture Catalogue.png|24px|link=]] [[Furniture Catalogue]] | ||
|{{Price|0}} | |||
| | |} | ||
| | |style="vertical-align: top;"| | ||
{|class="wikitable" | |||
!Item | |||
!Source | |||
!Price | |||
|- | |- | ||
|[[File:Decorative Door 6.png|40px|link=]] [[Decorative Door|Decorative Door 6]] | |||
|[[File:Furniture Catalogue.png|24px|link=]] [[Furniture Catalogue]] | |[[File:Furniture Catalogue.png|24px|link=]] [[Furniture Catalogue]] | ||
|{{Price|0}} | |||
|- | |- | ||
|{{Name|Decorative Joja Door|size=40}} | |||
|[[File: | |[[File:Joja Furniture Catalogue.png|16px|link=]] [[Joja Furniture Catalogue]] | ||
|{{Price|0}} | |||
|- | |- | ||
|[[File: | |{{Name|Decorative Wizard Door|size=40}} | ||
|[[File:Wizard Catalogue.png|16px|link=]] [[Wizard Catalogue]] | |||
|{{Price|0}} | |||
|- | |- | ||
|{{ | |{{Name|Decorative Junimo Door|size=40}} | ||
|[[File: | |[[File:Junimo Catalogue.png|16px|link=]] [[Junimo Catalogue]] | ||
|{{Price|0}} | |||
|- | |- | ||
|{{ | |{{Name|Decorative Retro Door|size=40}} | ||
|[[File: | |[[File:Retro Catalogue.png|16px|link=]] [[Retro Catalogue]] | ||
|{{Price|0}} | |||
|- | |- | ||
| | |} | ||
|- | |- | ||
| | |} | ||
==Banners== | |||
Banners cannot be placed outside. | |||
Banners cannot be purchased from the [[Traveling Cart]]. | |||
{| | |||
|- | |- | ||
| | |style="vertical-align: top;"| | ||
| | {|class="wikitable" | ||
!Item | |||
!Source | |||
!Price | |||
|- | |- | ||
|rowspan="2"|{{ | |rowspan="2"|{{Name|Clouds Banner}} | ||
|[[ | |[[Night Market]] | ||
|{{Price|1000}} | |||
|- | |- | ||
|[[File:Furniture Catalogue.png|24px|link=]] [[Furniture Catalogue]] | |[[File:Furniture Catalogue.png|24px|link=]] [[Furniture Catalogue]] | ||
|{{Price|0}} | |||
|- | |- | ||
|{{Name|Pastel Banner}} | |||
|[[ | |[[Egg Festival]] | ||
|{{Price|1000}} | |||
|- | |- | ||
| | |{{Name|Winter Banner}} | ||
|[[Feast of the Winter Star]] | |||
|{{Price|1000}} | |||
|- | |- | ||
|{{Name|Moonlight Jellies Banner}} | |||
|[[ | |[[Dance of the Moonlight Jellies]] | ||
|{{Price|800}} | |||
|- | |- | ||
| | |{{Name|Icy Banner}} | ||
|[[Festival of Ice]] | |||
|{{Price|800}} | |||
|- | |- | ||
|{{Name|Retro Banner}} | |||
|[[ | |[[File:Retro Catalogue.png|16px|link=]] [[Retro Catalogue]] | ||
| | |{{Price|0}} | ||
|- | |||
|} | |||
|- | |||
|} | |||
==Wall Hangings== | |||
Wall hangings cannot be placed outside. | |||
{{Stub|need the information about which Wall Hangings can be purchased from the Traveling Cart and which cannot be.}} | |||
{| | |||
|- | |- | ||
| | |style="vertical-align: top;"| | ||
| | {|class="wikitable" | ||
!Item | |||
!Source | |||
!Price | |||
|- | |- | ||
|rowspan="2"|{{ | |rowspan="2"|{{Name|Calendar|size=24}} | ||
|[[ | |[[File:Robin Icon.png|24px|link=]] [[Carpenter's Shop]] | ||
|{{Price|2000}} | |||
|- | |- | ||
|[[File:Furniture Catalogue.png|24px|link=]] [[Furniture Catalogue]] | |[[File:Furniture Catalogue.png|24px|link=]] [[Furniture Catalogue]] | ||
|{{Price|0}} | |||
|- | |- | ||
|{{ | |{{Name|Wallflower Pal|size=40}} | ||
|[[ | |[[File:Furniture Catalogue.png|24px|link=]] [[Furniture Catalogue]] | ||
|{{Price|0}} | |||
|- | |- | ||
|{{ | |rowspan="2"|{{Name|'Burnt Offering'|size=32}} | ||
|[[ | |[[File:Gunther Icon.png|24px|link=]] [[Museum|Museum Donation]] | ||
| | |[[Artifacts]] (11), [[Rare Disc]] and [[Dwarf Gadget]] | ||
|- | |||
|[[File:Mr. Qi Icon.png|24px|link=]] [[Casino]] | |||
|{{Price|4000|Qi}} | |||
|- | |- | ||
|{{ | |rowspan="2"|{{Name|Skull Poster|size=36}} | ||
|[[ | |[[File:Robin Icon.png|24px|link=]] [[Carpenter's Shop]] | ||
|{{Price|500}} | |||
|- | |- | ||
| | |[[File:Furniture Catalogue.png|24px|link=]] [[Furniture Catalogue]] | ||
| | |{{Price|0}} | ||
|- | |- | ||
|{{ | |rowspan="2"|{{Name|Little Photos|size=36}} | ||
|[[ | |[[File:Robin Icon.png|24px|link=]] [[Carpenter's Shop]] | ||
|{{Price|250}} | |||
|- | |- | ||
| | |[[File:Furniture Catalogue.png|24px|link=]] [[Furniture Catalogue]] | ||
|{{Price|0}} | |||
|- | |- | ||
|rowspan="2"| | |rowspan="2"|[[File:Anchor (furniture).png|24px|link=]] [[Anchor (furniture)|Anchor]] | ||
|[[ | |[[File:Robin Icon.png|24px|link=]] [[Carpenter's Shop]] | ||
|{{Price|750}} | |||
|- | |- | ||
|[[File: | |[[File:Furniture Catalogue.png|24px|link=]] [[Furniture Catalogue]] | ||
| | |{{Price|0}} | ||
|- | |- | ||
|rowspan="2"|{{ | |rowspan="2"|{{Name|World Map|size=48}} | ||
|[[ | |[[File:Robin Icon.png|24px|link=]] [[Carpenter's Shop]] | ||
|{{Price|500}} | |||
|- | |- | ||
|[[File: | |[[File:Furniture Catalogue.png|24px|link=]] [[Furniture Catalogue]] | ||
| | |{{Price|0}} | ||
|- | |- | ||
|{{Name|Cloud Decal 1|link=Cloud Decal|size=36}} | |||
|[[ | |[[Dance of the Moonlight Jellies]] | ||
|{{Price|1200}} | |||
|- | |- | ||
| | |{{Name|Cloud Decal 2|link=Cloud Decal|size=36}} | ||
| | |[[Dance of the Moonlight Jellies]] | ||
|{{Price|1200}} | |||
|- | |- | ||
|rowspan="2"|{{ | |rowspan="2"|{{Name|Miner's Crest|size=48}} | ||
|[[ | |[[File:Robin Icon.png|24px|link=]] [[Carpenter's Shop]] | ||
|{{Price|1000}} | |||
|- | |- | ||
|[[File: | |[[File:Furniture Catalogue.png|24px|link=]] [[Furniture Catalogue]] | ||
| | |{{Price|0}} | ||
|- | |- | ||
|rowspan="2"|{{ | |rowspan="2"|{{Name|Hanging Shield|size=36}} | ||
|[[ | |[[File:Robin Icon.png|24px|link=]] [[Carpenter's Shop]] | ||
|{{Price|500}} | |||
|- | |- | ||
|[[File: | |[[File:Furniture Catalogue.png|24px|link=]] [[Furniture Catalogue]] | ||
| | |{{Price|0}} | ||
|- | |- | ||
|{{ | |rowspan="2"|{{Name|Monster Danglers|size=64}} | ||
|[[ | |[[File:Robin Icon.png|24px|link=]] [[Carpenter's Shop]] | ||
|{{Price|1000}} | |||
|- | |- | ||
|{{ | |[[File:Furniture Catalogue.png|24px|link=]] [[Furniture Catalogue]] | ||
|{{Price|0}} | |||
|- | |||
|rowspan="2"|{{Name|Ceiling Flags|size=48}} | |||
|[[File:Robin Icon.png|24px|link=]] [[Carpenter's Shop]] | |||
|{{Price|50}} | |||
|- | |||
|[[File:Furniture Catalogue.png|24px|link=]] [[Furniture Catalogue]] | |||
|{{Price|0}} | |||
|- | |||
|rowspan="2"|{{Name|Pirate Flag|size=32}} | |||
|[[Desert Festival]] | |[[Desert Festival]] | ||
|{{Price|100|Calico}} | |||
|- | |||
|[[File:Penny Icon.png|24px|link=]] [[Penny#Fourteen Hearts|Penny's 14-Heart event]] | |||
|N/A | |||
|- | |- | ||
|{{ | |rowspan="2"|{{Name|Strawberry Decal}} | ||
|[[Desert Festival]] | |[[Desert Festival]] | ||
|{{Price|100|Calico}} | |||
|- | |- | ||
| | |[[File:Penny Icon.png|24px|link=]] [[Penny#Fourteen Hearts|Penny's 14-Heart event]] | ||
|N/A | |||
| | |||
|- | |- | ||
|{{ | |rowspan="2"|{{Name|Night Sky Decal 1|size=18}} | ||
|[[Desert Festival]] | |[[Desert Festival]] | ||
|{{Price|30|Calico}} | |||
|- | |- | ||
| | |[[File:Penny Icon.png|24px|link=]] [[Penny#Fourteen Hearts|Penny's 14-Heart event]] | ||
|N/A | |||
| | |||
|- | |- | ||
|{{ | |rowspan="2"|{{Name|Night Sky Decal 2|size=18}} | ||
|[[Desert Festival]] | |[[Desert Festival]] | ||
|{{Price|30|Calico}} | |||
|- | |- | ||
| | |[[File:Penny Icon.png|24px|link=]] [[Penny#Fourteen Hearts|Penny's 14-Heart event]] | ||
|N/A | |||
| | |||
|- | |- | ||
|{{ | |rowspan="2"|{{Name|Night Sky Decal 3|size=18}} | ||
|[[Desert Festival]] | |[[Desert Festival]] | ||
|{{Price|30|Calico}} | |||
|- | |- | ||
| | |[[File:Penny Icon.png|24px|link=]] [[Penny#Fourteen Hearts|Penny's 14-Heart event]] | ||
|N/A | |||
| | |||
|- | |- | ||
|{{ | |{{Name|Wall Pumpkin}} | ||
|[[ | |[[Crane Game]] during [[Fall]] | ||
|{{Price|500}} | |||
|- | |- | ||
|{{ | |{{Name|Small Wall Pumpkin}} | ||
| | |[[Crane Game]] during [[Fall]] | ||
| | |{{Price|500}} | ||
|- | |- | ||
|{{ | |{{Name|Pyramid Decal|size=24}} | ||
| | |[[Fishing]] at [[The Desert|Calico Desert]] southern pond | ||
|N/A | |||
|- | |- | ||
|{{ | |{{Name|Lifesaver}} | ||
|[[File: | |[[Fishing]] at the backroom of the [[File:Willy Icon.png|24px|link=]] [[Fish Shop]] | ||
| | |N/A | ||
|- | |- | ||
|{{ | |rowspan="2"|{{Name|Starport Decal|size=18}} | ||
|[[ | |[[Dance of the Moonlight Jellies]] | ||
|{{Price|1000}} | |||
|- | |- | ||
|[[File:Furniture Catalogue.png|24px|link=]] [[Furniture Catalogue]] | |||
|[[File: | |{{Price|0}} | ||
|- | |- | ||
|} | |rowspan="2"|{{Name|Decorative Pitchfork|size=18}} | ||
|[[Egg Festival]] | |||
|{{Price|1000}} | |||
|- | |- | ||
| | |[[File:Furniture Catalogue.png|24px|link=]] [[Furniture Catalogue]] | ||
|{{Price|0}} | |||
= | |||
{| | |||
|- | |- | ||
|rowspan="2"|{{ | |rowspan="2"|{{Name|Wood Panel|size=18}} | ||
|[[Feast of the Winter Star]] | |||
|{{Price|500}} | |||
|- | |- | ||
|[[File:Furniture Catalogue.png|24px|link=]] [[Furniture Catalogue]] | |[[File:Furniture Catalogue.png|24px|link=]] [[Furniture Catalogue]] | ||
|{{ | |{{Price|0}} | ||
|- | |- | ||
|rowspan="2"|{{ | |rowspan="2"|{{Name|Decorative Axe|size=18}} | ||
|[[ | |[[Feast of the Winter Star]] | ||
|{{Price| | |{{Price|1000}} | ||
|- | |- | ||
|[[File:Furniture Catalogue.png|24px|link=]] [[Furniture Catalogue]] | |[[File:Furniture Catalogue.png|24px|link=]] [[Furniture Catalogue]] | ||
|{{ | |{{Price|0}} | ||
|- | |- | ||
|rowspan="2"|{{ | |rowspan="2"|{{Name|Log Panel 1|link=Log Panel|size=18}} | ||
|[[ | |[[Feast of the Winter Star]] | ||
|{{Price| | |{{Price|500}} | ||
|- | |- | ||
|[[File:Furniture Catalogue.png|24px|link=]] [[Furniture Catalogue]] | |[[File:Furniture Catalogue.png|24px|link=]] [[Furniture Catalogue]] | ||
|{{ | |{{Price|0}} | ||
|- | |- | ||
|rowspan="2"|{{ | |rowspan="2"|{{Name|Log Panel 2|link=Log Panel|size=18}} | ||
|[[ | |[[Feast of the Winter Star]] | ||
|{{Price| | |{{Price|700}} | ||
|- | |- | ||
|[[File:Furniture Catalogue.png|24px|link=]] [[Furniture Catalogue]] | |[[File:Furniture Catalogue.png|24px|link=]] [[Furniture Catalogue]] | ||
|{{ | |{{Price|0}} | ||
|} | |||
|style="vertical-align: top;"| | |||
{|class="wikitable" | |||
!Item | |||
!Source | |||
!Price | |||
|- | |- | ||
|{{Name|Hanging Fish|size=24}} | |||
|[[File:Willy Icon.png|24px|link=]] [[Fish Shop]] | |||
|{{Price|1000}} | |||
|- | |- | ||
|[[File: | |{{Name|Wall Clock|size=24}} | ||
|{{ | |[[File:Furniture Catalogue.png|24px|link=]] [[Furniture Catalogue]] | ||
|{{Price|0}} | |||
|- | |- | ||
|{{ | |{{Name|Decorative Oak Ladder|size=22}} | ||
|[[File: | |[[File:Furniture Catalogue.png|24px|link=]] [[Furniture Catalogue]] | ||
|{{Price|0}} | |||
|- | |- | ||
|} | |{{Name|Decorative Walnut Ladder|size=22}} | ||
|[[File:Furniture Catalogue.png|24px|link=]] [[Furniture Catalogue]] | |||
|{{Price|0}} | |||
{| | |||
|- | |- | ||
| | |{{Name|Light Switch|size=24}} | ||
|[[File:Furniture Catalogue.png|24px|link=]] [[Furniture Catalogue]] | |||
|{{Price|0}} | |||
|- | |- | ||
|{{Name|Outlet|size=24}} | |||
|[[ | |[[File:Furniture Catalogue.png|24px|link=]] [[Furniture Catalogue]] | ||
|{{Price| | |{{Price|0}} | ||
|- | |- | ||
|{{ | |{{Name|Decorative Shovel|size=24}} | ||
|[[File:Furniture Catalogue.png|24px|link=]] [[Furniture Catalogue]] | |||
|{{Price|0}} | |{{Price|0}} | ||
|- | |- | ||
|{{Name|Wall Sword|size=24}} | |||
|[[ | |[[File:Marlon Icon.png|24px|link=]] [[Adventurer's Guild]] | ||
|{{Price| | |{{Price|2000}} | ||
|- | |- | ||
|[[ | |{{Name|Art Photo|size=24}} | ||
|{{Price| | |[[Desert Festival]] | ||
|{{Price|30|Calico}} | |||
|- | |- | ||
|{{ | |{{Name|Art Photo 2|size=24}} | ||
|{{Price| | |[[Desert Festival]] | ||
|{{Price|30|Calico}} | |||
|- | |- | ||
| | |{{Name|Pierre's Sign|size=48}} | ||
|[[Desert Festival]] | |||
|{{Price|50|Calico}} | |||
|- | |- | ||
| | |{{Name|Sam's Skateboard|size=32}} | ||
|{{ | |[[Desert Festival]] | ||
|{{Price|50|Calico}} | |||
|- | |- | ||
|} | |{{Name|Chicken Decal|size=48}} | ||
|[[Desert Festival]] | |||
|{{Price|60|Calico}} | |||
|- | |- | ||
| | |{{Name|Exotic Palace|size=48}} | ||
|[[Desert Festival]] | |||
|{{Price|120|Calico}} | |||
|- | |- | ||
|{{Name|Periodic Table|size=48}} | |||
|[[ | |[[Desert Festival]] | ||
|{{Price|70|Calico}} | |||
|- | |- | ||
| | |{{Name|Dusty Skull|size=48}} | ||
|[[Desert Festival]] | |||
|{{Price|50|Calico}} | |||
|- | |- | ||
|{{Name|Model Planes|size=48}} | |||
|[[ | |[[Desert Festival]] | ||
|{{Price|30|Calico}} | |||
|- | |- | ||
| | |{{Name|Desert Flags|size=48}} | ||
|[[Desert Festival]] | |||
|{{Price|10|Calico}} | |||
|- | |- | ||
|{{Name|Cow Decal|size=48}} | |||
|[[ | |[[Mayor's Manor#Prize Machine|Prize Machine]] | ||
|{{Name|Prize Ticket|1}} | |||
|- | |- | ||
| | |rowspan="2"|{{Name|J. Cola Light|size=64}} | ||
|[[JojaMart]] | |||
|{{Price|500}} | |||
|- | |- | ||
|[[File:Joja Furniture Catalogue.png|16px|link=]] [[Joja Furniture Catalogue]] | |||
|[[File: | |{{Price|0}} | ||
|- | |- | ||
|[[File:Furniture Catalogue.png| | |{{Name|J (sign)|size=20|}} | ||
|[[File:Joja Furniture Catalogue.png|16px|link=]] [[Joja Furniture Catalogue]] | |||
|{{Price|0}} | |||
|- | |- | ||
|{{Name|J. Light|size=20|}} | |||
|[[File: | |[[File:Joja Furniture Catalogue.png|16px|link=]] [[Joja Furniture Catalogue]] | ||
|{{Price|0}} | |||
|- | |- | ||
|[[File:Furniture Catalogue.png| | |{{Name|Joja Cola Ornament|size=20|}} | ||
|[[File:Joja Furniture Catalogue.png|16px|link=]] [[Joja Furniture Catalogue]] | |||
|{{Price|0}} | |||
|- | |- | ||
|{{Name|Manager of the Year}} | |||
|[[File: | |[[File:Joja Furniture Catalogue.png|16px|link=]] [[Joja Furniture Catalogue]] | ||
|{{Price|0}} | |||
|- | |- | ||
|[[File: | |{{Name|Witch's Broom|size=30}} | ||
|[[File:Wizard Catalogue.png|16px|link=]] [[Wizard Catalogue]] | |||
|{{Price|0}} | |||
|- | |- | ||
|{{Name|Small Elixir Shelf|size=48}} | |||
|[[File: | |[[File:Wizard Catalogue.png|16px|link=]] [[Wizard Catalogue]] | ||
|{{Price|0}} | |||
|- | |- | ||
|[[File: | |{{Name|Elixir Shelf|size=48}} | ||
|[[File:Wizard Catalogue.png|16px|link=]] [[Wizard Catalogue]] | |||
|{{Price|0}} | |||
|- | |- | ||
|{{Name|Small Stacked Elixir Shelf|size=48}} | |||
|[[File: | |[[File:Wizard Catalogue.png|16px|link=]] [[Wizard Catalogue]] | ||
|{{Price|0}} | |||
|- | |- | ||
|[[File: | |{{Name|Stacked Elixir Shelf|size=48}} | ||
|[[File:Wizard Catalogue.png|16px|link=]] [[Wizard Catalogue]] | |||
|{{Price|0}} | |||
|- | |- | ||
|{{Name|Wizard Bookshelf|size=48}} | |||
|[[File: | |[[File:Wizard Catalogue.png|16px|link=]] [[Wizard Catalogue]] | ||
|{{Price|0}} | |||
|- | |- | ||
|[[File: | |{{Name|Junimo Wall Plaque|size=32}} | ||
|[[File:Junimo Catalogue.png|16px|link=]] [[Junimo Catalogue]] | |||
|{{Price|0}} | |||
|- | |- | ||
|{{Name|Junimo Star|size=24}} | |||
|[[File: | |[[File:Junimo Catalogue.png|16px|link=]] [[Junimo Catalogue]] | ||
|{{Price|0}} | |||
|- | |- | ||
|[[File: | |{{Name|Bulletin Board|size=60}} | ||
|[[File:Junimo Catalogue.png|16px|link=]] [[Junimo Catalogue]] | |||
|{{Price|0}} | |||
|- | |- | ||
| | |} | ||
|- | |- | ||
|[[ | |} | ||
| | |||
==Fish Tanks== | |||
[[Fish Tank|Fish tanks]] cannot be placed outside. | |||
Fish tanks cannot be deleted from the inventory with a [[Trash Cans|trash can]] as long as they contain items. Certain items can be added to the fish tank to change its appearance by holding the item and right-clicking on the tank. To get a list of the items inside or to remove them, right-click on the tank with empty hands. The location and appearance of the decorations and any stationary animals placed inside is random and can be changed without removing items by picking up and re-placing the tank. | |||
{|class="wikitable" | |||
!Item | |||
!Source | |||
!Price | |||
|- | |- | ||
|rowspan="2"|{{Name| | |rowspan="2"|{{Name|Modern Fish Tank|size=32}} | ||
|- | |- | ||
|[[File:Furniture Catalogue.png|24px|link=]] [[Furniture Catalogue]] | |[[File:Furniture Catalogue.png|24px|link=]] [[Furniture Catalogue]] | ||
|{{Price|0}} | |||
|- | |- | ||
|rowspan="2"|{{Name|Small Fish Tank|size=32}} | |||
|[[File:Willy Icon.png|24px|link=]] [[Fish Shop]] | |||
|{{Price|500}} | |||
|- | |- | ||
| | |[[File:Furniture Catalogue.png|24px|link=]] [[Furniture Catalogue]] | ||
|{{Price|0}} | |||
|- | |- | ||
|[[ | |rowspan="2"|{{Name|Large Fish Tank|size=64}} | ||
|[[File:Willy Icon.png|24px|link=]] [[Fish Shop]] | |||
|{{Price|2000}} | |||
|- | |- | ||
| | |[[File:Furniture Catalogue.png|24px|link=]] [[Furniture Catalogue]] | ||
|{{Price|0}} | |||
|- | |- | ||
|[[ | |rowspan="2"|{{Name|Deluxe Fish Tank|size=80}} | ||
| | |[[File:Willy Icon.png|24px|link=]] [[Fish Shop]]<br />''Only available after completing [[Quests#Tropical Fish|"Tropical Fish"]]'' | ||
|{{Price|5000}} | |||
|- | |- | ||
| | |[[File:Furniture Catalogue.png|24px|link=]] [[Furniture Catalogue]] | ||
|{{Price|0}} | |||
|- | |- | ||
| | |rowspan="2"|{{Name|Jungle Tank|size=64}} | ||
|- | |- | ||
| | |[[File:Raccoon Icon.png|24px|link=]] [[Giant Stump#Raccoon Wife's Shop|Raccoon Wife's Shop]] <br />''Only available after completing [[Quests#The Giant Stump|"The Giant Stump"]]'' | ||
|{{Name|Broken Glasses|5}} | |||
|- | |- | ||
|[[File: | |{{Name|Aquatic Sanctuary|size=112}} | ||
|[[File:Mr. Qi Icon.png|24px|link=]] [[Qi's Walnut Room]] | |||
|{{Price|20|gem}} | |||
|- | |- | ||
| | |} | ||
==Torches== | |||
Torches can be placed outside. | |||
{| | |||
|- | |- | ||
| | |style="vertical-align: top;"| | ||
{|class="wikitable" | |||
!Item | |||
!Source | |||
!Price | |||
|- | |- | ||
| | |rowspan="2"|{{Name|Stump Torch}} | ||
|[[Night Market]] | |||
|{{Price|800}} | |||
|- | |- | ||
|{{Name|Furniture Catalogue}} | |||
|{{Price|0}} | |||
|- | |- | ||
| | |rowspan="3"|{{Name|Plain Torch}} | ||
|[[Luau]] | |||
|{{Price|700}} | |||
|- | |- | ||
| | |[[Night Market]] | ||
|{{Price|800}} | |||
|- | |- | ||
| | |{{Name|Furniture Catalogue}} | ||
|{{Price|0}} | |||
|- | |- | ||
|rowspan="2"|{{Name| | |rowspan="2"|{{Name|Jungle Torch}} | ||
|- | |- | ||
|{{NPC|Island Trader|size=24}} | |||
|{{Name|Cinder Shard|5}} | |||
| | |||
|- | |- | ||
|} | |} | ||
== | ==Large Decorations== | ||
All large decorations can be placed outside except for the [[China Cabinet]] and [[Industrial Pipe]]. | |||
All large decoration items available in the [[Furniture Catalogue]] cannot be purchased from the [[Traveling Cart]]. | |||
{| | {| | ||
|- | |- | ||
| Line 3,088: | Line 3,297: | ||
{|class="wikitable" | {|class="wikitable" | ||
!Item | !Item | ||
! | !Source | ||
! | !Price | ||
|- | |- | ||
|{{ | |rowspan="2"|{{Name|China Cabinet|size=62}} | ||
|{{ | |[[File:Robin Icon.png|24px|link=]] [[Carpenter's Shop]] | ||
|{{ | |{{Price|6000}} | ||
|{{ | |- | ||
|[[File:Furniture Catalogue.png|24px|link=]] [[Furniture Catalogue]] | |||
|{{Price|0}} | |||
|- | |||
|rowspan="2"|{{Name|Ceramic Pillar|size=24}} | |||
|[[File:Robin Icon.png|24px|link=]] [[Carpenter's Shop]] | |||
|{{Price|250}} | |||
|- | |||
|[[File:Furniture Catalogue.png|24px|link=]] [[Furniture Catalogue]] | |||
|{{Price|0}} | |||
|- | |- | ||
| | |rowspan="2"|{{Name|Gold Pillar|size=24}} | ||
|{{ | |[[File:Robin Icon.png|24px|link=]] [[Carpenter's Shop]] | ||
| | |{{Price|450}} | ||
|{{ | |||
|- | |- | ||
| | |[[File:Furniture Catalogue.png|24px|link=]] [[Furniture Catalogue]] | ||
|{{ | |{{Price|0}} | ||
|{{ | |- | ||
| | |rowspan="2"|{{Name|Industrial Pipe|size=24}} | ||
| | |[[File:Robin Icon.png|24px|link=]] [[Carpenter's Shop]] | ||
| | |{{Price|300}} | ||
= | |||
{| | |||
|- | |- | ||
|[[File:Furniture Catalogue.png|24px|link=]] [[Furniture Catalogue]] | |||
|{{Price|0}} | |||
|- | |||
|rowspan="2"|{{Name|Totem Pole|size=24}} | |||
|[[File:Robin Icon.png|24px|link=]] [[Carpenter's Shop]] | |||
|{{Price|750}} | |||
|- | |- | ||
| | |[[File:Furniture Catalogue.png|24px|link=]] [[Furniture Catalogue]] | ||
|{{Price|0}} | |||
|- | |||
|{{Name|Standing Geode|size=36}} | |||
|[[File:Gunther Icon.png|24px|link=]] [[Museum|Museum Donation]] | |||
|[[Minerals]] (11) | |||
|- | |||
|{{Name|Obsidian Vase|size=36}} | |||
|[[File:Gunther Icon.png|24px|link=]] [[Museum|Museum Donation]] | |||
|[[Minerals]] (31) | |||
|- | |||
|[[File:Sloth Skeleton L.png|30px]][[File:Sloth Skeleton M.png|30px]][[File:Sloth Skeleton R.png|30px]] [[Sloth Skeleton]] (L / M / R) | |||
|[[File:Gunther Icon.png|24px|link=]] [[Museum|Museum Donation]] | |||
|[[Artifacts]] (7), Bone Pieces | |||
|- | |||
|{{Name|Skeleton Statue|size=36}} | |||
|[[File:Gunther Icon.png|24px|link=]] [[Museum|Museum Donation]] | |||
|[[Artifacts]] (15) | |||
|- | |||
|{{Name|Chicken Statue (furniture)|size=36}} | |||
|[[File:Gunther Icon.png|24px|link=]] [[Museum|Museum Donation]] | |||
|[[Artifacts]] (5), [[Chicken Statue]] | |||
|- | |||
|{{Name|Leah's Sculpture|size=36}} | |||
|[[File:Leah Icon.png|24px|link=]] [[Leah#Six Hearts II|Leah's 6-Heart II event]] | |||
|N/A | |||
|- | |||
|{{Name|Sam's Boombox|size=48}} | |||
|[[File:Sam Icon.png|24px|link=]] [[Sam#Fourteen Hearts|Sam's 14-Heart event]] | |||
|N/A | |||
|- | |||
|{{Name|Wumbus Statue|size=64}} | |||
|[[Movie Theater#Crane Game|Crane Game]] during [[Summer]]<br />''Only available if [[Movie Theater#Movies|Wumbus]] is playing'' | |||
|{{Price|500}} | |||
|- | |||
|{{Name|Bobo Statue|size=64}} | |||
|[[Movie Theater#Crane Game|Crane Game]] during [[Summer]]<br />''Only available if [[Movie Theater#Movies|Wumbus]] is playing'' | |||
|{{Price|500}} | |||
|- | |||
|{{Name|Purple Serpent Statue|size=36}} | |||
|[[Movie Theater#Crane Game|Crane Game]] during [[Fall]] | |||
|{{Price|500}} | |||
|- | |||
|{{Name|Green Serpent Statue|size=36}} | |||
|[[Movie Theater#Crane Game|Crane Game]] during [[Fall]] | |||
|{{Price|500}} | |||
|- | |||
|rowspan="2"|{{Name|Lg. Futan Bear|size=64}} | |||
|[[File:Gunther Icon.png|24px|link=]] [[Museum|Museum Donation]] | |||
|Total Items (30) | |||
|- | |||
|[[Movie Theater#Crane Game|Crane Game]] during any [[Season]] | |||
|{{Price|500}} | |||
|- | |||
|{{Name|Bear Statue|size=48}} | |||
|[[File:Gunther Icon.png|24px|link=]] [[Museum|Museum Donation]] | |||
|Total Items (50) | |||
|- | |||
|{{Name|Junimo Plush|size=64}} | |||
|Found in a [[Secrets#Junimo Plush|Secret]] location | |||
|N/A | |||
|- | |||
|{{Name|Butterfly Hutch|size=64}} | |||
|[[File:Desert Trader Icon.png|24px]] [[Desert Trader]] | |||
|{{Name|Bat Wing|200}} | |||
|- | |||
|{{Name|Gourmand Statue|size=64}} | |||
|[[Fishing]] at the [[Ginger Island#Pirate Cove|Pirate Cove]] | |||
|N/A | |||
|} | |} | ||
|style="vertical-align: top;"| | |style="vertical-align: top;"| | ||
{|class="wikitable | {|class="wikitable" | ||
!Item | !Item | ||
!Source | |||
!Price | |||
|- | |- | ||
|} | |{{Name|Iridium Krobus|size=36}} | ||
|[[Fishing]] south of [[Cindersap Forest]] | |||
== | |N/A | ||
|- | |||
|rowspan="3"|{{Name|Decorative Trash Can|size=30}} | |||
{| | |[[File:Robin Icon.png|24px|link=]] [[Carpenter's Shop]] | ||
|{{Price|250}} | |||
|- | |||
|[[File:Furniture Catalogue.png|24px|link=]] [[Furniture Catalogue]] | |||
|{{Price|0}} | |||
|- | |||
|[[Fishing]] in the fountain west of the [[Community Center]] | |||
|{{Price|0}} | |||
|- | |||
|{{Name|Upright Piano|size=64}} | |||
|[[Night Market]] | |||
|{{Price|100000}} | |||
|- | |||
|{{Name|Coat Stand|size=20}} | |||
|[[File:Sandy Icon.png|24px|link=]] [[Oasis]] | |||
|{{Price|2000}} | |||
|- | |||
|{{Name|Bird House|size=20}} | |||
|[[File:Marnie Icon.png|24px|link=]] [[Marnie's Ranch]] | |||
|{{Price|5000}} | |||
|- | |- | ||
|{{ | |{{Name|Decorative Sword|size=65}} | ||
|[[File: | |[[File:Marlon Icon.png|24px|link=]] [[Adventurer's Guild]] | ||
|{{Price| | |{{Price|10000}} | ||
|- | |- | ||
|{{ | |{{Name|Clothesline|size=60}} | ||
|[[File: | |[[File:Sandy Icon.png|24px|link=]] [[Oasis]] | ||
|{{Price| | |{{Price|5000}} | ||
|- | |- | ||
|{{Name|Elegant Vase|size=24}} | |||
|[[ | |[[File:Furniture Catalogue.png|24px|link=]] [[Furniture Catalogue]] | ||
|{{Price| | |{{Price|0}} | ||
|- | |- | ||
|[[File: | |{{Name|Cat Tree|size=48}} | ||
|{{Price| | |[[File:Marnie Icon.png|24px|link=]] [[Marnie's Ranch]] | ||
|{{Price|10000}} | |||
|- | |- | ||
|{{ | |{{Name|Dark Cat Tree|size=48}} | ||
|[[File: | |[[File:Marnie Icon.png|24px|link=]] [[Marnie's Ranch]] | ||
|{{Price| | |{{Price|10000}} | ||
|- | |- | ||
|{{ | |{{Name|Doghouse|size=48}} | ||
|[[File:Traveling Cart Icon.png|24px|link=]] [[Traveling Cart]] | |[[File:Marnie Icon.png|24px|link=]] [[Marnie's Ranch]] | ||
|{{Price|70000}} | |{{Price|10000}} | ||
|- | |- | ||
|{{ | |{{Name|Dark Doghouse|size=48}} | ||
|[[File:Traveling Cart Icon.png|24px|link=]] [[Traveling Cart]] | |[[File:Marnie Icon.png|24px|link=]] [[Marnie's Ranch]] | ||
|{{Price|110000}} | |{{Price|10000}} | ||
|- | |- | ||
|{{ | |{{Name|Dark Piano|size=64}} | ||
|[[File:Garbage Can.png|24px|link=]] [[Garbage Can|Garbage Cans]] | |[[File:Desert Trader Icon.png|24px]] [[Desert Trader]] | ||
|N/A | |{{Name|Coal|999}} | ||
|- | |- | ||
|} | |{{Name|Radio Desk|size=46}} | ||
|[[Desert Festival]] | |||
==Farmhouse Furniture== | |{{Price|40|Calico}} | ||
Below are lists of the furniture that comes with the [[Farmhouse]] for each choice of [[Farm Maps|Farm Map]]. All furniture shown below comes with each choice of [[Cabin]] as well. | |- | ||
|{{Name|Calico Statue|size=24}} | |||
<div style="float: left;"> | |[[Desert Festival]] | ||
{|class="wikitable" | |{{Price|25|Calico}} | ||
|- | |- | ||
!Standard Farm | |rowspan="2"|{{Name|Decorative Barrel|size=24}} | ||
!Riverland Farm | |[[Desert Festival]] | ||
!Forest Farm | |{{Price|10|Calico}} | ||
!Hill-top Farm | |- | ||
|[[File:Furniture Catalogue.png|24px|link=]] [[Furniture Catalogue]] | |||
|{{Price|0}} | |||
|- | |||
|{{Name|Joja Vault|size=32}} | |||
|[[File:Joja Furniture Catalogue.png|16px|link=]] [[Joja Furniture Catalogue]] | |||
|{{Price|0}} | |||
|- | |||
|{{Name|Stacked Joja Crates|size=28|link=Stacked Joja Boxes}} | |||
|[[File:Joja Furniture Catalogue.png|16px|link=]] [[Joja Furniture Catalogue]] | |||
|{{Price|0}} | |||
|- | |||
|{{Name|Joja Crate|size=28}} | |||
|[[File:Joja Furniture Catalogue.png|16px|link=]] [[Joja Furniture Catalogue]] | |||
|{{Price|0}} | |||
|- | |||
|{{Name|Joja Shopping Cart|size=50}} | |||
|[[File:Joja Furniture Catalogue.png|16px|link=]] [[Joja Furniture Catalogue]] | |||
|{{Price|0}} | |||
|- | |||
|{{Name|Large Joja Crate|size=36}} | |||
|[[File:Joja Furniture Catalogue.png|16px|link=]] [[Joja Furniture Catalogue]] | |||
|{{Price|0}} | |||
|- | |||
|{{Name|Joja Cola Fridge|size=48}} | |||
|[[File:Joja Furniture Catalogue.png|16px|link=]] [[Joja Furniture Catalogue]] | |||
|{{Price|0}} | |||
|- | |||
|{{Name|Wizard Study|size=60}} | |||
|[[File:Wizard Catalogue.png|16px|link=]] [[Wizard Catalogue]] | |||
|{{Price|0}} | |||
|- | |||
|{{Name|Cauldron|size=48}} | |||
|[[File:Wizard Catalogue.png|16px|link=]] [[Wizard Catalogue]] | |||
|{{Price|0}} | |||
|- | |||
|{{Name|Junimo Hut|size=48|link=Junimo Hut (furniture)}} | |||
|[[File:Junimo Catalogue.png|16px|link=]] [[Junimo Catalogue]] | |||
|{{Price|0}} | |||
|- | |||
|{{Name|Large Junimo Hut|size=48}} | |||
|[[File:Junimo Catalogue.png|16px|link=]] [[Junimo Catalogue]] | |||
|{{Price|0}} | |||
|- | |||
|{{Name|Small Junimo Hut|size=48}} | |||
|[[File:Junimo Catalogue.png|16px|link=]] [[Junimo Catalogue]] | |||
|{{Price|0}} | |||
|- | |||
|{{Name|Brochure Cabinet|size=48}} | |||
|[[File:Junimo Catalogue.png|16px|link=]] [[Junimo Catalogue]] | |||
|{{Price|0}} | |||
|- | |||
|{{Name|Retro Cabinet|size=48}} | |||
|[[File:Retro Catalogue.png|16px|link=]] [[Retro Catalogue]] | |||
|{{Price|0}} | |||
|- | |||
|} | |||
|- | |||
|} | |||
==Small Decorations== | |||
All small decorations can be placed outside. | |||
All small decoration items available in the [[Furniture Catalogue]] cannot be purchased from the [[Traveling Cart]]. | |||
{| | |||
|- | |||
|style="vertical-align: top;"| | |||
{|class="wikitable" | |||
!Item | |||
!Source | |||
!Price | |||
|- | |||
|{{Name|Singing Stone|size=30}} | |||
|[[File:Gunther Icon.png|24px|link=]] [[Museum|Museum Donation]] | |||
|[[Minerals]] (21) | |||
|- | |||
|rowspan="2"|{{Name|Decorative Bowl|size=36}} | |||
|[[File:Robin Icon.png|24px|link=]] [[Carpenter's Shop]] | |||
|{{Price|250}} | |||
|- | |||
|[[File:Furniture Catalogue.png|24px|link=]] [[Furniture Catalogue]] | |||
|{{Price|0}} | |||
|- | |||
|rowspan="2"|{{Name|Futan Bear|size=36}} | |||
|[[File:Robin Icon.png|24px|link=]] [[Carpenter's Shop]] | |||
|{{Price|1500}} | |||
|- | |||
|[[File:Furniture Catalogue.png|24px|link=]] [[Furniture Catalogue]] | |||
|{{Price|0}} | |||
|- | |||
|rowspan="2"|{{Name|Globe|size=36}} | |||
|[[File:Robin Icon.png|24px|link=]] [[Carpenter's Shop]] | |||
|{{Price|750}} | |||
|- | |||
|[[File:Furniture Catalogue.png|24px|link=]] [[Furniture Catalogue]] | |||
|{{Price|0}} | |||
|- | |||
|rowspan="2"|{{Name|Model Ship|size=36}} | |||
|[[File:Robin Icon.png|24px|link=]] [[Carpenter's Shop]] | |||
|{{Price|750}} | |||
|- | |||
|[[File:Furniture Catalogue.png|24px|link=]] [[Furniture Catalogue]] | |||
|{{Price|0}} | |||
|- | |||
|rowspan="2"|{{Name|Small Crystal|size=36}} | |||
|[[File:Robin Icon.png|24px|link=]] [[Carpenter's Shop]] | |||
|{{Price|750}} | |||
|- | |||
|[[File:Furniture Catalogue.png|24px|link=]] [[Furniture Catalogue]] | |||
|{{Price|0}} | |||
|- | |||
|rowspan="2"|{{Name|Decorative Lantern|size=36}} | |||
|[[File:Robin Icon.png|24px|link=]] [[Carpenter's Shop]] | |||
|{{Price|500}} | |||
|- | |||
|[[File:Furniture Catalogue.png|24px|link=]] [[Furniture Catalogue]] | |||
|{{Price|0}} | |||
|- | |||
|{{Name|Small Junimo Plush|size=96}} | |||
|[[Crane Game]] during any [[Season]] | |||
|{{Price|500}} | |||
|- | |||
|{{Name|Futan Rabbit|size=36}} | |||
|[[Crane Game]] during any [[Season]] | |||
|{{Price|500}} | |||
|- | |||
|{{Name|Squirrel Figurine|size=36}} | |||
|[[Fishing]] north of [[Ginger Island]] | |||
|N/A | |||
|- | |||
|{{Name|Joja Cola Cans|size=36}} | |||
|[[File:Joja Furniture Catalogue.png|16px|link=]] [[Joja Furniture Catalogue]] | |||
|{{Price|0}} | |||
|- | |||
|{{Name|Cash Register|size=36}} | |||
|[[File:Joja Furniture Catalogue.png|16px|link=]] [[Joja Furniture Catalogue]] | |||
|{{Price|0}} | |||
|- | |||
|{{Name|Elixir Bundle|size=32}} | |||
|[[File:Wizard Catalogue.png|16px|link=]] [[Wizard Catalogue]] | |||
|{{Price|0}} | |||
|- | |||
|{{Name|Two Elixirs|size=32}} | |||
|[[File:Wizard Catalogue.png|16px|link=]] [[Wizard Catalogue]] | |||
|{{Price|0}} | |||
|- | |||
|{{Name|Crystal Ball|size=24}} | |||
|[[File:Wizard Catalogue.png|16px|link=]] [[Wizard Catalogue]] | |||
|{{Price|0}} | |||
|- | |||
|{{Name|Amethyst Crystal Ball|size=24}} | |||
|[[File:Wizard Catalogue.png|16px|link=]] [[Wizard Catalogue]] | |||
|{{Price|0}} | |||
|- | |||
|{{Name|Topaz Crystal Ball|size=24}} | |||
|[[File:Wizard Catalogue.png|16px|link=]] [[Wizard Catalogue]] | |||
|{{Price|0}} | |||
|- | |||
|{{Name|Aquamarine Crystal Ball|size=24}} | |||
|[[File:Wizard Catalogue.png|16px|link=]] [[Wizard Catalogue]] | |||
|{{Price|0}} | |||
|- | |||
|{{Name|Emerald Crystal Ball|size=24}} | |||
|[[File:Wizard Catalogue.png|16px|link=]] [[Wizard Catalogue]] | |||
|{{Price|0}} | |||
|- | |||
|{{Name|Ruby Crystal Ball|size=24}} | |||
|[[File:Wizard Catalogue.png|16px|link=]] [[Wizard Catalogue]] | |||
|{{Price|0}} | |||
|- | |||
|{{Name|Small Book Stack|size=32}} | |||
|[[File:Wizard Catalogue.png|16px|link=]] [[Wizard Catalogue]] | |||
|{{Price|0}} | |||
|- | |||
|{{Name|Book Stack|size=32}} | |||
|[[File:Wizard Catalogue.png|16px|link=]] [[Wizard Catalogue]] | |||
|{{Price|0}} | |||
|- | |||
|{{Name|Large Book Stack|size=32}} | |||
|[[File:Wizard Catalogue.png|16px|link=]] [[Wizard Catalogue]] | |||
|{{Price|0}} | |||
|- | |||
|{{Name|Purple Book|size=32}} | |||
|[[File:Wizard Catalogue.png|16px|link=]] [[Wizard Catalogue]] | |||
|{{Price|0}} | |||
|- | |||
|{{Name|Blue Book|size=32}} | |||
|[[File:Wizard Catalogue.png|16px|link=]] [[Wizard Catalogue]] | |||
|{{Price|0}} | |||
|- | |||
|{{Name|Yellow Book|size=32}} | |||
|[[File:Wizard Catalogue.png|16px|link=]] [[Wizard Catalogue]] | |||
|{{Price|0}} | |||
|- | |||
|{{Name|Red Book|size=32}} | |||
|[[File:Wizard Catalogue.png|16px|link=]] [[Wizard Catalogue]] | |||
|{{Price|0}} | |||
|- | |||
|{{Name|Green Book|size=32}} | |||
|[[File:Wizard Catalogue.png|16px|link=]] [[Wizard Catalogue]] | |||
|{{Price|0}} | |||
|- | |||
|{{Name|Brown Book|size=32}} | |||
|[[File:Wizard Catalogue.png|16px|link=]] [[Wizard Catalogue]] | |||
|{{Price|0}} | |||
|} | |||
|style="vertical-align: top;"| | |||
{|class="wikitable" | |||
!Item | |||
!Source | |||
!Price | |||
|- | |||
|{{Name|Fallen Purple Book|size=32}} | |||
|[[File:Wizard Catalogue.png|16px|link=]] [[Wizard Catalogue]] | |||
|{{Price|0}} | |||
|- | |||
|{{Name|Fallen Blue Book|size=32}} | |||
|[[File:Wizard Catalogue.png|16px|link=]] [[Wizard Catalogue]] | |||
|{{Price|0}} | |||
|- | |||
|{{Name|Fallen Yellow Book|size=32}} | |||
|[[File:Wizard Catalogue.png|16px|link=]] [[Wizard Catalogue]] | |||
|{{Price|0}} | |||
|- | |||
|{{Name|Fallen Red Book|size=32}} | |||
|[[File:Wizard Catalogue.png|16px|link=]] [[Wizard Catalogue]] | |||
|{{Price|0}} | |||
|- | |||
|{{Name|Fallen Green Book|size=32}} | |||
|[[File:Wizard Catalogue.png|16px|link=]] [[Wizard Catalogue]] | |||
|{{Price|0}} | |||
|- | |||
|{{Name|Fallen Brown Book|size=32}} | |||
|[[File:Wizard Catalogue.png|16px|link=]] [[Wizard Catalogue]] | |||
|{{Price|0}} | |||
|- | |||
|{{Name|Small Book Pile|size=32}} | |||
|[[File:Wizard Catalogue.png|16px|link=]] [[Wizard Catalogue]] | |||
|{{Price|0}} | |||
|- | |||
|{{Name|Book Pile|size=32}} | |||
|[[File:Wizard Catalogue.png|16px|link=]] [[Wizard Catalogue]] | |||
|{{Price|0}} | |||
|- | |||
|{{Name|Large Book Pile|size=32}} | |||
|[[File:Wizard Catalogue.png|16px|link=]] [[Wizard Catalogue]] | |||
|{{Price|0}} | |||
|- | |||
|{{Name|Junimo Plaque|size=24}} | |||
|[[File:Junimo Catalogue.png|16px|link=]] [[Junimo Catalogue]] | |||
|{{Price|0}} | |||
|- | |||
|{{Name|Junimo Pot|size=24}} | |||
|[[File:Junimo Catalogue.png|16px|link=]] [[Junimo Catalogue]] | |||
|{{Price|0}} | |||
|- | |||
|{{Name|Junimo Bag|size=24}} | |||
|[[File:Junimo Catalogue.png|16px|link=]] [[Junimo Catalogue]] | |||
|{{Price|0}} | |||
|- | |||
|{{Name|Junimo Bundle|size=24}} | |||
|[[File:Junimo Catalogue.png|16px|link=]] [[Junimo Catalogue]] | |||
|{{Price|0}} | |||
|- | |||
|{{Name|Small Junimo Pot|size=24}} | |||
|[[File:Junimo Catalogue.png|16px|link=]] [[Junimo Catalogue]] | |||
|{{Price|0}} | |||
|- | |||
|{{Name|Green Sleeping Junimo|size=24}} | |||
|[[File:Junimo Catalogue.png|16px|link=]] [[Junimo Catalogue]] | |||
|{{Price|0}} | |||
|- | |||
|{{Name|Blue Sleeping Junimo|size=24}} | |||
|[[File:Junimo Catalogue.png|16px|link=]] [[Junimo Catalogue]] | |||
|{{Price|0}} | |||
|- | |||
|{{Name|Red Sleeping Junimo|size=24}} | |||
|[[File:Junimo Catalogue.png|16px|link=]] [[Junimo Catalogue]] | |||
|{{Price|0}} | |||
|- | |||
|{{Name|Purple Sleeping Junimo|size=24}} | |||
|[[File:Junimo Catalogue.png|16px|link=]] [[Junimo Catalogue]] | |||
|{{Price|0}} | |||
|- | |||
|{{Name|Yellow Sleeping Junimo|size=24}} | |||
|[[File:Junimo Catalogue.png|16px|link=]] [[Junimo Catalogue]] | |||
|{{Price|0}} | |||
|- | |||
|{{Name|Orange Sleeping Junimo|size=24}} | |||
|[[File:Junimo Catalogue.png|16px|link=]] [[Junimo Catalogue]] | |||
|{{Price|0}} | |||
|- | |||
|{{Name|Gray Sleeping Junimo|size=24}} | |||
|[[File:Junimo Catalogue.png|16px|link=]] [[Junimo Catalogue]] | |||
|{{Price|0}} | |||
|- | |||
|{{Name|Retro Radio|size=24}} | |||
|[[File:Retro Catalogue.png|16px|link=]] [[Retro Catalogue]] | |||
|{{Price|0}} | |||
|- | |||
|{{Name|Decorative Hatch|size=24}} | |||
|[[File:Furniture Catalogue.png|24px|link=]] [[Furniture Catalogue]] | |||
|{{Price|0}} | |||
|- | |||
|{{Name|Six-Pack Rings|size=32}} | |||
|[[File:Trash Catalogue.png|16px|link=]] [[Trash Catalogue]] | |||
|{{Price|0}} | |||
|- | |||
|{{Name|Green Bottle|size=32}} | |||
|[[File:Trash Catalogue.png|16px|link=]] [[Trash Catalogue]] | |||
|{{Price|0}} | |||
|- | |||
|{{Name|Plastic Bag|size=32}} | |||
|[[File:Trash Catalogue.png|16px|link=]] [[Trash Catalogue]] | |||
|{{Price|0}} | |||
|- | |||
|{{Name|Aluminum Can|size=32}} | |||
|[[File:Trash Catalogue.png|16px|link=]] [[Trash Catalogue]] | |||
|{{Price|0}} | |||
|- | |||
|{{Name|Blue Bottle|size=32}} | |||
|[[File:Trash Catalogue.png|16px|link=]] [[Trash Catalogue]] | |||
|{{Price|0}} | |||
|- | |||
|{{Name|Buried Tire|size=32}} | |||
|[[File:Trash Catalogue.png|16px|link=]] [[Trash Catalogue]] | |||
|{{Price|0}} | |||
|- | |||
|{{Name|Tire|size=32}} | |||
|[[File:Trash Catalogue.png|16px|link=]] [[Trash Catalogue]] | |||
|{{Price|0}} | |||
|- | |||
|{{Name|Wrapper|size=32}} | |||
|[[File:Trash Catalogue.png|16px|link=]] [[Trash Catalogue]] | |||
|{{Price|0}} | |||
|- | |||
|{{Name|Spilled Beverage|size=32}} | |||
|[[File:Trash Catalogue.png|16px|link=]] [[Trash Catalogue]] | |||
|{{Price|0}} | |||
|- | |||
|{{Name|Messy Shirt|size=32}} | |||
|[[File:Trash Catalogue.png|16px|link=]] [[Trash Catalogue]] | |||
|{{Price|0}} | |||
|- | |||
|{{Name|Messy Shorts|size=32}} | |||
|[[File:Trash Catalogue.png|16px|link=]] [[Trash Catalogue]] | |||
|{{Price|0}} | |||
|- | |||
|} | |||
|- | |||
|} | |||
==Special Items== | |||
Special items can be placed outside. | |||
{| | |||
|- | |||
|style="vertical-align: top;"| | |||
{|class="wikitable" | |||
!Item | |||
!Source | |||
!Price | |||
|- | |||
|{{Name|Basic Log|size=36}} | |||
|[[File:Robin Icon.png|24px|link=]] [[Carpenter's Shop]] | |||
|{{Price|250}} | |||
|- | |||
|rowspan="2"|{{Name|Log Section|size=36}} | |||
|[[File:Robin Icon.png|24px|link=]] [[Carpenter's Shop]] | |||
|{{Price|350}} | |||
|- | |||
|[[Night Market]] on [[Winter|Winter 17]] | |||
|{{Price|200}} | |||
|- | |||
|{{Name|Ornamental Hay Bale|size=36}} | |||
|[[File:Marnie Icon.png|24px|link=]] [[Marnie's Ranch]] | |||
|{{Price|250}} | |||
|- | |||
|rowspan="2"|{{Name|Sign Of The Vessel|size=36}} | |||
|[[File:Krobus Icon.png|24px|link=]] [[Krobus#Krobus Shop|Krobus' Shop]] | |||
|{{Price|350}} | |||
|- | |||
|[[File:Pam Icon.png|24px|link=]] [[Pam#Nine Hearts|Pam's 9-Heart Event]] | |||
|N/A | |||
|- | |||
|{{Name|Wicked Statue|size=36}} | |||
|[[File:Krobus Icon.png|24px|link=]] [[Krobus#Krobus Shop|Krobus' Shop]] (Recipe) | |||
|{{Price|1000}} | |||
|- | |||
|rowspan="2"|{{Name|Big Green Cane|size=36}} | |||
|[[Night Market]] | |||
|{{Price|200}} | |||
|- | |||
|[[Crane Game]] during [[Winter]] | |||
|{{Price|500}} | |||
|- | |||
|rowspan="2"|{{Name|Big Red Cane|size=36}} | |||
|[[Night Market]] | |||
|{{Price|200}} | |||
|- | |||
|[[Crane Game]] during [[Winter]] | |||
|{{Price|500}} | |||
|- | |||
|rowspan="2"|{{Name|Green Canes|size=36}} | |||
|[[Night Market]] | |||
|{{Price|200}} | |||
|- | |||
|[[Crane Game]] during [[Winter]] | |||
|{{Price|500}} | |||
|- | |||
|rowspan="2"|{{Name|Red Canes|size=36}} | |||
|[[Night Market]] | |||
|{{Price|200}} | |||
|- | |||
|[[Crane Game]] during [[Winter]] | |||
|{{Price|500}} | |||
|- | |||
|rowspan="2"|{{Name|Mixed Cane|size=36}} | |||
|[[Night Market]] | |||
|{{Price|200}} | |||
|- | |||
|[[Crane Game]] during [[Winter]] | |||
|{{Price|500}} | |||
|- | |||
|rowspan="2"|{{Name|Lawn Flamingo|size=36}} | |||
|[[Egg Festival]] | |||
|{{Price|400}} | |||
|- | |||
|[[Crane Game]] during [[Spring]] | |||
|{{Price|500}} | |||
|- | |||
|rowspan="2"|{{Name|Plush Bunny|size=36}} | |||
|[[Egg Festival]] | |||
|{{Price|2000}} | |||
|- | |||
|[[Crane Game]] during [[Spring]] | |||
|{{Price|500}} | |||
|- | |||
|rowspan="3"|{{Name|Seasonal Decor Spring|link=Seasonal Decor|size=36}} | |||
|[[Flower Dance]] | |||
|{{Price|350}} | |||
|- | |||
|[[Night Market]] | |||
|{{Price|500}} | |||
|- | |||
|[[Crane Game]] during [[Spring]] | |||
|{{Price|500}} | |||
|- | |||
|rowspan="2"|{{Name|Tub o' Flowers|size=36}} | |||
|[[Flower Dance]] | |||
|{{Price|250}} | |||
|- | |||
|[[Flower Dance]] (Recipe) | |||
|{{Price|1000}} | |||
|- | |||
|[[File:FreeCactus.png|36px|link=]] [[Desert Festival#Free Cactus|Free Cactus]] | |||
|[[Desert Festival]] | |||
|N/A | |||
|- | |||
|rowspan="2"|{{Name|Tea Set|size=36}} | |||
|[[File:Traveling Cart Icon.png|24px|link=]] [[Traveling Cart]] | |||
|{{Price|1000000}} | |||
|- | |||
|Gift at [[Feast of the Winter Star]] | |||
|N/A | |||
|- | |||
|rowspan="2"|{{Name|Drum Block|size=36}} | |||
|[[File:Gunther Icon.png|24px|link=]] [[Museum|Museum Donation]] | |||
|[[Artifacts]] (3), [[Ancient Drum]] | |||
|- | |||
|[[File:Robin Icon.png|24px|link=]] [[Robin#Six Hearts|Robin's 6-Heart Event]] (Recipe) | |||
|N/A | |||
|- | |||
|rowspan="2"|{{Name|Flute Block|size=36}} | |||
|[[File:Gunther Icon.png|24px|link=]] [[Museum|Museum Donation]] | |||
|[[Artifacts]] (3), [[Bone Flute]] | |||
|- | |||
|[[File:Robin Icon.png|24px|link=]] [[Robin#Six Hearts|Robin's 6-Heart Event]] (Recipe) | |||
|N/A | |||
|- | |||
|rowspan="3"|{{Name|Grave Stone|size=36}} | |||
|[[Spirit's Eve]] | |||
|{{Price|350}} | |||
|- | |||
|[[Night Market]] on [[Winter|Winter 15]] | |||
|{{Price|200}} | |||
|- | |||
|[[Crane Game]] during [[Fall]] | |||
|{{Price|500}} | |||
|- | |||
|{{Name|Stone Cairn|size=36}} | |||
|[[File:Dwarf Icon.png|24px|link=]] [[Dwarf#Dwarf Shop|Dwarf's Shop]] | |||
|{{Price|200}} | |||
|} | |||
|style="vertical-align: top;"| | |||
{|class="wikitable" | |||
!Item | |||
!Source | |||
!Price | |||
|- | |||
|[[File:Mannequin (M).png|36px]][[File:Mannequin (F).png|36px]] [[Mannequins]] | |||
|[[File:Sandy Icon.png|24px]] [[Oasis]] | |||
|{{Price|12000}} | |||
|- | |||
|[[File:Cursed Mannequin (M).png|36px]][[File:Cursed Mannequin (F).png|36px]] [[Cursed Mannequins]] | |||
|Dropped by {{Name|Haunted Skull|class=inline}} | |||
|N/A | |||
|- | |||
|{{Name|Stone Frog|size=36}} | |||
|[[Night Market]] on [[Winter|Winter 15]] | |||
|{{Price|500}} | |||
|- | |||
|{{Name|Stone Junimo|size=36}} | |||
|Found by using [[Secret Notes#Secret Note #14|Secret Note #14]] | |||
|N/A | |||
|- | |||
|{{Name|Stone Owl|size=36}} | |||
|[[Night Market]] on [[Winter|Winter 17]] | |||
|{{Price|500}} | |||
|- | |||
|{{Name|Stone Owl Random|link=Random Events#Stone Owl{{!}}Stone Owl|size=36}} | |||
|[[Random Events|Random Event]] | |||
|N/A | |||
|- | |||
|{{Name|Stone Parrot|size=36}} | |||
|[[Night Market]] on [[Winter|Winter 16]] | |||
|{{Price|500}} | |||
|- | |||
|{{Name|Suit Of Armor|size=36}} | |||
|[[Night Market]] on [[Winter|Winter 16]] | |||
|{{Price|200}} | |||
|- | |||
|{{Name|??Foroguemon??|size=36}} | |||
|Found in a [[Secrets#Locked Boxes|Secret]] location | |||
|N/A | |||
|- | |||
|{{Name|??HMTGF??|size=36}} | |||
|Found in a [[Secrets#Locked Boxes|Secret]] location | |||
|N/A | |||
|- | |||
|{{Name|??Pinky Lemon??|size=36}} | |||
|Found in a [[Secrets#Locked Boxes|Secret]] location | |||
|N/A | |||
|- | |||
|{{Name|Solid Gold Lewis|size=36}} | |||
|Found by using [[Secret Notes#Secret Note #19|Secret Note #19]] | |||
|N/A | |||
|- | |||
|{{Name|Statue Of Endless Fortune|size=36}} | |||
|[[File:Mr. Qi Icon.png|24px|link=]] [[Casino]] | |||
|{{Price|1000000}} | |||
|- | |||
|{{Name|Statue Of Perfection|size=36}} | |||
|[[Grandpa#Grandpa's Evaluation|Grandpa's Evaluation]] | |||
|N/A | |||
|- | |||
|{{Name|Statue Of True Perfection|size=36}} | |||
|Achieving 100% [[Perfection]] | |||
|N/A | |||
|- | |||
|{{Name|Soda Machine|size=36}} | |||
|Completing the [[Joja Community Development Form]] | |||
|N/A | |||
|- | |||
|{{Name|Stardew Hero Trophy|size=36}} | |||
|Rebuilding the [[Community Center]] | |||
|N/A | |||
|- | |||
|{{Name|Junimo Kart Arcade System|size=36}} | |||
|Beating "Progress Mode" of [[Junimo Kart]] | |||
|N/A | |||
|- | |||
|{{Name|Prairie King Arcade System|size=36}} | |||
|Beating [[Journey of the Prairie King]] | |||
|N/A | |||
|- | |||
|} | |||
|- | |||
|} | |||
==Catalogues== | |||
Catalogues can be placed outside. | |||
Once placed, "using" a catalogue allows you to purchase unlimited furniture, wallpaper, or flooring items for {{Price|0}}. | |||
{|class="wikitable" | |||
!Item | |||
!Source | |||
!Price | |||
|- | |||
|{{Name|Catalogue|size=32}} | |||
|[[File:Pierre Icon.png|24px|link=]] [[Pierre's General Store]] | |||
|{{Price|30000}} | |||
|- | |||
|rowspan="2"|{{Name|Furniture Catalogue|size=64}} | |||
|[[File:Robin Icon.png|24px|link=]] [[Carpenter's Shop]] | |||
|{{Price|200000}} | |||
|- | |||
|[[Desert Festival]] | |||
|{{Price|1000|Calico}} | |||
|- | |||
|rowspan="2"|{{Name|Joja Furniture Catalogue|size=32}} | |||
|[[JojaMart]] | |||
|{{Price|25000}} | |||
|- | |||
|[[File:Traveling Cart Icon.png|24px|link=]] [[Traveling Cart]] | |||
|{{Price|30000}} | |||
|- | |||
|{{Name|Wizard Catalogue|size=32}} | |||
|[[File:Krobus.png|24px|link=]] [[Krobus]] | |||
|{{Price|150000}} | |||
|- | |||
|{{Name|Junimo Catalogue|size=32}} | |||
|[[File:Traveling Cart Icon.png|24px|link=]] [[Traveling Cart]] | |||
|{{Price|70000}} | |||
|- | |||
|{{Name|Retro Catalogue|size=32}} | |||
|[[File:Traveling Cart Icon.png|24px|link=]] [[Traveling Cart]] | |||
|{{Price|110000}} | |||
|- | |||
|{{Name|Trash Catalogue|size=32}} | |||
|[[File:Garbage Can.png|24px|link=]] [[Garbage Can|Garbage Cans]] | |||
|N/A | |||
|- | |||
|} | |||
==Farmhouse Furniture== | |||
Below are lists of the furniture that comes with the [[Farmhouse]] for each choice of [[Farm Maps|Farm Map]]. All furniture shown below comes with each choice of [[Cabin]] as well. | |||
<div style="float: left;"> | |||
{|class="wikitable" | |||
|- | |||
!Standard Farm | |||
!Riverland Farm | |||
!Forest Farm | |||
!Hill-top Farm | |||
|- | |||
| style="vertical-align:top;" | | |||
{{Name|Single Bed|1}} | |||
{{Name|Brick Fireplace|1}} | |||
{{Name|Budget TV|1}} | |||
{{Name|Red Cottage Rug|1}} | |||
{{Name|Basic Window|1}} | |||
{{Name|Oak Table|1}} | |||
{{Name|Oak Chair|1}} | |||
{{Name|Decorative Bowl|1}} | |||
{{Name|House Plant|1|}} | |||
{{Name|'Little Tree'|1}} | |||
| style="vertical-align:top;" | | |||
{{Name|Single Bed|1}} | |||
{{Name|Brick Fireplace|1}} | |||
{{Name|Floor TV|1}} | |||
{{Name|Nautical Rug|1}} | |||
{{Name|Burlap Rug|1}} | |||
{{Name|Porthole|2}} | |||
{{Name|Walnut Table|1}} | |||
{{Name|Walnut Chair|1}} | |||
{{Name|Model Ship|1}} | |||
{{Name|Anchor (furniture)|1}} | |||
{{Name|World Map|1}} | |||
| style="vertical-align:top;" | | |||
{{Name|Single Bed|1}} | |||
{{Name|Brick Fireplace|1}} | |||
{{Name|Floor TV|1}} | |||
{{Name|Woodcut Rug|1}} | |||
{{Name|Carved Window|1}} | |||
{{Name|Pub Table|1}} | |||
{{Name|Walnut Chair|1}} | |||
{{Name|Manicured Pine|2}} | |||
{{Name|S. Pine|1}} | |||
{{Name|Bonsai Tree|1}} | |||
{{Name|L. Light String|1}} | |||
| style="vertical-align:top;" | | |||
{{Name|Single Bed|1}} | |||
{{Name|Stone Fireplace|1}} | |||
{{Name|Floor TV|1}} | |||
{{Name|Bamboo Mat|2}} | |||
{{Name|Burlap Rug|1}} | |||
{{Name|Metal Window|1}} | |||
{{Name|Walnut Tea-Table|1}} | |||
{{Name|Candle Lamp|1}} | |||
{{Name|Small Crystal|1}} | |||
{{Name|Miner's Crest|1}} | |||
|- | |||
|}</div> | |||
<div style="float: left;"> | |||
{|class="wikitable" | |||
|- | |||
!Wilderness Farm | |||
!Four Corners Farm | |||
!Beach Farm | |||
!Meadowlands Farm | |||
|- | |- | ||
| style="vertical-align:top;" | | | style="vertical-align:top;" | | ||
{{ | {{Name|Single Bed|1}} | ||
{{ | {{Name|Stone Fireplace|1}} | ||
{{ | {{Name|Floor TV|1}} | ||
{{ | {{Name|Monster Rug|1}} | ||
{{ | {{Name|Ornate Window|1}} | ||
{{ | {{Name|Boarded Window|1}} | ||
{{ | {{Name|Walnut End Table|1}} | ||
{{ | {{Name|Ornate Lamp|1}} | ||
{{ | {{Name|Decorative Lantern|1}} | ||
{{ | {{Name|House Plant 8|1|link=House Plant}} | ||
{{Name|Hanging Shield|1}} | |||
{{Name|Monster Danglers|1}} | |||
| style="vertical-align:top;" | | | style="vertical-align:top;" | | ||
{{ | {{Name|Single Bed|1}} | ||
{{ | {{Name|Brick Fireplace|1}} | ||
{{ | {{Name|Budget TV|1}} | ||
{{ | {{Name|Red Cottage Rug|1}} | ||
{{ | {{Name|Basic Window|2}} | ||
{{ | {{Name|Birch Table|1}} | ||
{{ | {{Name|Birch Bench|2}} | ||
{{ | {{Name|Box Lamp|1}} | ||
{{ | {{Name|House Plant 2|1|link=House Plant}} | ||
{{ | {{Name|House Plant 6|1|link=House Plant}} | ||
{{ | {{Name|House Plant 10|1|link=House Plant}} | ||
{{Name|'Sun 45'|1}} | |||
| style="vertical-align:top;" | | | style="vertical-align:top;" | | ||
{{ | {{Name|Single Bed|1}} | ||
{{ | {{Name|Floor TV|1}} | ||
{{Name|Oceanic Rug|1}} | |||
{{ | {{Name|Basic Window|2}} | ||
{{ | {{Name|Artist Bookcase|1}} | ||
{{ | {{Name|Birch Table|1}} | ||
{{ | {{Name|Birch Bench|1}} | ||
{{ | {{Name|Birch Chair|2}} | ||
{{ | {{Name|Indoor Palm|2}} | ||
{{ | {{Name|Small Plant}} | ||
{{ | |||
| style="vertical-align:top;" | | | style="vertical-align:top;" | | ||
{{ | {{Name|Single Bed|1}} | ||
{{ | {{Name|Brick Fireplace|1}} | ||
{{ | {{Name|Floor TV|1}} | ||
{{ | {{Name|Large Cottage Rug|1}} | ||
{{ | {{Name|Small Window|2}} | ||
{{ | {{Name|Brown Armchair|1}} | ||
{{ | {{Name|Oak Table|1}} | ||
{{ | {{Name|Oak Bench|1}} | ||
{{ | {{Name|Oak Dresser|1}} | ||
{{ | {{Name|Country Lamp|1}} | ||
{{Name|Decorative Pitchfork|1}} | |||
{{Name|Decorative Lantern|1}} | |||
{{Name|House Plant|2}} | |||
{{Name|Ceiling Flags|3}} | |||
|- | |- | ||
|}</div> | |}</div> | ||
| Line 3,442: | Line 4,229: | ||
{|class="wikitable" | {|class="wikitable" | ||
|- | |- | ||
![[Island Farmhouse]] | ![[Island Farmhouse]] | ||
|- | |- | ||
| style="vertical-align:top;" | | | style="vertical-align:top;" | | ||
{{ | {{Name|Tropical Bed|1 per farmer}} | ||
{{Name|Stove Fireplace|1}} | |||
{{Name|Bamboo Mat|1}} | |||
{{Name|Basic Window|4}} | |||
{{Name|Burlap Rug|1}} | |||
{{Name|Indoor Palm|4}} | |||
{{ | |||
{{ | |||
{{ | |||
{{ | |||
{{ | |||
|- | |- | ||
|}</div>{{Clear}} | |}</div>{{Clear}} | ||
| Line 3,530: | Line 4,255: | ||
{{History|1.3.27|Fireplaces are now moveable. Added several new items.}} | {{History|1.3.27|Fireplaces are now moveable. Added several new items.}} | ||
{{History|1.4|Dressers can now be used to store [[clothing]], [[hats]], [[footwear|shoes]], and [[rings]].}} | {{History|1.4|Dressers can now be used to store [[clothing]], [[hats]], [[footwear|shoes]], and [[rings]].}} | ||
{{History|1.5|Most furniture can now be placed outside. Beds are now moveable. Players can now sit in chairs. Added new items (including Fish Tanks category), new sources, and new farm.}} | {{History|1.5|Most furniture can now be placed outside. Beds are now moveable. Players can now sit in chairs. Added new items (including Fish Tanks category), new sources, and a new farm type, the Beach farm.}} | ||
{{History|1.6|Added new | {{History|1.6|Added 280 new pieces of furniture. Five new themed item catalogues: Joja Furniture Catalogue, Wizard Catalogue, Junimo Catalogue, Retro Catalogue, and Trash Catalogue. Decorative lanterns now emit light. Starry Double Bed, Strawberry Double Bed, and Pirate Double Bed are no longer obtainable from the Furniture Catalogue. There's now a small chance to find furniture items while doing random tasks. Several existing furniture items' description changed from "Can be placed inside your house." to "Can be placed as decoration." Furniture can no longer be placed on top of crops.}} | ||
{{History|1.6.9|Beds can now be placed in any constructed buildings that allow furniture.}} | |||
{{NavboxFurniture}} | {{NavboxFurniture}} | ||
Latest revision as of 16:37, 19 May 2026

|
Under Construction This article or section is under construction. It may be in the process of an expansion or major restructuring. Last edited by [[User:imported>Margotbean|imported>Margotbean]] on 2026-05-19 16:37:57. |
Furniture can be purchased from Robin at the Carpenter's Shop or from the Traveling Cart merchant. Both shops offer a random selection of furniture each day they are open. The cost of furniture at the Traveling Cart is random, but is always between  250–2,500g. Prices at the Carpenter's Shop do not vary.
Some furniture can be obtained only by donating items to the Museum, purchased at Festivals, the Casino, JojaMart, or other unique sources. These exceptions are listed in the tables below.
After the first Farmhouse upgrade, Robin also offers the Furniture Catalogue for sale at the Carpenter's Shop. Once placed, "using" the furniture catalogue allows you to purchase furniture items for 0g in unlimited quantity.
There is a small chance of finding random furniture items when engaging in various tasks, such as slaying monsters, breaking open crates, shaking or chopping trees, tilling Artifact Spots, or panning.
Most furniture can be placed outside.[1] However, some items cannot be placed anywhere other than inside the Farmhouse or a Shed. Furniture will display a green square on tiles where it can be placed. The tile will turn red if the furniture cannot be placed.
Players can sit in chairs, benches, couches, and armchairs.
Furniture cannot be sold through the Shipping Bin or to any merchant/shop, and cannot be gifted to villagers.
Controls
- Computer:
 Right-click on furniture while selected to rotate or place it, depending on the item. Some furniture can be easily picked up and moved by
 left-clicking.
- Nintendo Switch: Use the Y button to pick up and place furniture, the A button to rotate furniture, and the R Stick to choose where to place furniture.
- Xbox: Press X or A to quick-place without placement guide and X to remove - it will not place if there’s not enough space. To remove an item, stand in front of it and click X. For more control, use the right toggle to move the item around the room and press X to place/remove - this displays a faded image of the item and the placement guide to show where it can or cannot be placed. Some items can be rotated using A before placing.
- On all systems, some furniture can only be picked up by using a tool, or by holding the 'use tool' button (left-click on computer) to remove it once it is placed.
Chairs
Chairs can be placed outside.
All chairs available in the Furniture Catalogue can also be purchased from the Traveling Cart for 250–2,500g.


Benches
Benches can be placed outside.
All benches available in the Furniture Catalogue can also be purchased from the Traveling Cart for 250–2,500g.
| Item | Source | Price |
|---|---|---|
 Oak Bench |
 Carpenter's Shop |
750g
|
 Furniture Catalogue |
0g
| |
 Walnut Bench |
Carpenter's Shop
|
750g
|
| Furniture Catalogue
|
0g
| |
 Birch Bench |
Carpenter's Shop
|
750g
|
| Furniture Catalogue
|
0g
| |
 Mahogany Bench |
Carpenter's Shop
|
2,000g
|
| Furniture Catalogue
|
0g
| |
 Modern Bench |
Carpenter's Shop
|
2,000g
|
| Furniture Catalogue
|
0g
|
Couches
Couches cannot be placed outside except for the Moldy Couch.
All couches available in the Furniture Catalogue can also be purchased from the Traveling Cart for 250–2,500g.
|
|


Armchairs
Armchairs cannot be placed outside.
All armchairs available in the Furniture Catalogue can also be purchased from the Traveling Cart for 250–2,500g.
| Item | Source | Price |
|---|---|---|
 Blue Armchair |
Carpenter's Shop
|
1,000g
|
| Furniture Catalogue
|
0g
| |
 Red Armchair |
Carpenter's Shop
|
1,000g
|
| Furniture Catalogue
|
0g
| |
 Green Armchair |
Carpenter's Shop
|
1,000g
|
| Furniture Catalogue
|
0g
| |
 Yellow Armchair |
Carpenter's Shop
|
1,000g
|
| Furniture Catalogue
|
0g
| |
 Brown Armchair |
Carpenter's Shop
|
1,000g
|
| Furniture Catalogue
|
0g
|
Tables
Tables can be placed outside. They can also be used to display items.
While holding an item, right-click on the table to display it. For large tables you need to stand near the center of the table to display an item on it, otherwise you will pick up the table instead.
All tables available in the Furniture Catalogue can also be purchased from the Traveling Cart for 250–2,500g.
|
|


Long Tables
Long tables can be placed outside. They can also be used to display items.
While holding an item, right-click on the long table to display it. For long tables you need to stand near the center of the table to display an item on it, otherwise you will pick up the table instead.
All long tables available in the Furniture Catalogue can also be purchased from the Traveling Cart for 250–2,500g.
| Item | Source | Price |
|---|---|---|
 Winter Dining Table |
Carpenter's Shop
|
3,500g
|
| Furniture Catalogue
|
0g
| |
 Festive Dining Table |
Carpenter's Shop
|
3,500g
|
| Furniture Catalogue
|
0g
| |
 Mahogany Dining Table |
Carpenter's Shop
|
3,000g
|
| Furniture Catalogue
|
0g
| |
 Modern Dining Table |
Carpenter's Shop
|
2,700g
|
| Furniture Catalogue
|
0g
| |
 Bountiful Dining Table |
Furniture Catalogue
|
0g
|
Bookcases
Bookcases cannot be placed outside.
All bookcases available in the Furniture Catalogue can also be purchased from the Traveling Cart for 250–2,500g.
|
|


Dressers
Dressers cannot be placed outside.
Dressers can be used to store clothing, hats, shoes, and rings. They cannot be deleted from the inventory with a trash can as long as they contain items.
All dressers available in the Furniture Catalogue can be also purchased from the Traveling Cart for 250–2,500g.
|
|


Fireplaces
Fireplaces cannot be placed outside.
Once placed, right-clicking on fireplaces will turn the fire on or off.
All fireplaces available in the Furniture Catalogue cannot be purchased from the Traveling Cart.
|
|
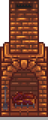
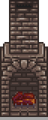
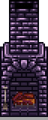



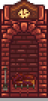
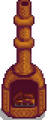
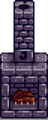
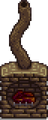


Rugs
Rugs cannot be placed outside.
All rugs available in the Furniture Catalogue cannot be purchased from the Traveling Cart.
|
|


Floor Dividers
Floor dividers cannot be placed outside.
All floor dividers available in the Furniture Catalogue cannot be purchased from the Traveling Cart.
|


Cushions
Cushions cannot be placed outside.
All cushions available in the Furniture Catalogue cannot be purchased from the Traveling Cart.
|
|


Lamps & Wall Sconces
Lamps and wall sconces cannot be placed outside. Lamps can also be placed inside coops and barns.
At night, all lamps listed below provide light in a radius of about 6 tiles, and all wall sconces provide light in a radius of about 2 tiles.
All lamps and wall sconces available in the Furniture Catalogue can also be purchased from the Traveling Cart for 250–2,500g.
|
|


Windows
Windows cannot be placed outside.
All windows available in the Furniture Catalogue cannot be purchased from the Traveling Cart.
|
|


TVs
TVs cannot be placed outside except for the Broken Television.
TVs can be used for watching television channels. However, the Broken Television does not function.
All televisions available in the Furniture Catalogue can also be purchased from the Traveling Cart for 250–2,500g.
|
|


Beds
Beds cannot be placed outside and can only be placed in any constructed building that allows furniture.
The player can sleep in a bed to end the day and restore Energy and Health. Players cannot sleep in Child Beds.
All beds available in the Furniture Catalogue can also be purchased from the Traveling Cart for 250–2,500g.
|
|


Decorative Plants
House Plants
House plants can be placed outside.
All 15 of the house plants are available in the Furniture Catalogue and can also be purchased from the Traveling Cart for 250–2,500g. In addition, they can be purchased from the Carpenter's Shop for 250g.
| House Plants | ||||||||||||||
|---|---|---|---|---|---|---|---|---|---|---|---|---|---|---|

|

|

|

|

|

|

|

|

|

|

|

|

|

|

|
Freestanding Decorative Plants
Freestanding decorative plants can be placed outside.
|
|


Decorative Hanging Plants
Wall hanging plants cannot be placed outside.
All decorative hanging plants available in the Furniture Catalogue can also be purchased from the Traveling Cart for 250–2,500g.
|
|


Seasonal Plants
Seasonal plants can be placed outside. Once placed, their appearance changes with the season.
Seasonal plants are not available in the Furniture Catalogue and cannot be purchased from the Traveling Cart.
| Spring Appearance |
Summer Appearance |
Fall Appearance |
Winter Appearance |
Source | Price |
|---|---|---|---|---|---|
 |
 |
 |
 |
Egg Festival | 350g
|
| Night Market | 500g
| ||||
 |
 |
 |
 |
Egg Festival | 350g
|
| Night Market | 500g
| ||||
 |
 |
 |
 |
Flower Dance | 350g
|
| Night Market | 500g
| ||||
 |
 |
 |
 |
 Oasis |
100g
|
| Night Market | 500g
| ||||
 |
 |
 |
 |
Carpenter's Shop
|
400g
|
| Night Market | 500g
| ||||
 |
 |
 |
 |
Flower Dance | 350g
|
| Night Market | 500g
|
Fancy House Plants
Each of the Fancy House Plants and the first three House Plants can all be obtained from the Prize Machine inside the Mayor's Manor, while the last two House Plants can be obtained from the Crane Machine inside the Movie Theater.
|
| ||||||||||||||||


Paintings
Paintings cannot be placed outside.
All paintings available in the Furniture Catalogue can also be purchased from the Traveling Cart for 250–2,500g.
|
|


Small Painting Position
Note that some small paintings hang higher or lower on the wall than others.

Night Market Paintings
Famous Painter Lupini sells a different painting each day of the Night Market for 1,200g. The paintings rotate over a 3-year schedule, for a total of 9 paintings.
PortraitsPortraits cannot be placed outside. Once you have 14 hearts with a villager, their portrait will show up every time the Traveling Cart visits.
Movie PostersMovie posters cannot be placed outside. Movie Posters can be obtained only by playing the Crane Game inside the Movie Theater. Each poster will randomly appear in the Crane Game only during the time when its movie is playing at the Theater.
Decorative DoorsDecorative doors cannot be placed outside. All decorative doors available in the Furniture Catalogue cannot be purchased from the Traveling Cart.
BannersBanners cannot be placed outside. Banners cannot be purchased from the Traveling Cart.
Wall HangingsWall hangings cannot be placed outside.
Fish TanksFish tanks cannot be placed outside. Fish tanks cannot be deleted from the inventory with a trash can as long as they contain items. Certain items can be added to the fish tank to change its appearance by holding the item and right-clicking on the tank. To get a list of the items inside or to remove them, right-click on the tank with empty hands. The location and appearance of the decorations and any stationary animals placed inside is random and can be changed without removing items by picking up and re-placing the tank.
TorchesTorches can be placed outside.
|
|||||||||||||||||||||||||||||||||||||||||||||||||||||||||||||||||||||||||||||||||||||||||||||||||||||||||||||||||||||||||||||||||||||||||||||||||||||||||||||||||||||||||||||||||||||||||||||||||||||||||||||||||||||||||||||||||||||||||||||||||||||||||||||||||||||||||||||||||||||||||||||||||||||||||||||||||||||||||||||||||||||||||||||||||||||||||||||||||||||||||||||||||||||||||||||||||||||||||||||||||||||||||||||||||||||||||||||||||||||||||||||||||||||||||||||||||||||||||||||||||||||||||||||||||||||||||||||||||||||||||||||||||||||||||||||||||||||||||||||||||||||||||||||||||||||||||||||||||||||||||||||||||||||||||||||||||||||||||||||||||||||||||||||||||||||||||||||||||||||||||||||||||||||||||||||||||||||||||||||||||||||||||||||||||||||||||||||||||||||||||||||||||||||||||||||||||||||||||||||||||||||||||||||||||||||||||||||||||||||||||||||||||||||||||||||||||||||||||||||||||||||||||||||||||||||||||||||||||||||||||||||||||||||||||||||||||||||||||||||||||||||||||||||||||||||||||||||||||||||||