
Adventurer's Guild: Difference between revisions
imported>Margotbean m Text replacement - "{{[Ss]poiler}} " to "" |
imported>BridgeSeller No edit summary |
||
| (12 intermediate revisions by 6 users not shown) | |||
| Line 11: | Line 11: | ||
To access the Adventurer's Guild, the player must first complete the story quest [[Quests#Initiation|"Initiation"]]. Once completed, the guild is open daily from 2pm to 2am, except on festival days when the door is locked. | To access the Adventurer's Guild, the player must first complete the story quest [[Quests#Initiation|"Initiation"]]. Once completed, the guild is open daily from 2pm to 2am, except on festival days when the door is locked. | ||
The guild is closed on all festival days, with exception of [[Desert Festival]], [[Trout Derby]], [[SquidFest]] and [[Night Market]], as well as [[Dance of the Moonlight Jellies]] and [[Spirit's Eve]]. | |||
==Interior Layout== | ==Interior Layout== | ||
| Line 27: | Line 29: | ||
!Reward Description | !Reward Description | ||
|- | |- | ||
|id="Slime"|[[File:Green Slime.png|24px]] [[Slimes|Slime]] (any color,<br /> | |id="Slime"|[[File:Green Slime.png|24px]] [[Slimes|Slime]] (any color, excludes Big<br />Slimes and Slimes in the [[Slime Hutch]]) | ||
|1000 | |1000 | ||
|{{Name|Slime Charmer Ring}} | |{{Name|Slime Charmer Ring}} | ||
| Line 97: | Line 99: | ||
!Sell Price | !Sell Price | ||
|- | |- | ||
|[[File:Wooden Blade.png|center]] | |[[File:Rusty Sword.png|36px|center]] | ||
|[[Rusty Sword]] | |||
|{{Description|Rusty Sword}} | |||
| | |||
|data-sort-value="0250"|{{Price|250}} | |||
|data-sort-value="0050"|{{Price|50}} | |||
|- | |||
|[[File:Wooden Blade.png|36px|center]] | |||
|[[Wooden Blade]] | |[[Wooden Blade]] | ||
|{{Description|Wooden Blade}} | |{{Description|Wooden Blade}} | ||
| Line 104: | Line 113: | ||
|data-sort-value="0050"|{{Price|50}} | |data-sort-value="0050"|{{Price|50}} | ||
|- | |- | ||
|[[File:Iron Dirk.png|center]] | |[[File:Femur.png|36px|center]] | ||
|[[Femur]] | |||
|{{Description|Femur}} | |||
|Reach Floor 10 of [[the Mines]]. | |||
|data-sort-value="0350"|{{Price|350}} | |||
|data-sort-value="0100"|{{Price|100}} | |||
|- | |||
|[[File:Iron Dirk.png|36px|center]] | |||
|[[Iron Dirk]] | |[[Iron Dirk]] | ||
|{{Description|Iron Dirk}} | |{{Description|Iron Dirk}} | ||
| Line 111: | Line 127: | ||
|data-sort-value="0050"|{{Price|50}} | |data-sort-value="0050"|{{Price|50}} | ||
|- | |- | ||
|[[File:Silver Saber.png|center]] | |[[File:Silver Saber.png|36px|center]] | ||
|[[Silver Saber]] | |[[Silver Saber]] | ||
|{{Description|Silver Saber}} | |{{Description|Silver Saber}} | ||
| Line 118: | Line 134: | ||
|data-sort-value="0100"|{{Price|100}} | |data-sort-value="0100"|{{Price|100}} | ||
|- | |- | ||
|[[File:Pirate's Sword.png|center]] | |[[File:Elf Blade.png|36px|center]] | ||
|[[Elf Blade]] | |||
|{{Description|Elf Blade}} | |||
|Reach Floor 20 of [[the Mines]]. | |||
|data-sort-value="0750"|{{Price|750}} | |||
|data-sort-value="0100"|{{Price|100}} | |||
|- | |||
|[[File:Steel Smallsword.png|36px|center]] | |||
|[[Steel Smallsword]] | |||
|{{Description|Steel Smallsword}} | |||
|Reach Floor 20 of [[the Mines]]. | |||
|data-sort-value="0750"|{{Price|750}} | |||
|data-sort-value="0050"|{{Price|50}} | |||
|- | |||
|[[File:Pirate's Sword.png|36px|center]] | |||
|[[Pirate's Sword]] | |[[Pirate's Sword]] | ||
|{{Description|Pirate's Sword}} | |{{Description|Pirate's Sword}} | ||
| Line 125: | Line 155: | ||
|data-sort-value="0100"|{{Price|100}} | |data-sort-value="0100"|{{Price|100}} | ||
|- | |- | ||
|[[File:Cutlass.png|center]] | |[[File:Cutlass.png|36px|center]] | ||
|[[Cutlass]] | |[[Cutlass]] | ||
|{{Description|Cutlass}} | |{{Description|Cutlass}} | ||
| Line 132: | Line 162: | ||
|data-sort-value="0150"|{{Price|150}} | |data-sort-value="0150"|{{Price|150}} | ||
|- | |- | ||
|[[File:Wood Mallet.png|center]] | |[[File:Wood Mallet.png|36px|center]] | ||
|[[Wood Mallet]] | |[[Wood Mallet]] | ||
|{{Description|Wood Mallet}} | |{{Description|Wood Mallet}} | ||
| Line 139: | Line 169: | ||
|data-sort-value="0150"|{{Price|150}} | |data-sort-value="0150"|{{Price|150}} | ||
|- | |- | ||
|[[File:Claymore.png|center]] | |[[File:Claymore.png|36px|center]] | ||
|[[Claymore]] | |[[Claymore]] | ||
|{{Description|Claymore}} | |{{Description|Claymore}} | ||
| Line 146: | Line 176: | ||
|data-sort-value="0250"|{{Price|250}} | |data-sort-value="0250"|{{Price|250}} | ||
|- | |- | ||
|[[File:Templar's Blade.png|center]] | |[[File:Templar's Blade.png|36px|center]] | ||
|[[Templar's Blade]] | |[[Templar's Blade]] | ||
|{{Description|Templar's Blade}} | |{{Description|Templar's Blade}} | ||
| Line 153: | Line 183: | ||
|data-sort-value="0250"|{{Price|250}} | |data-sort-value="0250"|{{Price|250}} | ||
|- | |- | ||
|[[File:Bone Sword.png|center]] | |[[File:Crystal Dagger.png|36px|center]] | ||
|[[Crystal Dagger]] | |||
|{{Description|Crystal Dagger}} | |||
|Reach Floor 60 of [[the Mines]]. | |||
|data-sort-value="4500"|{{Price|4500}} | |||
|data-sort-value="0200"|{{Price|200}} | |||
|- | |||
|[[File:Bone Sword.png|36px|center]] | |||
|[[Bone Sword]] | |[[Bone Sword]] | ||
|{{Description|Bone Sword}} | |{{Description|Bone Sword}} | ||
| Line 160: | Line 197: | ||
|data-sort-value="0250"|{{Price|250}} | |data-sort-value="0250"|{{Price|250}} | ||
|- | |- | ||
|[[File:Steel Falchion.png|center]] | |[[File:Steel Falchion.png|36px|center]] | ||
|[[Steel Falchion]] | |[[Steel Falchion]] | ||
|{{Description|Steel Falchion}} | |{{Description|Steel Falchion}} | ||
| Line 167: | Line 204: | ||
|data-sort-value="0400"|{{Price|400}} | |data-sort-value="0400"|{{Price|400}} | ||
|- | |- | ||
|[[File:Lava Katana.png|center]] | |[[File:Obsidian Edge.png|36px|center]] | ||
|[[Obsidian Edge]] | |||
|{{Description|Obsidian Edge}} | |||
|Reach Floor 90 of [[the Mines]]. | |||
|data-sort-value="9000"|{{Price|9000}} | |||
|data-sort-value="0300"|{{Price|300}} | |||
|- | |||
|[[File:Lava Katana.png|36px|center]] | |||
|[[Lava Katana]] | |[[Lava Katana]] | ||
|{{Description|Lava Katana}} | |{{Description|Lava Katana}} | ||
| Line 174: | Line 218: | ||
|data-sort-value="0500"|{{Price|500}} | |data-sort-value="0500"|{{Price|500}} | ||
|- | |- | ||
|[[File:Galaxy Sword.png|center]] | |[[File:Galaxy Sword.png|36px|center]] | ||
|[[Galaxy Sword]] | |[[Galaxy Sword]] | ||
|{{Description|Galaxy Sword}} | |{{Description|Galaxy Sword}} | ||
| Line 181: | Line 225: | ||
|data-sort-value="650"|{{Price|650}} | |data-sort-value="650"|{{Price|650}} | ||
|- | |- | ||
|[[File:Galaxy Dagger.png|center]] | |[[File:Galaxy Dagger.png|36px|center]] | ||
|[[Galaxy Dagger]] | |[[Galaxy Dagger]] | ||
|{{Description|Galaxy Dagger}} | |{{Description|Galaxy Dagger}} | ||
| Line 188: | Line 232: | ||
|data-sort-value="400"|{{Price|400}} | |data-sort-value="400"|{{Price|400}} | ||
|- | |- | ||
|[[File:Galaxy Hammer.png|center]] | |[[File:Galaxy Hammer.png|36px|center]] | ||
|[[Galaxy Hammer]] | |[[Galaxy Hammer]] | ||
|{{Description|Galaxy Hammer}} | |{{Description|Galaxy Hammer}} | ||
| Line 195: | Line 239: | ||
|data-sort-value="0600"|{{Price|600}} | |data-sort-value="0600"|{{Price|600}} | ||
|- | |- | ||
|[[File:Sneakers.png|center]] | |[[File:Sneakers.png|36px|center]] | ||
|[[Sneakers]] | |[[Sneakers]] | ||
|{{Description|Sneakers}} | |{{Description|Sneakers}} | ||
| Line 202: | Line 246: | ||
|data-sort-value="0050"|{{Price|50}} | |data-sort-value="0050"|{{Price|50}} | ||
|- | |- | ||
|[[File:Leather Boots.png|center]] | |[[File:Leather Boots.png|36px|center]] | ||
|[[Leather Boots]] | |[[Leather Boots]] | ||
|{{Description|Leather Boots}} | |{{Description|Leather Boots}} | ||
| Line 209: | Line 253: | ||
|data-sort-value="0100"|{{Price|100}} | |data-sort-value="0100"|{{Price|100}} | ||
|- | |- | ||
|[[File:Tundra Boots.png|center]] | |[[File:Work Boots.png|36px|center]] | ||
|[[Work Boots]] | |||
|{{Description|Work Boots}} | |||
|Reach Floor 10 of [[the Mines]]. | |||
|data-sort-value="0700"|{{Price|700}} | |||
|data-sort-value="0100"|{{Price|100}} | |||
|- | |||
|[[File:Tundra Boots.png|36px|center]] | |||
|[[Tundra Boots]] | |[[Tundra Boots]] | ||
|{{Description|Tundra Boots}} | |{{Description|Tundra Boots}} | ||
| Line 216: | Line 267: | ||
|data-sort-value="0150"|{{Price|150}} | |data-sort-value="0150"|{{Price|150}} | ||
|- | |- | ||
|[[File:Combat Boots.png|center]] | |[[File:Combat Boots.png|36px|center]] | ||
|[[Combat Boots]] | |[[Combat Boots]] | ||
|{{Description|Combat Boots}} | |{{Description|Combat Boots}} | ||
| Line 223: | Line 274: | ||
|data-sort-value="0150"|{{Price|150}} | |data-sort-value="0150"|{{Price|150}} | ||
|- | |- | ||
|[[File:Firewalker Boots.png|center]] | |[[File:Firewalker Boots.png|36px|center]] | ||
|[[Firewalker Boots]] | |[[Firewalker Boots]] | ||
|{{Description|Firewalker Boots}} | |{{Description|Firewalker Boots}} | ||
| Line 230: | Line 281: | ||
|data-sort-value="0300"|{{Price|300}} | |data-sort-value="0300"|{{Price|300}} | ||
|- | |- | ||
|[[File:Dark Boots.png|center]] | |[[File:Dark Boots.png|36px|center]] | ||
|[[Dark Boots]] | |[[Dark Boots]] | ||
|{{Description|Dark Boots}} | |{{Description|Dark Boots}} | ||
| Line 237: | Line 288: | ||
|data-sort-value="0300"|{{Price|300}} | |data-sort-value="0300"|{{Price|300}} | ||
|- | |- | ||
|[[File:Space Boots.png|center]] | |[[File:Space Boots.png|36px|center]] | ||
|[[Space Boots]] | |[[Space Boots]] | ||
|{{Description|Space Boots}} | |{{Description|Space Boots}} | ||
| Line 244: | Line 295: | ||
|data-sort-value="0400"|{{Price|400}} | |data-sort-value="0400"|{{Price|400}} | ||
|- | |- | ||
|[[File:Amethyst Ring.png|center]] | |[[File:Amethyst Ring.png|36px|center]] | ||
|[[Amethyst Ring]] | |[[Amethyst Ring]] | ||
|{{Description|Amethyst Ring}} | |{{Description|Amethyst Ring}} | ||
| Line 251: | Line 302: | ||
|data-sort-value="0100"|{{Price|100}} | |data-sort-value="0100"|{{Price|100}} | ||
|- | |- | ||
|[[File:Topaz Ring.png|center]] | |[[File:Topaz Ring.png|36px|center]] | ||
|[[Topaz Ring]] | |[[Topaz Ring]] | ||
|{{Description|Topaz Ring}} | |{{Description|Topaz Ring}} | ||
| Line 258: | Line 309: | ||
|data-sort-value="0100"|{{Price|100}} | |data-sort-value="0100"|{{Price|100}} | ||
|- | |- | ||
|[[File:Aquamarine Ring.png|center]] | |[[File:Aquamarine Ring.png|36px|center]] | ||
|[[Aquamarine Ring]] | |[[Aquamarine Ring]] | ||
|{{Description|Aquamarine Ring}} | |{{Description|Aquamarine Ring}} | ||
| Line 265: | Line 316: | ||
|data-sort-value="0200"|{{Price|200}} | |data-sort-value="0200"|{{Price|200}} | ||
|- | |- | ||
|[[File:Jade Ring.png|center]] | |[[File:Jade Ring.png|36px|center]] | ||
|[[Jade Ring]] | |[[Jade Ring]] | ||
|{{Description|Jade Ring}} | |{{Description|Jade Ring}} | ||
| Line 272: | Line 323: | ||
|data-sort-value="0200"|{{Price|200}} | |data-sort-value="0200"|{{Price|200}} | ||
|- | |- | ||
|[[File:Emerald Ring.png|center]] | |[[File:Emerald Ring.png|36px|center]] | ||
|[[Emerald Ring]] | |[[Emerald Ring]] | ||
|{{Description|Emerald Ring}} | |{{Description|Emerald Ring}} | ||
| Line 279: | Line 330: | ||
|data-sort-value="0300"|{{Price|300}} | |data-sort-value="0300"|{{Price|300}} | ||
|- | |- | ||
|[[File:Ruby Ring.png|center]] | |[[File:Ruby Ring.png|36px|center]] | ||
|[[Ruby Ring]] | |[[Ruby Ring]] | ||
|{{Description|Ruby Ring}} | |{{Description|Ruby Ring}} | ||
| Line 286: | Line 337: | ||
|data-sort-value="0300"|{{Price|300}} | |data-sort-value="0300"|{{Price|300}} | ||
|- | |- | ||
|[[File:Slingshot.png|center]] | |[[File:Slingshot.png|36px|center]] | ||
|[[Slingshot]] | |[[Slingshot]] | ||
|{{Description|Slingshot}} | |{{Description|Slingshot}} | ||
| Line 293: | Line 344: | ||
|data-sort-value="0000"|N/A | |data-sort-value="0000"|N/A | ||
|- | |- | ||
|[[File:Master Slingshot.png|center]] | |[[File:Master Slingshot.png|36px|center]] | ||
|[[Master Slingshot]] | |[[Master Slingshot]] | ||
|{{Description|Master Slingshot}} | |{{Description|Master Slingshot}} | ||
| Line 300: | Line 351: | ||
|data-sort-value="0000"|N/A | |data-sort-value="0000"|N/A | ||
|- | |- | ||
|[[File:Explosive Ammo.png|center]] | |[[File:Explosive Ammo.png|36px|center]] | ||
|[[Explosive Ammo]] | |[[Explosive Ammo]] | ||
|{{Description|Explosive Ammo}} | |{{Description|Explosive Ammo}} | ||
| Line 321: | Line 372: | ||
|data-sort-value="0"|N/A | |data-sort-value="0"|N/A | ||
|- | |- | ||
|[[File:Slime Charmer Ring.png|center]] | |[[File:Slime Charmer Ring.png|36px|center]] | ||
|[[Slime Charmer Ring]] | |[[Slime Charmer Ring]] | ||
|{{Description|Slime Charmer Ring}} | |{{Description|Slime Charmer Ring}} | ||
| Line 328: | Line 379: | ||
|data-sort-value="0350"|{{Price|350}} | |data-sort-value="0350"|{{Price|350}} | ||
|- | |- | ||
|[[File:Savage Ring.png|center]] | |[[File:Savage Ring.png|36px|center]] | ||
|[[Savage Ring]] | |[[Savage Ring]] | ||
|{{Description|Savage Ring}} | |{{Description|Savage Ring}} | ||
| Line 335: | Line 386: | ||
|data-sort-value="0750"|{{Price|750}} | |data-sort-value="0750"|{{Price|750}} | ||
|- | |- | ||
|[[File:Burglar's Ring.png|center]] | |[[File:Burglar's Ring.png|36px|center]] | ||
|[[Burglar's Ring]] | |[[Burglar's Ring]] | ||
|{{Description|Burglar's Ring}} | |{{Description|Burglar's Ring}} | ||
| Line 342: | Line 393: | ||
|data-sort-value="0750"|{{Price|750}} | |data-sort-value="0750"|{{Price|750}} | ||
|- | |- | ||
|[[File:Vampire Ring.png|center]] | |[[File:Vampire Ring.png|36px|center]] | ||
|[[Vampire Ring]] | |[[Vampire Ring]] | ||
|{{Description|Vampire Ring}} | |{{Description|Vampire Ring}} | ||
| Line 349: | Line 400: | ||
|data-sort-value="0750"|{{Price|750}} | |data-sort-value="0750"|{{Price|750}} | ||
|- | |- | ||
|[[File:Crabshell Ring.png|center]] | |[[File:Crabshell Ring.png|36px|center]] | ||
|[[Crabshell Ring]] | |[[Crabshell Ring]] | ||
|{{Description|Crabshell Ring}} | |{{Description|Crabshell Ring}} | ||
| Line 356: | Line 407: | ||
|data-sort-value="1000"|{{Price|1000}} | |data-sort-value="1000"|{{Price|1000}} | ||
|- | |- | ||
|[[File:Napalm Ring.png|center]] | |[[File:Napalm Ring.png|36px|center]] | ||
|[[Napalm Ring]] | |[[Napalm Ring]] | ||
|{{Description|Napalm Ring}} | |{{Description|Napalm Ring}} | ||
| Line 363: | Line 414: | ||
|data-sort-value="1000"|{{Price|1000}} | |data-sort-value="1000"|{{Price|1000}} | ||
|- | |- | ||
|[[File:Skeleton Mask.png|center]] | |[[File:Skeleton Mask.png|36px|center]] | ||
|[[Skeleton Mask]] | |[[Skeleton Mask]] | ||
|{{Description|Skeleton Mask}} | |{{Description|Skeleton Mask}} | ||
| Line 370: | Line 421: | ||
|data-sort-value="0000"|N/A | |data-sort-value="0000"|N/A | ||
|- | |- | ||
|[[File:Hard Hat.png|center]] | |[[File:Hard Hat.png|36px|center]] | ||
|[[Hard Hat]] | |[[Hard Hat]] | ||
|{{Description|Hard Hat}} | |{{Description|Hard Hat}} | ||
| Line 377: | Line 428: | ||
|data-sort-value="0000"|N/A | |data-sort-value="0000"|N/A | ||
|- | |- | ||
|[[File:Arcane Hat.png|center]] | |[[File:Arcane Hat.png|36px|center]] | ||
|[[Arcane Hat]] | |[[Arcane Hat]] | ||
|{{Description|Arcane Hat}} | |{{Description|Arcane Hat}} | ||
| Line 384: | Line 435: | ||
|data-sort-value="0000"|N/A | |data-sort-value="0000"|N/A | ||
|- | |- | ||
|[[File:Knight's Helmet.png|center]] | |[[File:Knight's Helmet.png|36px|center]] | ||
|[[Knight's Helmet]] | |[[Knight's Helmet]] | ||
|{{Description|Knight's Helmet}} | |{{Description|Knight's Helmet}} | ||
| Line 391: | Line 442: | ||
|data-sort-value="0000"|N/A | |data-sort-value="0000"|N/A | ||
|- | |- | ||
|[[File:Insect Head.png|center]] | |[[File:Insect Head.png|36px|center]] | ||
|[[Insect Head]] | |[[Insect Head]] | ||
|{{Description|Insect Head}} | |{{Description|Insect Head}} | ||
| Line 402: | Line 453: | ||
The player can lose items if they collapse due to low health in [[the Mines]], [[Quarry Mine]], [[Skull Cavern]] or [[Volcano Dungeon]]. In that case they can speak to [[Marlon]] in the Adventurer's Guild to use the "Item Recovery Service", which will recover one of the lost items for a fee. The fee is equivalent to the sell price of the item or stack - recovering a non-saleable item is free. The item will be mailed to the player overnight. Only one item (or one stack) can be recovered; the rest are lost permanently after it's selected. The player can make their choice anytime until their next collapse due to low health, which will reset it to the new lost items. | The player can lose items if they collapse due to low health in [[the Mines]], [[Quarry Mine]], [[Skull Cavern]] or [[Volcano Dungeon]]. In that case they can speak to [[Marlon]] in the Adventurer's Guild to use the "Item Recovery Service", which will recover one of the lost items for a fee. The fee is equivalent to the sell price of the item or stack - recovering a non-saleable item is free. The item will be mailed to the player overnight. Only one item (or one stack) can be recovered; the rest are lost permanently after it's selected. The player can make their choice anytime until their next collapse due to low health, which will reset it to the new lost items. | ||
If the player has completed the Monster Eradication Goal of killing 150 Magma | If the player has completed the Monster Eradication Goal of killing 150 [[Magma Sprite]]s, they will receive Marlon's phone number. This allows the player to use the Item Recovery Service from a [[Telephone]]. | ||
If a player has obtained the power from the [[Mapping Cave Systems]] book, they will get a 50% discount on the recovery fee. | If a player has obtained the power from the [[Mapping Cave Systems]] book, they will get a 50% discount on the recovery fee. | ||
| Line 418: | Line 469: | ||
{{History|1.6|Changed open hours from 2pm-10pm to 2pm-2am. Changed Monster Eradication Goal for cave insects from 125 to 80. Added wall and decorative swords to shop inventory. Reading [[Mapping Cave Systems]] will decrease the price to retrieve items.}} | {{History|1.6|Changed open hours from 2pm-10pm to 2pm-2am. Changed Monster Eradication Goal for cave insects from 125 to 80. Added wall and decorative swords to shop inventory. Reading [[Mapping Cave Systems]] will decrease the price to retrieve items.}} | ||
{{History|1.6.2|Now shows the Guild is open from 2pm-2am rather than 2pm-10pm.}} | {{History|1.6.2|Now shows the Guild is open from 2pm-2am rather than 2pm-10pm.}} | ||
{{History|1.6.9|Added [[Rusty Sword]], [[Femur]], [[Elf Blade]], [[Steel Smallsword]], [[Crystal Dagger]], [[Obsidian Edge]], and [[Work Boots]] to shop inventory.}} | |||
{{NavboxBuildings}} | {{NavboxBuildings}} | ||
| Line 423: | Line 475: | ||
[[Category:Mountain Locations]] | [[Category:Mountain Locations]] | ||
[[Category:Stores]] | [[Category:Stores]] | ||
[[de:Abenteurergilde]] | [[de:Abenteurergilde]] | ||
Latest revision as of 17:32, 8 September 2026
| Adventurer's Guild | |
 | |
  | |
| Open Hours: | 2:00pm to 2:00am |
| Address: | Just east of the mines, northeast of town. |
| Occupants: | |


|keywords=Stardew Valley Wiki,Stardew Valley,Villagers,Adventurer's Guild,,hours,location
}}{{#seo:
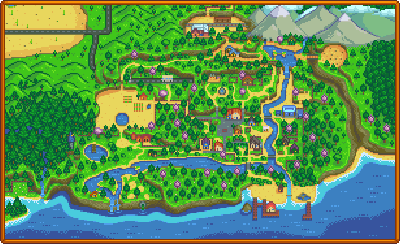
|keywords=Stardew Valley Wiki, Stardew Valley, Adventurer's Guild, gift |site_name=Stardew Valley Wiki |type=article |title=Adventurer's Guild - Stardew Valley Wiki }} The Adventurer's Guild is located east of the Mines and is the home of Marlon and Gil. There the player can purchase Weapons, Boots, and Rings. Marlon will also buy weapons, boots, and rings, as well as Monster Loot from the player.
To access the Adventurer's Guild, the player must first complete the story quest "Initiation". Once completed, the guild is open daily from 2pm to 2am, except on festival days when the door is locked.
The guild is closed on all festival days, with exception of Desert Festival, Trout Derby, SquidFest and Night Market, as well as Dance of the Moonlight Jellies and Spirit's Eve.
Interior Layout
Inside the Adventurer's Guild building players can find Marlon manning the counter, offering weapons, boots and rings for sale. Gil is sitting in his rocking chair beside the fire, and just to the left of the fireplace is the monster eradication goal list.
Neither Marlon nor Gil accept gifts, gain friendship points, or have bedrooms for the player to enter. The back room of the guild is accessible only after slaying 1,000 monsters.[1] In that room, there is a box containing the Mapping Cave Systems book.

Monster Eradication Goals
A list of how many of certain types of monsters killed is stored on the wall to the right of Marlon's desk. When the allotted amount has been slain, Gil will give the player a reward. Previously earned rewards can be purchased from Marlon. If the player has a full inventory and cannot take the reward(s) from Gil, when they close the inventory they will be unable to retrieve the reward from him. If the inventory is full they can select the item in the dialog and drop it on the floor. It will remain on the floor while they sort out space in their inventory. Otherwise the player will have to purchase the item from Marlon.
| Monster Type | Quantity | Reward | Reward Description |
|---|---|---|---|
 Slime (any color, excludes Big Slimes and Slimes in the Slime Hutch) |
1000 |  Slime Charmer Ring |
Prevents damage from slimes. |
Void Spirits: Shadow Shaman  Shadow Shaman (dangerous)  Shadow Brute  Shadow Brute (dangerous)  Shadow Sniper |
150 |  Savage Ring |
Gain a short speed boost whenever you slay a monster. |
Bats: Bat  Bat (dangerous)  Frost Bat  Frost Bat (dangerous)  Lava Bat  Iridium Bat |
200 |  Vampire Ring |
Gain a little health every time you slay a monster. |
Skeletons: Skeleton  Skeleton (dangerous)  Skeleton Mage |
50 |  Skeleton Mask |
The red eyes are glowing mysteriously. |
Cave Insects: Bug  Bug (dangerous)  Cave Fly  Cave Fly (dangerous)  Grub  Grub (dangerous)  Mutant Fly  Mutant Grub  Armored Bug  Armored Bug (dangerous) |
80 |  Insect Head |
Not very pleasant to wield. |
Duggies: Duggy  Duggy (dangerous)  Magma Duggy |
30 |  Hard Hat |
Keep your dome in one piece. |
Dust Sprites: Dust Sprite  Dust Sprite (dangerous) |
500 |  Burglar's Ring |
Monsters have a greater chance of dropping loot. |
Rock Crabs: Rock Crab  Rock Crab (dangerous)  Lava Crab  Lava Crab (dangerous)  Iridium Crab |
60 |  Crabshell Ring |
The top of the ring is made from enchanted crab shell. |
Mummies: Mummy  Mummy (dangerous) |
100 |  Arcane Hat |
The type of cowboy hat worn by a wizard. |
 Pepper Rex |
50 |  Knight's Helmet |
It looks just like the real thing! |
Serpents: Serpent  Royal Serpent |
250 |  Napalm Ring |
When you defeat an enemy, they explode. |
Magma Sprites: Magma Sprite  Magma Sparker |
150 | Marlon's Phone Number | Can call to utilize Item Recovery Service from home |
Shop
| Image | Name | Description | Unlocked | Buy Price | Sell Price |
|---|---|---|---|---|---|
 |
Rusty Sword | A rusty, dull old sword. |  250g |
50g
| |
 |
Wooden Blade | Not bad for a piece of carved wood. | 250g
|
50g
| |
 |
Femur | An old, heavy bone caked in centuries of grime. | Reach Floor 10 of the Mines. | 350g
|
100g
|
 |
Iron Dirk | A common dagger. | Reach Floor 15 of the Mines. | 500g
|
50g
|
 |
Silver Saber | Plated with silver to deter rust. | Reach Floor 20 of the Mines. | 750g
|
100g
|
 |
Elf Blade | Only the nimble hands of an elf could craft this. | Reach Floor 20 of the Mines. | 750g
|
100g
|
 |
Steel Smallsword | A standard metal blade. | Reach Floor 20 of the Mines. | 750g
|
50g
|
 |
Pirate's Sword | It looks like a pirate owned this once. | Reach Floor 25 of the Mines. | 850g
|
100g
|
 |
Cutlass | A finely crafted blade. | Reach Floor 25 of the Mines. | 1,500g
|
150g
|
 |
Wood Mallet | The solid head packs a punch. Relatively light for a club. | Reach Floor 40 of the Mines. | 2,000g
|
150g
|
 |
Claymore | It's really heavy. | Reach Floor 45 of the Mines. | 2,000g
|
250g
|
 |
Templar's Blade | It once belonged to an honorable knight. | Reach Floor 55 of the Mines. | 4,000g
|
250g
|
 |
Crystal Dagger | The blade is made of purified quartz. | Reach Floor 60 of the Mines. | 4,500g
|
200g
|
 |
Bone Sword | A very light piece of sharpened bone. | Reach Floor 75 of the Mines. | 6,000g
|
250g
|
 |
Steel Falchion | Light and powerful. | Reach Floor 90 of the Mines. | 9,000g
|
400g
|
 |
Obsidian Edge | It's incredibly sharp. | Reach Floor 90 of the Mines. | 9,000g
|
300g
|
 |
Lava Katana | A powerful blade forged in a pool of churning lava. | Reach the bottom of the Mines. | 25,000g
|
500g
|
 |
Galaxy Sword | It's unlike anything you've ever seen. | Bring a Prismatic Shard to the Three Pillars in the Desert. | 50,000g
|
650g
|
 |
Galaxy Dagger | It's unlike anything you've seen. | After collecting the Galaxy Sword. | 35,000g
|
400g
|
 |
Galaxy Hammer | It's made from an ultra-light material you've never seen before. | After collecting the Galaxy Sword. | 75,000g
|
600g
|
 |
Sneakers | A little flimsy... but fashionable! | 500g
|
50g
| |
 |
Leather Boots | The leather is very supple. | Reach Floor 10 of the Mines. | 500g
|
100g
|
 |
Work Boots | Steel-toed for extra protection. | Reach Floor 10 of the Mines. | 700g
|
100g
|
 |
Tundra Boots | The fuzzy lining keeps your ankles so warm. | Reach Floor 50 of the Mines. | 750g
|
150g
|
 |
Combat Boots | Reinforced with iron mesh. | Reach Floor 40 of the Mines. | 1,250g
|
150g
|
 |
Firewalker Boots | It's said these can withstand the hottest magma. | Reach Floor 80 of the Mines. | 2,000g
|
300g
|
 |
Dark Boots | Made from thick black leather. | Reach Floor 80 of the Mines. | 2,500g
|
300g
|
 |
Space Boots | An iridium weave gives them a purple sheen. | Reach Floor 110 of the Mines. | 5,000g
|
400g
|
 |
Amethyst Ring | Increases knockback by 10%. | 1,000g
|
100g
| |
 |
Topaz Ring | You feel a little bit safer wearing this. | 1,000g
|
100g
| |
 |
Aquamarine Ring | Increases critical strike chance by 10%. | Reach Floor 40 of the Mines. | 2,500g
|
200g
|
 |
Jade Ring | Increases critical strike power by 10%. | Reach Floor 40 of the Mines. | 2,500g
|
200g
|
 |
Emerald Ring | Increases weapon speed by 10%. | Reach Floor 80 of the Mines. | 5,000g
|
300g
|
 |
Ruby Ring | Increases attack by 10%. | Reach Floor 80 of the Mines. | 5,000g
|
300g
|
 |
Slingshot | Requires stones for ammo. | Reach Floor 40 of the Mines. | 500g
|
N/A |
 |
Master Slingshot | Requires stones for ammo. | Reach Floor 70 of the Mines. | 1,000g
|
N/A |
 |
Explosive Ammo | Fire this with the slingshot. | Unlock the recipe for Explosive Ammo. | 300g
|
20g
|
 |
Wall Sword | Can be placed inside your house. | 2,000g
|
N/A | |
 |
Decorative Sword | Can be placed as decoration. | 10,000g
|
N/A | |
 |
Slime Charmer Ring | Prevents damage from slimes. | Kill 1000 Slimes | 25,000g
|
350g
|
 |
Savage Ring | Gain a short speed boost whenever you slay a monster. | Kill 150 Void Spirits (Shadow Shaman / Shadow Brute) | 25,000g
|
750g
|
 |
Burglar's Ring | Monsters have a greater chance of dropping loot. | Kill 500 Dust Sprites | 20,000g
|
750g
|
 |
Vampire Ring | Gain a little health every time you slay a monster. | Kill 200 Bats | 15,000g
|
750g
|
 |
Crabshell Ring | The top of the ring is made from enchanted crab shell. | Kill 60 Rock Crabs | 15,000g
|
1,000g
|
 |
Napalm Ring | When you defeat an enemy, they explode. | Kill 250 Serpents | 30,000g
|
1,000g
|
 |
Skeleton Mask | The red eyes are glowing mysteriously. | Kill 50 Skeletons | 20,000g
|
N/A |
 |
Hard Hat | Keep your dome in one piece. | Kill 30 Duggies | 20,000g
|
N/A |
 |
Arcane Hat | The type of cowboy hat worn by a wizard. | Kill 100 Mummies | 20,000g
|
N/A |
 |
Knight's Helmet | It looks just like the real thing! | Kill 50 Pepper Rex | 20,000g
|
N/A |
 |
Insect Head | Not very pleasant to wield. | Kill 80 Cave Insects | 10,000g
|
200g
|
Item Recovery Service
The player can lose items if they collapse due to low health in the Mines, Quarry Mine, Skull Cavern or Volcano Dungeon. In that case they can speak to Marlon in the Adventurer's Guild to use the "Item Recovery Service", which will recover one of the lost items for a fee. The fee is equivalent to the sell price of the item or stack - recovering a non-saleable item is free. The item will be mailed to the player overnight. Only one item (or one stack) can be recovered; the rest are lost permanently after it's selected. The player can make their choice anytime until their next collapse due to low health, which will reset it to the new lost items.
If the player has completed the Monster Eradication Goal of killing 150 Magma Sprites, they will receive Marlon's phone number. This allows the player to use the Item Recovery Service from a Telephone.
If a player has obtained the power from the Mapping Cave Systems book, they will get a 50% discount on the recovery fee.
References
- ↑ See Maps\AdventureGuild.tmx in the game files.
History
- 1.1: Changed Monster Eradication Goal for cave insects from 150 to 125.
- 1.4: Added Monster Eradication Goals for Rock Crab, Mummy, Pepper Rex, and Serpent. Added Item Recovery Service.
- 1.4.1: Increased price of Explosive Ammo from 100g to 300g. Unlocks once the player learns the crafting recipe instead of when they have a slingshot weapon in inventory.
- 1.5: Added Slingshot and Master Slingshot to shop inventory. Fixed bug where Iridium Bats were not counted towards the relevant Monster Eradication Goal. Added Monster Eradication Goal for Magma Sprite.
- 1.6: Changed open hours from 2pm-10pm to 2pm-2am. Changed Monster Eradication Goal for cave insects from 125 to 80. Added wall and decorative swords to shop inventory. Reading Mapping Cave Systems will decrease the price to retrieve items.
- 1.6.2: Now shows the Guild is open from 2pm-2am rather than 2pm-10pm.
- 1.6.9: Added Rusty Sword, Femur, Elf Blade, Steel Smallsword, Crystal Dagger, Obsidian Edge, and Work Boots to shop inventory.
| Buildings | ||
|---|---|---|
| Merchants | Abandoned House • Adventurer's Guild • Blacksmith • Bookseller • Carpenter's Shop • Casino • Desert Trader • Fish Shop • Giant Stump • Harvey's Clinic • Ice Cream Stand • Island Trader • JojaMart • Marnie's Ranch • Oasis • Pierre's General Store • Qi's Walnut Room • The Stardrop Saloon • Traveling Cart • Volcano Dwarf • Wizard's Tower | |
| Houses | 1 River Road • 2 River Road • 1 Willow Lane • 2 Willow Lane • 24 Mountain Road • Elliott's Cabin • Farmhouse • Island Farmhouse • Leah's Cottage • Mayor's Manor • Tent • Trailer • Treehouse | |
| Farm Buildings | Farming | Barn • Cabin • Coop • Fish Pond • Greenhouse • Mill • Pet Bowl • Shed • Silo • Slime Hutch • Stable • Well |
| Special | Desert Obelisk • Earth Obelisk • Farm Obelisk • Gold Clock • Island Obelisk • Junimo Hut • Water Obelisk | |
| Other Buildings | Community Center • Dog Pen • Island Field Office • Joja Warehouse • Movie Theater • Museum • Spa • Witch's Hut | |